
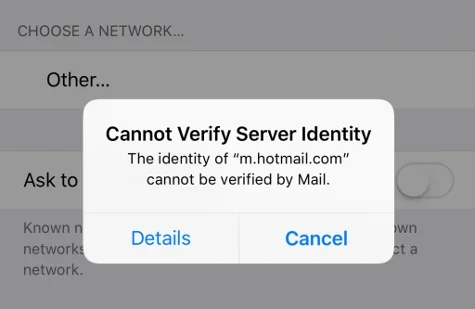
“I have a popop window that keeps showing up on my iPhone screen. How do I remove 'cannot verify server identiry' off my iPhone 15?”
Are you seeing the "Cannot Verify Server Identity" error on your iPhone? It is a common issue you may encounter while using the Mail app. This problem can be very frustrating as it will prevent you from sending and receiving emails.
So, what does this error message mean and how can you fix it? Don't worry. In this article, we’ll explain why your iPhone shows this error and walk you through the best ways to fix it. Let’s dive in!
If you open the Mail app and see the “Cannot Verify Server Identity” error, it usually means that the SSL certificate on the mail server doesn’t match the server settings on your iPhone. When your iPhone tries to confirm the certificate’s reliability by checking it against the domain name, the mismatch causes the verification to fail. As a result, the certificate is marked as untrusted, and you get the error message.
Your iPhone may display the “Cannot Verify Server Identity” error when it tries to connect to an untrusted server - often one with an expired, mismatched, or invalid SSL certificate. However, this doesn’t necessarily mean your device is under cyberattack. Other common causes include outdated iOS versions, incorrect email settings, or glitches in your network settings, all of which can interfere with secure connections.
If you cannot verify server identity on your iPhone or iPad, don’t worry, below are some effective solutions you can take to get rid of the problem.
Before trying any advanced fixes, restart your iPhone. A simple reboot can often clear temporary software glitches or resolve SSL certificate mismatches. Here’s how to restart your iPhone, depending on your model:
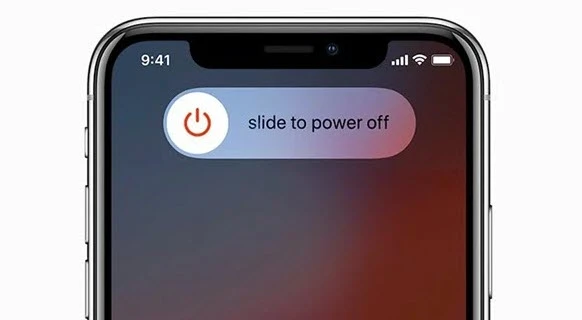
Drag the slider to power off the iPhone. Wait a while, then press and hold the Top or Side button again to turn the device back on.
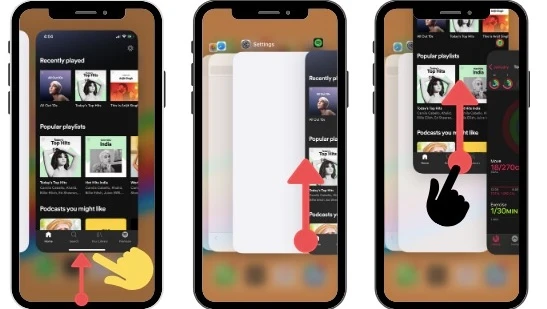
Sometimes, the problem can occur because of a glitch on the Mail app. In this case, restarting the app may solve the problem.
Removing the email account and re-adding it will reset the server identity details, which may help to solve the issue. Here is how to do this:
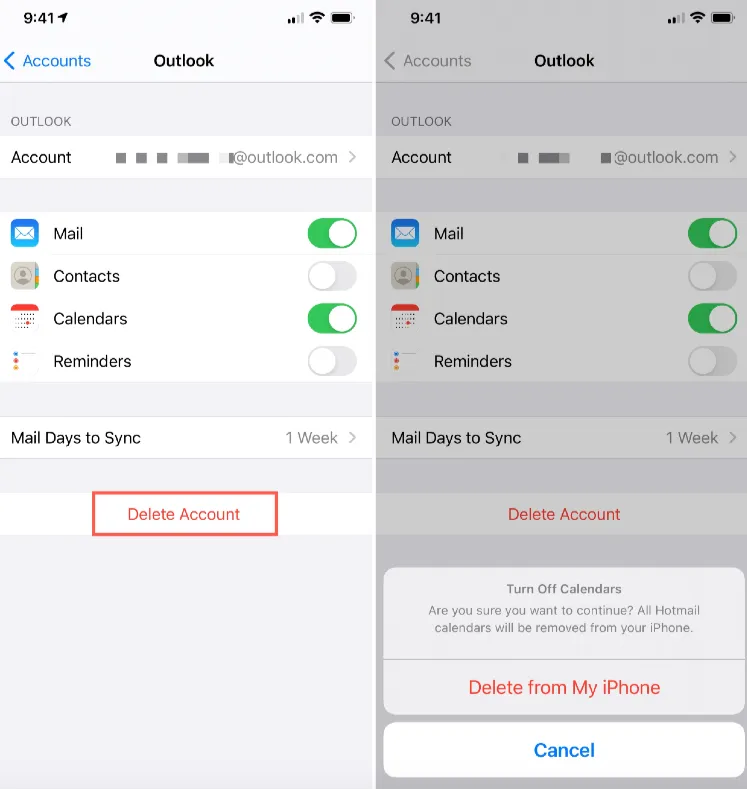
This action will remove the email account from your device. To add it back, go to Mail > Add Account, enter your login details, and your email account will be set up again.
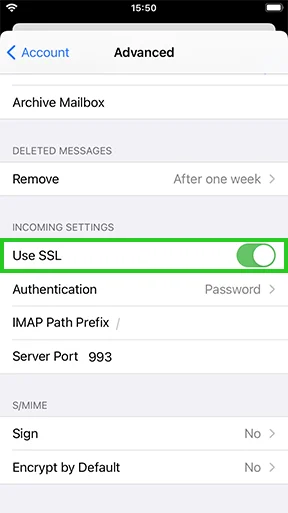
If you're still seeing the “Cannot Verify Server Identity” error on your iPhone or iPad, you can try disabling the SSL certificate for the affected email account. Follow these steps to do so:
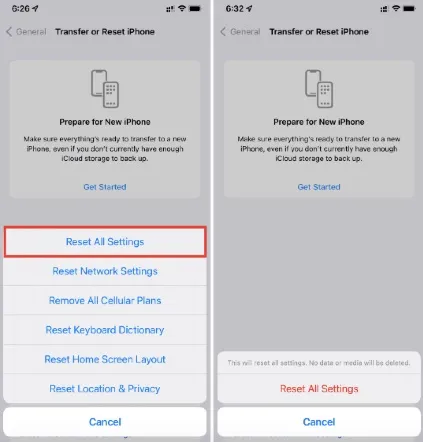
Resetting your iPhone’s network settings will restore all Wi-Fi, cellular, and VPN configurations to their default state. This can help eliminate any network-related glitches that may be affecting apps like Mail. Here’s how to reset network settings:
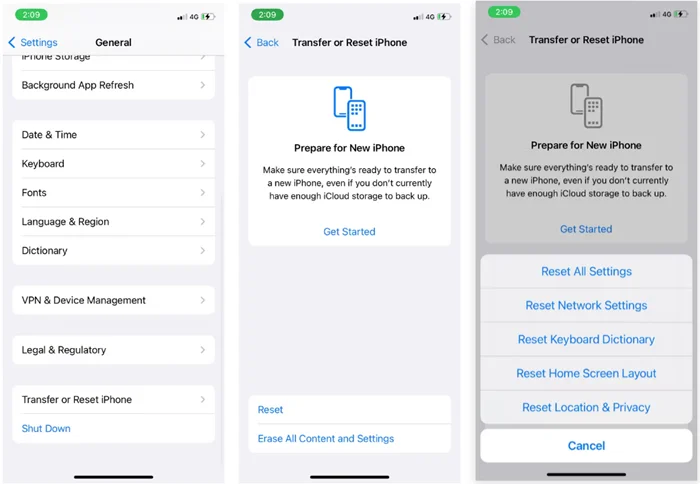
Sometimes the settings of the apps on your iPhone can interfere and cause the issue. As it can be hard to find which app is causing the issue, you can try to reset all settings on your iPhone. Here is how to do this:
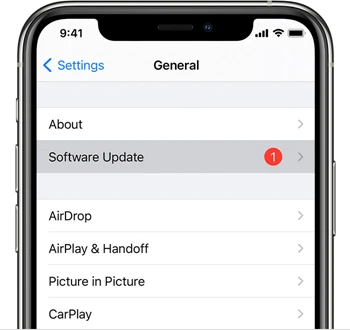
An outdated iOS version can cause problems with email syncing, which may trigger the “Cannot Verify Server Identity” error. Updating your iPhone to the latest iOS version can often resolve this issue quickly.
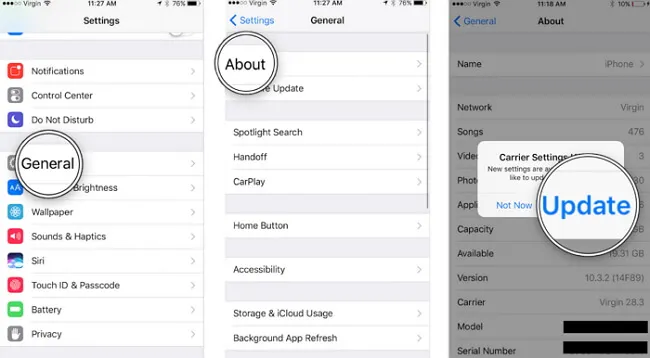
Updating the carrier settings can also be useful if some network problems cause the error. To update carrier settings:
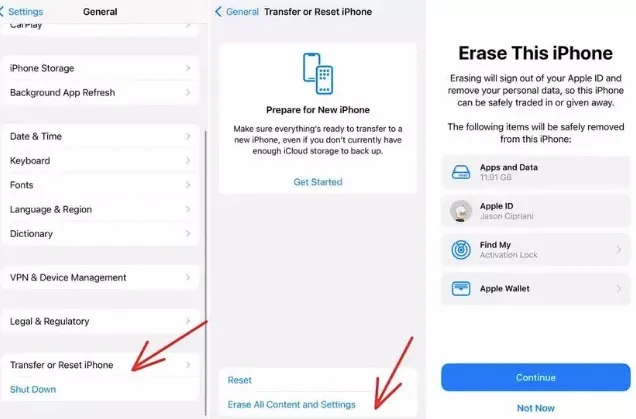
If you still cannot solve the issue, consider factory resetting your iPhone. Keep in mind that this will erase all your data and settings, so it’s important to back up your device before proceeding. Here’s how to reset your iPhone to factory settings:
Fortunately, there is a way to solve the problem and bring your iPhone to normal state without losing any data. You can use the FoneGeek iOS System Recovery tool for this. It allows you to solve more than 200 iOS system-related issues quickly and efficiently. The powerful tool is easy to use and lets you fix any iOS-related issues safely. And the best thing is there is no chance of losing your data while using it.


Let’s see how to fix iPhone cannot verify server identity without data loss:
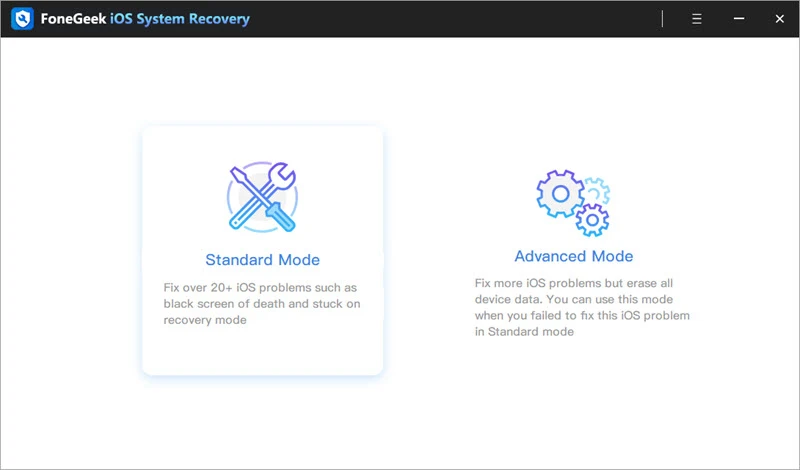
Step 1: Download and install the FoneGeek iOS System Recovery on your Windows or Mac computer. Then, launch the program and choose Standard Mode on the homepage.
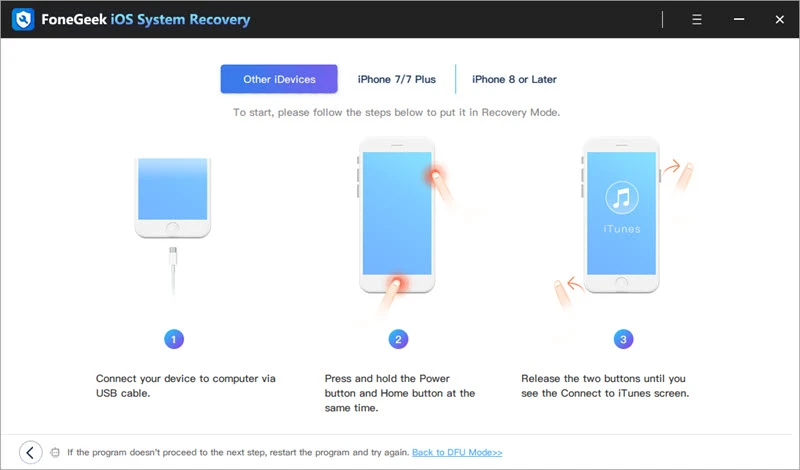
Step 2: Now plug your iPhone to the computer with a USB cable. If your device is in the normal state and running iOS 12 or later, unlock the phone and press Next.
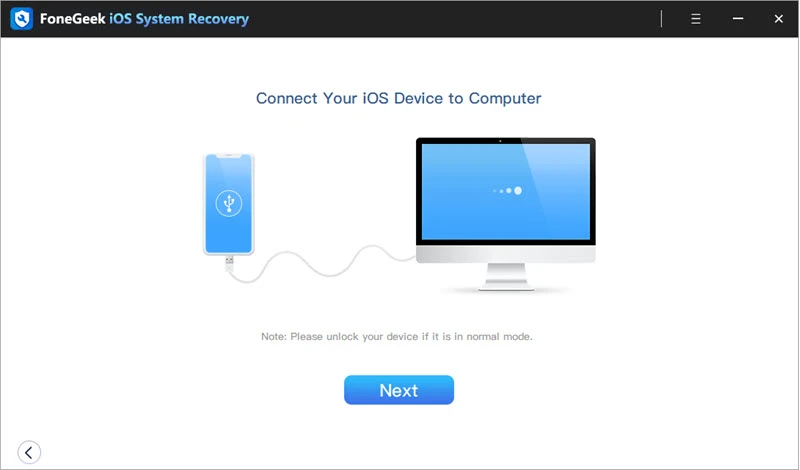
If the device is not detected by the software, boot it into the DFU or Recovery mode by following the on-screen guide.
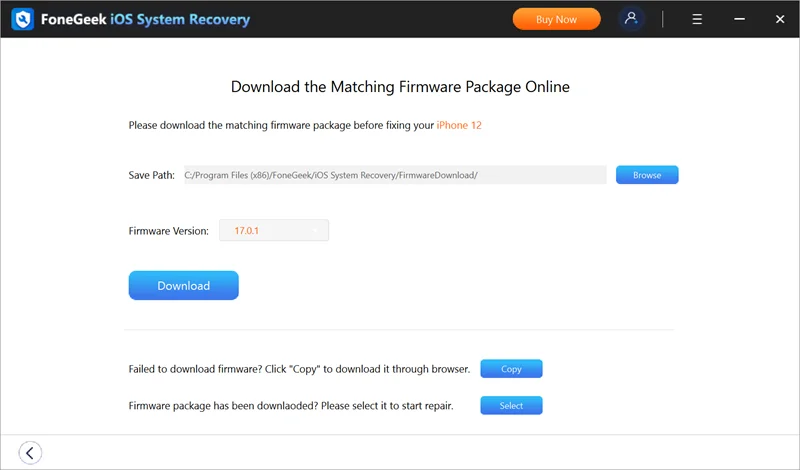
Step 3: You will now notice the available iOS versions and your iPhone model in the app interface. Select the preferred version of the Firmware and press Download.
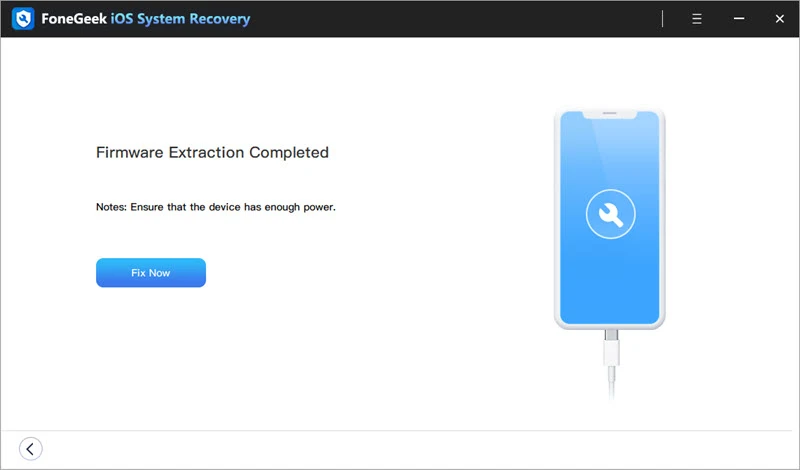
Step 4: Wait for the FoneGeek program to download and verify the iOS firmware. Once ready, click Fix Now to start the repair process. After a short time, your iPhone will restart and back to normal.
If none of the above solutions work, the issue might be with your email service provider. They could be undergoing maintenance or facing technical problems. In such cases, it’s best to contact your provider to get more information and ask them to resolve or reconfigure the email server settings.
You can also reach out to Apple Support, especially if you suspect the problem lies with Apple’s servers. Reporting the issue to them may help find a solution.
There you have it, 10 different fixes to solve the iPhone cannot verify server identity. We hope you will be able to get rid of the issue following the solutions we outlined above.
If you are sure that a system error is causing the issue, don't waste your time trying all the methods. Instead, make use of the FoneGeek iOS System Recovery software to fix the problem easily and quickly.
As a professional writer who is interested in technology, Edwin J. Parke has helped thousands of users by offering various tips to solve their problems.
Your email address will not be published. Required fields are marked *


Copyright © 2025 FoneGeek Software Co., Ltd. All Rights Reserved


 English