
“I charged my iPhone 16 and it shows the thunder sign and green bar showing that it's charging. But the battery percentage isn't going up. Does anyone know the problem with this?”
Have you ever plugged in your iPhone for hours, only to find that the battery level hasn't increased? The charging indicator is on, but the battery percentage remains the same. This can be incredibly frustrating, especially if you leave your phone to charge overnight and wake up to find the battery still at the same level.
This issue is common among iOS 18 users. When this happens, it's hard to determine if the problem is with your phone, battery, or charger. This article will explain why your iPhone is showing charging, but the battery isn't going up, and provide solutions to fix it.
The battery percentage malfunction in your iPhone could be primarily caused by software glitches. Apple has admitted that there are cases where the battery percentage behaves unpredictably due to software bugs. Sometimes, the battery appears to be always full, then suddenly drops. In other cases, the battery percentage remains the same even after charging for hours.
The good news is that we can easily fix the software glitches, and if the issue is hardware-related, like an outdated or faulty battery, you should consider repairing or replacing it.
Now that you understand why your iPhone is showing charging but the battery percentage is not increasing, here are some simple solutions you can try.
Your iPhone charger may be the cause of this charging issue. It could be that the charger is damaged or the adapter is faulty. Get a new lightning cable and adapter to charge your iPhone to fix this issue.
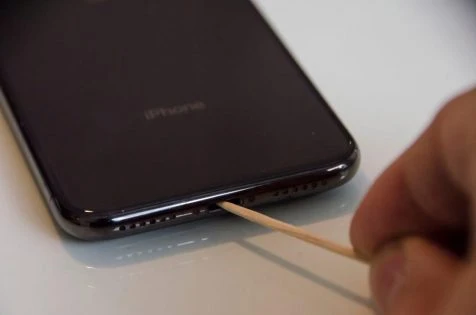
If dirt or dust in your iPhone's charging port is causing the issue where your iPhone indicates it's charging but isn't actually charging, you'll need to clean the charging port. Use a toothpick and compressed air for this task. Ensure you do it under a bright LED light to see any debris clearly.
If you notice that your iPhone battery percentage is not increasing, check the power source. Ensure there is a battery icon with a lightning symbol on your status bar or a green battery icon on your lock screen. If there is none, your iPhone is not properly connected to an external power source.
Too many apps running in the background can slow down your iPhone's charging speed, which can cause the iPhone to show charging, but the percentage is not increasing. To force close background apps:
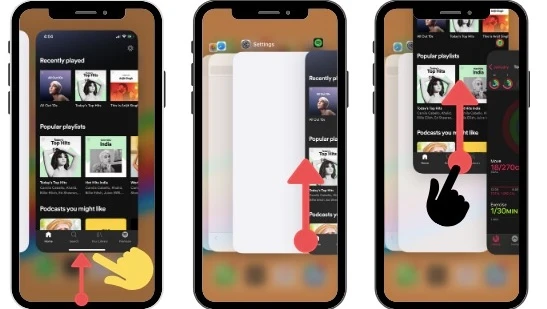
Once all the apps have been closed, restart the iPhone and charge it. After a few minutes, take it off and check if there was an increase in the battery percentage.
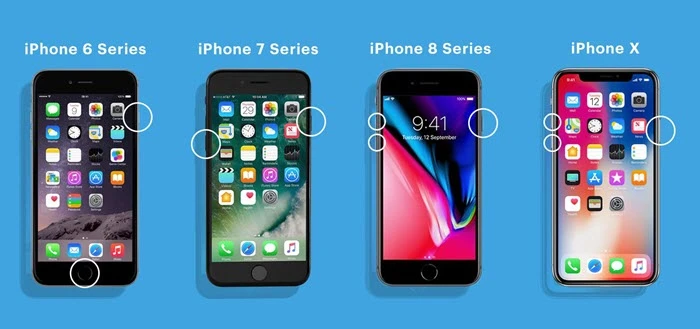
Restarting is one of the best ways to fix most iPhone issues. It will give your iPhone a fresh start and fix the battery percentage malfunction error. If a simple restart doesn't help, you can do a hard restart.
Below are the steps to hard restart your iPhone, depending on the model you're using:
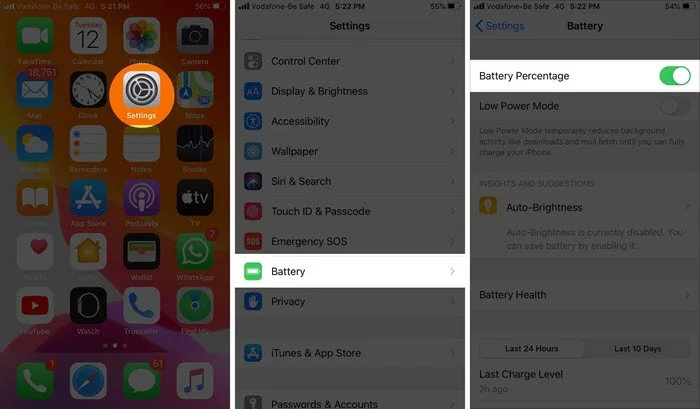
Try turning off the setting to display the battery percentage on your iPhone screen, then turn it back on again. This could refresh the settings and resolve any issues with displaying the correct battery percentage. Follow these steps:
Draining and then recharging your iPhone battery can sometimes help recalibrate the battery percentage indicator and resolve issues where the battery percentage isn't displaying correctly or seems stuck.
You can use your iPhone until the battery drains completely and the device shuts off on its own. Then, let it charge uninterrupted until it reaches 100% battery. Make sure to use a reliable power source and cable.
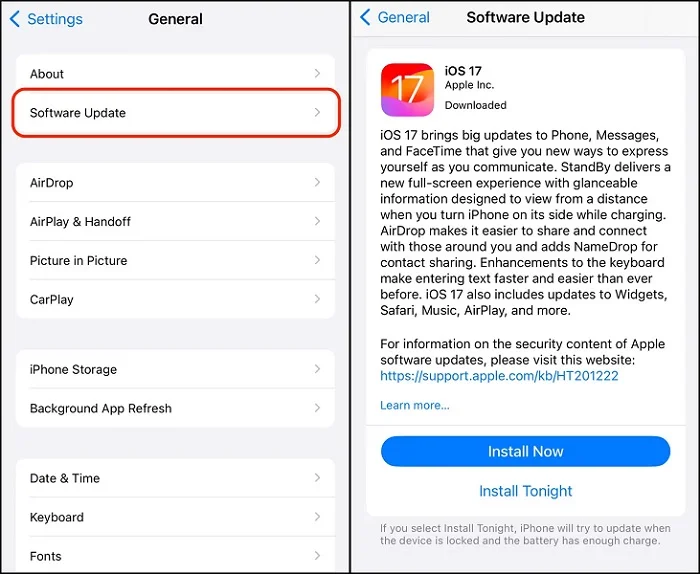
If your iPhone is running an outdated iOS version, you can experience such battery percentage glitches. So, it is important to update your iPhone to the latest iOS 18.
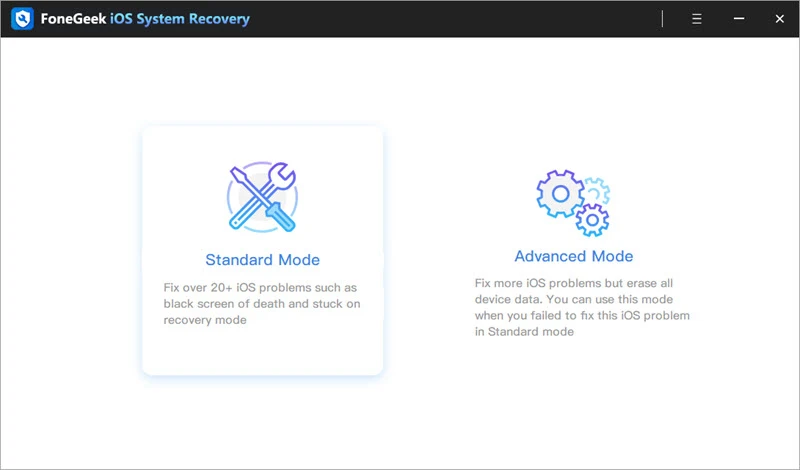
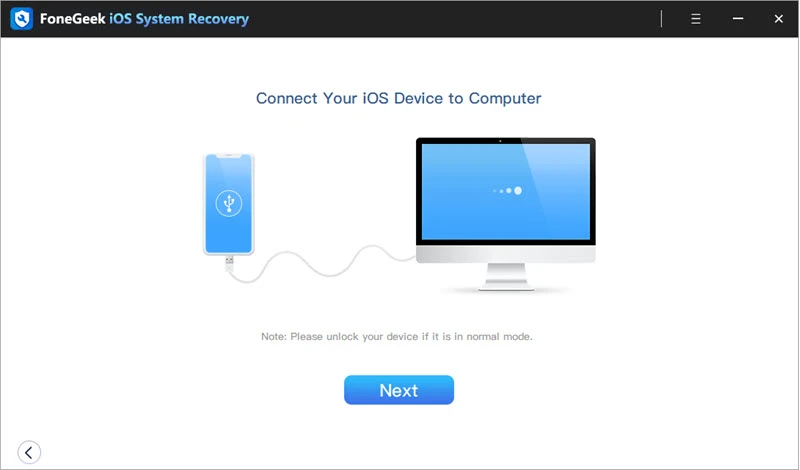
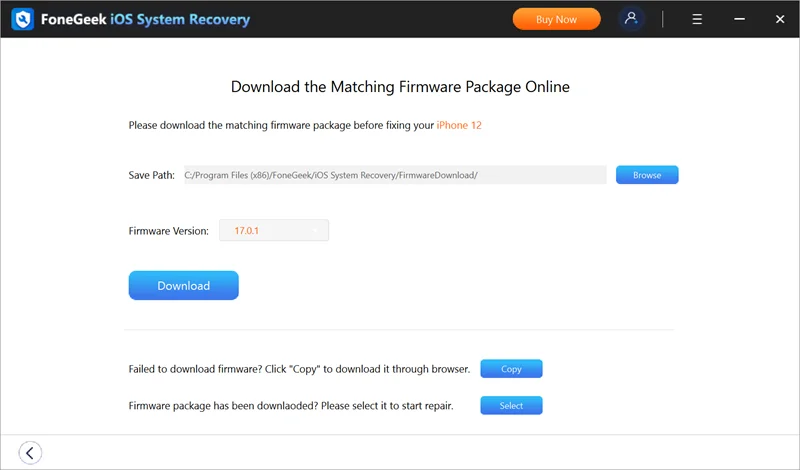
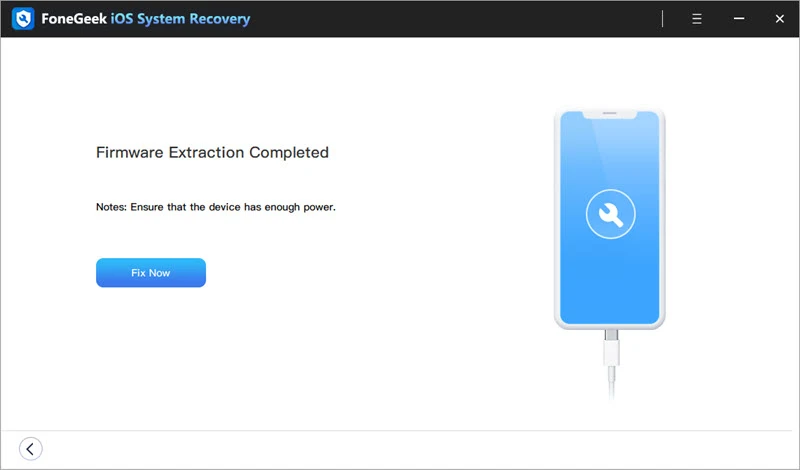
If the solutions mentioned above fail and you still cannot fix the charging problem on your iPhone, you will need 3rd-party software to help you solve it. Professional tools like FoneGeek iOS System Recovery have been rated as the most reliable tool when it comes to solving iPhone issues.
This tool allows you to fix any iOS issue without any data loss, and it doesn't require any prior understanding of iOS technology. Plus, it is compatible with all iOS versions and iPhone models (even iOS 18 and iPhone 16) and comes with a 100% success rate.


Follow the steps to use FoneGeek iOS System Recovery to fix your charging issues:
Contact Apple Support if the charging problem continues even after attempting all of the solutions mentioned above. They will help you if there is a serious problem. You can also take your iPhone to the service center to have a professional examine.
In the case of your iPhone showing charging but battery percentage not increasing, follow the steps above carefully to fix this issue. For a fast fix, use the best iPhone repair tool, FoneGeek iOS System Recovery. For more questions, we are here to help. Do get in touch with us.
Joan J. Mims is interested in researching all tips about iPhone, iPad and Android. He loves to share useful ideas with all users.
Your email address will not be published. Required fields are marked *


Copyright © 2025 FoneGeek Software Co., Ltd. All Rights Reserved


 English