
 User Concern
“My iPhone WiFi not working after updating to iOS 17? It didn't even show my network as a choice. What's the problem and how to fix it?”
Updating your iPhone to iOS 17 and now the WiFi is not working? Well, the Wi-Fi connectivity issue is quite common after an iOS update. Several users said that the WiFi stops working when they update the device to iOS 17, for example:
Don't worry. Here are 11 practical solutions to fix the iPhone Wi-Fi not working issue after upgrading to iOS 17.
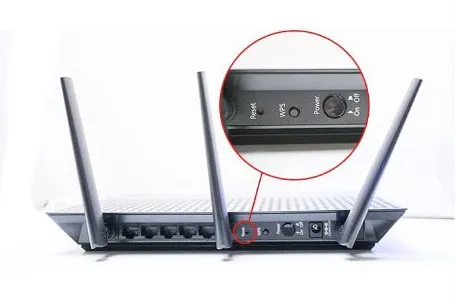
The first step is to check the Wi-Fi router and ensure it is working properly. You can restart your router and try connecting your iPhone to the Wi-Fi network again to see if it resolves the problem. Just use the switch or the power button on the router to turn if off and then turn it back on after 10 seconds.
You may have checked the router, but have you also checked the cables and the modem? It is important to check all possible cables to ensure that everything is connected. A loose connection at one point will disrupt the whole network. The modem and the coaxial cables are the ones that need to be thoroughly checked.
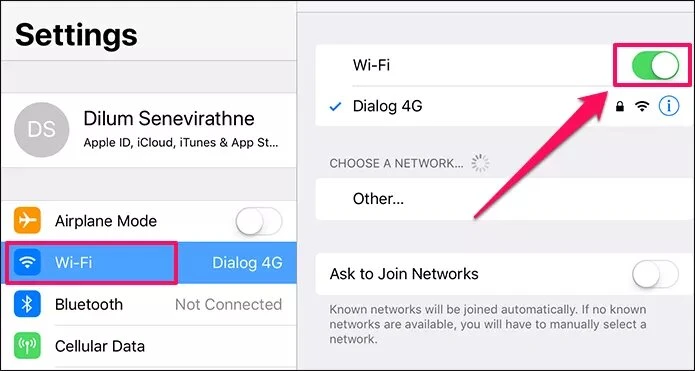
If you are sure that you are quite close to the Wi-Fi router and there is still no WiFi connection, you can turn your Wi-Fi off and then back on again to troubleshoot the issue.
To do this, head to Settings > WiFi and turn off the switch for Wi-Fi. Wait for 30 seconds and tap on the switch to turn the Wi-Fi back on. Then connect your iPhone to your Wi-Fi network.
In order to ascertain whether the problem is with the network or the device, you can try to connect your iPhone to another Wi-Fi network if available. This will definitely help you understand where the problem lies.
If you won't be able to fix your Wi-Fi connectivity issue even after trying the above methonds, then you can try to turn on Airplane Mode and then turn it off. This might help to solve the WiFi connectivitry problem.
To do so, swipe up from the bottom of the screen to bring up the Control Center (On iPhone with Face ID, swipe down from top-right corner). Tap on the airplane icon to enable it, then tap on the same icon to disable if after 15 seconds.

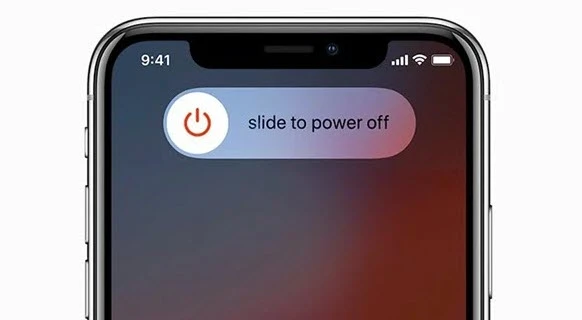
Another effective solution to solve iPhone Wi-Fi not working problem is restarting the device. To do it, you can use the physical buttons like you usually do, or follow the Apple guide on restarting iPhone or iPad.
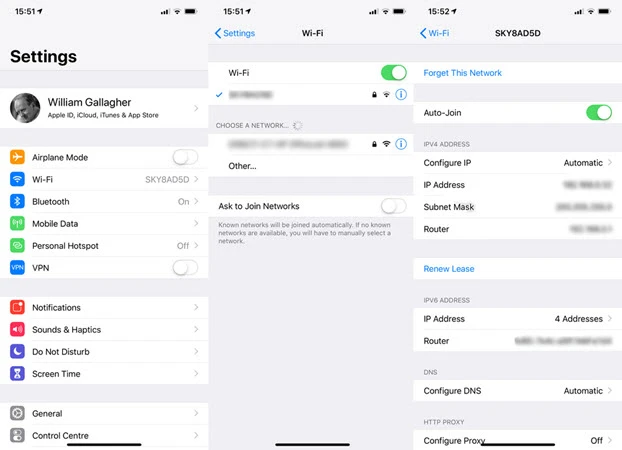
If you're not able to connect to a Wi-Fi network, you can try to forget the Wi-Fi network and rejoin it. Ensure you know the Wi-Fi password and then follow the steps below:
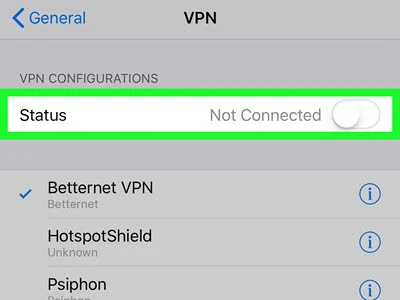
In some cases, you might face Wi-Fi connectivity issues when your iPhone is connected to a VPN. To fix this, you can try to disable the VPN in the application or go to Settings to turn off the toggle for VPN.
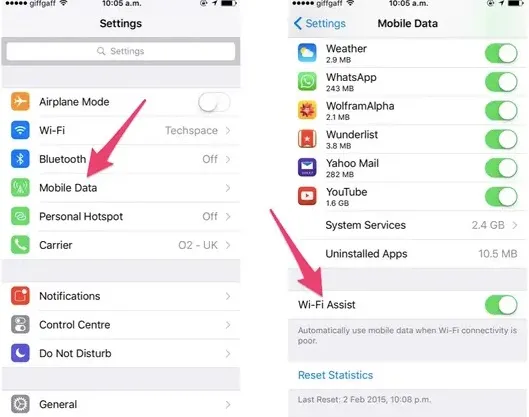
For users whose iPhone runs the iOS 9 and later versions, they can improve the WiFi connection signal by turning off the WiFi Assist feature.
Go to iPhone Settings > Cellular > WiFi Assist and toggle the feature to ON and then turn it back off.
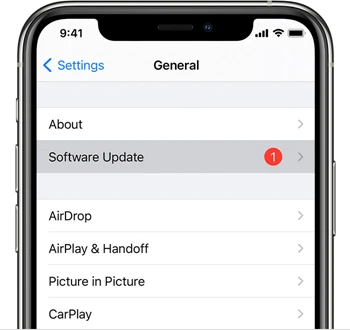
It is also a good idea to update your iPhone to the newest version of the operating system, which often includes bug fixes that can help solve the Wi-Fi issues.
To do it, go to Settings > General and tap on "Software Update". If there is an update available, tap "Download and Install".
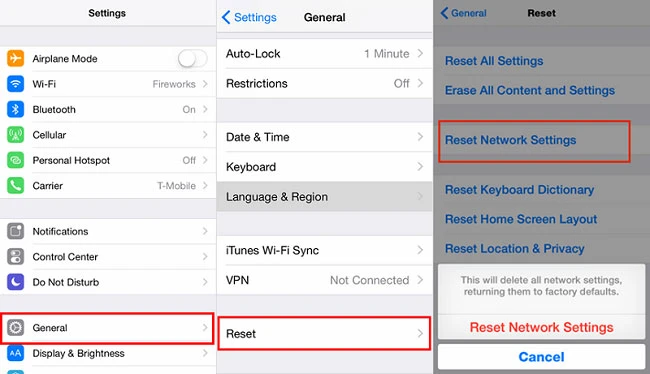
If your iPhone Wi-Fi is still not working, resetting network settings is worthy to try. This will restore all the network settings on your iPhone to default, including saved Wi-Fi, Bluetooth devices, VPN configurations, etc.
To reset network settings, navigate to Settings > General > Reset and tap on "Reset Network Settings". Then enter your device's passcode and confirm.
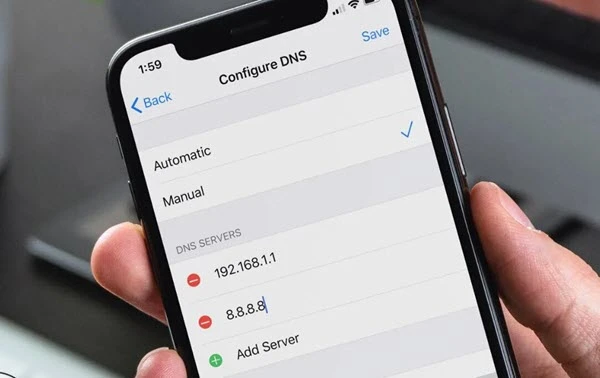
If none of the above solutions work for you, you can try to change the DNS on your iPhone. This may help to fix the Wi-Fi not working issue. Follow the steps below to switch to a Google DNS:
If you iPhone is still having trouble connecting to your Wi-Fi network, try using FoneGeek iOS System Recovery. It is a professional iOS repair tool that comes with a lot of exciting features. Let's see what they are.
So, now that you know the amazing features offered by FoneGeek iOS System Recovery, we will proceed to the steps so that you can fix the problem of Wi-Fi not working on your iPhone.
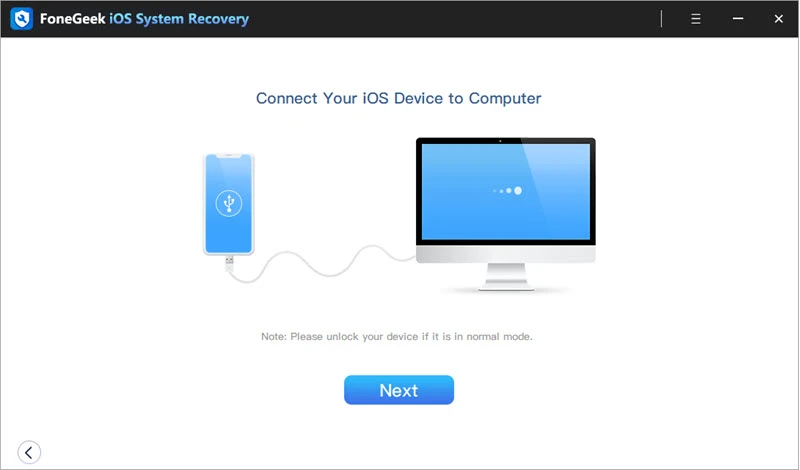
Step 1. Launch FoneGeek iOS System Recovery and choose "Standard Mode" to proceed. Then connect your iPhone to the computer via USB cable.
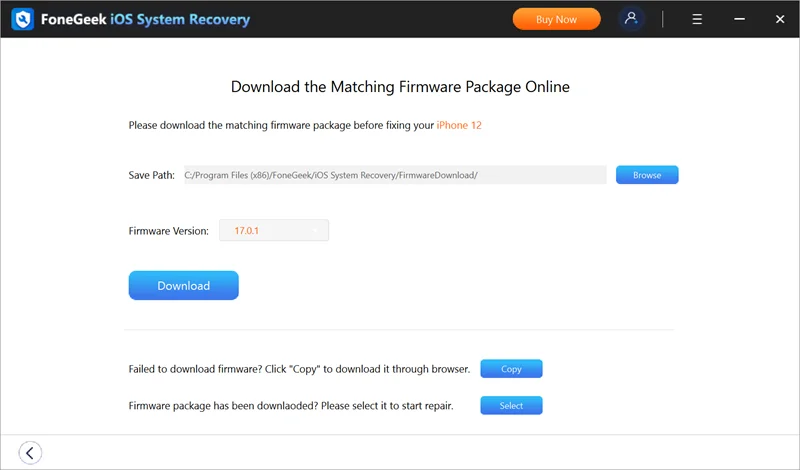
Step 2. Once the device is connected, you will need to download the matching firmware for it. The program will automatically detect your device model and display the available iOS version. You only need to click on "Download" to initiate the process.
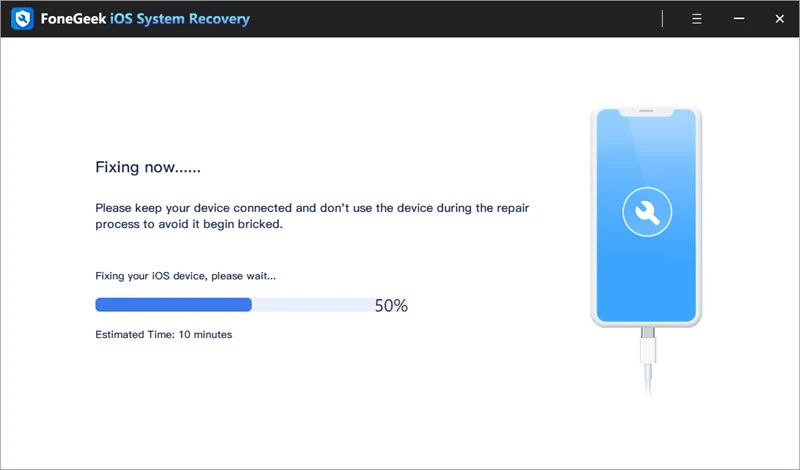
Step 3. When the firmware has been downloaded, click on "Fix Now" and the program will start to repair the device. Once the repair is done, your iPhone will restart and it should work normally again.
Q1. How to view Wi-Fi password on iPhone?
There is no way to view WiFi password on iPhone. You can put your iPhone near another device and the password will be automatically shared.
Q2. Why won't iPhone connect to my car?
If iPhone couldn’t be connected to Apple Carplay, it might be the issue of the integration between apps, iOS update error or incompatibility issue.
These are the simple solutions that you can follow to fix the iPhone Wi-Fi not working issue after iOS update. With these steps, you will be able to enjoy the full use of your iPhone and get rid of the Wi-Fi connectivity problems.
If you've tried all the solutions and you still can't connect to your Wi-Fi network, your iPhone may have a hardware issue. You'd better take the device to a local Apple Store to have it repaired.
Fay J. Melton has explored the area of technology and software for more than 5 years and he is enthusiastic about helping users solve various technology issues.
Your email address will not be published. Required fields are marked *

Copyright © 2025 FoneGeek Software Co., Ltd. All Rights Reserved