
iPhones develop issues from time to time. Some are not that serious while others, like the “SOS Only” warning on iOS 18/17, can be a real inconvenience. Imagine not being able to use any basic function of your phone. Yes, that’s what happens when “SOS Only” shows up on your iPhone. Every basic function gets blocked and you’re left with only the ability to make emergency calls.

If you’re experiencing that right now, I’ll help you out. You’ll learn how to fix SOS only on iPhone in this post. There are various methods you can use to deal with it but before we jump to them, it’s good to first learn what this SOS only iPhone issue is all about.
You may have at least once seen a “SOS” or “SOS Only” notification on your iPhone - in the status bar. What it simply means is that your phone hasn’t connected to any cellular network and as such, it’s unable to use or access the typical cellular connectivity. It also implies that you can only use the phone to make emergency calls.
The text usually shows up when you’re not within a service area or you’re in an area where the coverage or cellular connectivity is poor. You may see it too when in tunnels, rural areas, or any area where your iPhone can’t connect to a cellular network.
Is the SOS/SOS Only message same as “No Service”? No, it’s not. When you see a SOS Only text, it means you’re still able to use the phone, but only for making emergency calls to 911 or related services. The “No Service” warning is different as it means there’s totally no service coverage, even for emergency calls.
Your iPhone could show SOS/SOS Only message due to various reasons. Here are some of them:
You now know what could cause your iPhone to show “SOS Only,” so let’s check various ways to fix this issue.
What if you’re seeing the SOS Only message because there’s no signal where you are? That’s what usually happens. How do you fix it? Check your cellular network coverage. In case there’s no network coverage where you are or the signal is just poor, be patient until you get to some place with better coverage.
It’s a simple step but often works, especially if it’s a network error that’s causing the SOS/SOS Only text to appear. Turning off the cellular data and turning it back on will force the phone to establish a fresh connection, which could ultimately fix up the error. Follow these steps.
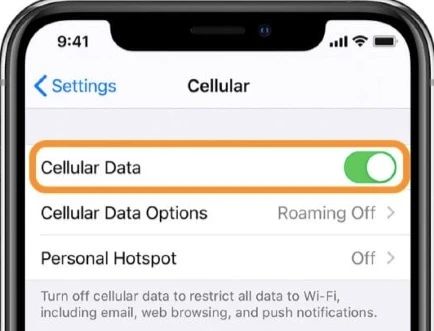
You can use the Control Center to do this too. Just bring down the Control Center. Go to the Cellular Data icon and tap it to disable it. After some few seconds, tap the icon again to enable it.
Do you have the data roaming option disabled on your iPhone? That could just be why you have SOS Only showing up on the status bar, especially if you’re travelling. You can fix this by turning on the data roaming option.
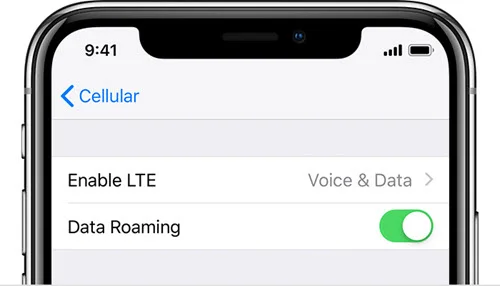
Once you do that, you should have a 4G or 5G showing up in your phone’s status bar rather than the SOS Only text.
I would suggest you turn off 5G if you have it enabled on your iPhone. Use just 4G because 5G is not yet fully rolled out around the world, and it may interfere with your phone’s signal strength and connection leading to the SOS Only issue. So, disable it and stick to 4G.
The fastest way to restart all your wireless connections, except Bluetooth, is to turn off the Airplane mode and turn it back on - doing this can help to remove the SOS Only iPhone issue.

You can turn on/off the airplane mode right from Settings too.
This is one troubleshooting method that works almost every time. You basically reset the caches when you reboot the iPhone. This can resolve settings errors and bugs hence fixing the SOS Only issue and ensuring a stable network connection.
Now, get the phone up and running again by simply long-pressing the power button.
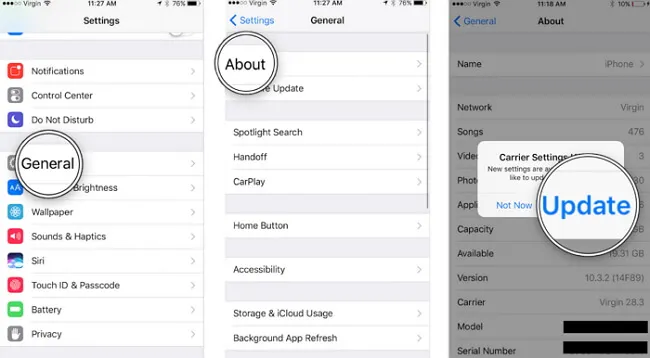
You can stay out of trouble by keeping your carrier settings up to date. It’s easy to do that as carrier providers usually release updates aimed at improving cellular connectivity as well as the overall network performance. The update happens automatically, but you can do it manually in Settings > General > About if you wish so.
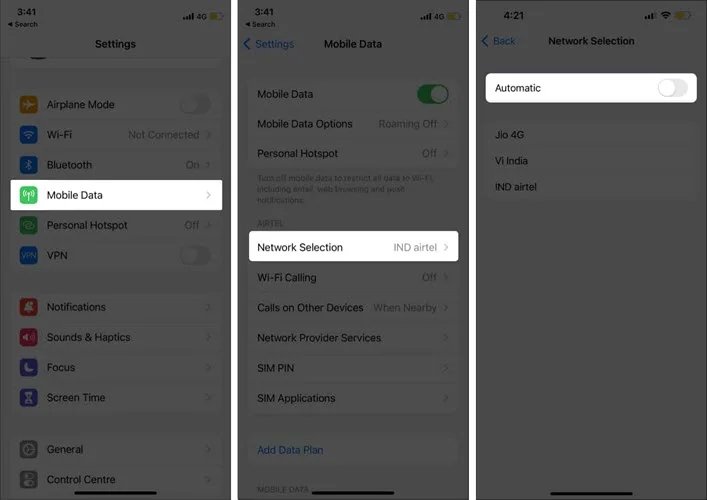
What the Automatic Network Selection does is guide your SIM to connect to the correct network. Sometimes it may fail to find the right network instantly, though. You can solve this by disabling the Automatic Network Selection settings on the phone and then enabling it again. The connection will be re-established and the SOS Only iPhone issue will disappear.
It’s unusual for a physical SIM card to cause network connectivity issues. It can happen, though, and when it does, what you can do is to remove the SIM card and then put it back inside. This can help resolve the SOS Only issue, but if your iPhone uses an eSIM, avoid resetting it if your carrier doesn’t says so.
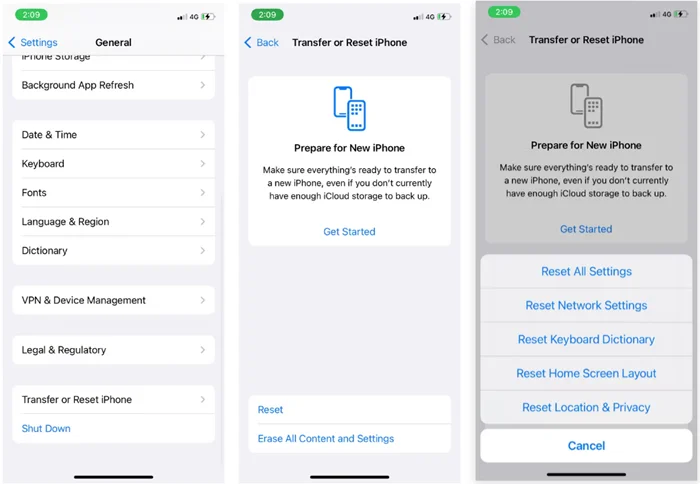
The solution that may finally get rid of the SOS issue could probably be resetting your network settings. Yes, this could turn off SOS Only because it erases every connection it has made. Note that this action will also erase your entire phone’s network data including Wi-Fi passwords, VPN configurations, connected Bluetooth devices, and any other network settings.
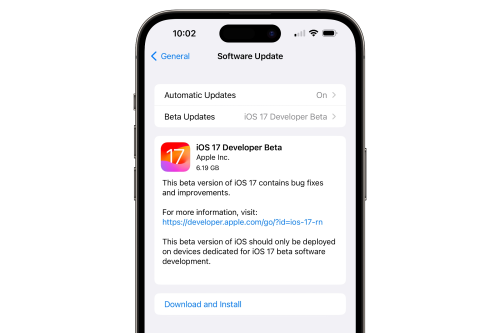
There could be a software issue causing the SOS Only text to show up. Doing an iOS update can help to solve it. You only need to confirm if there’s any available update and install it.
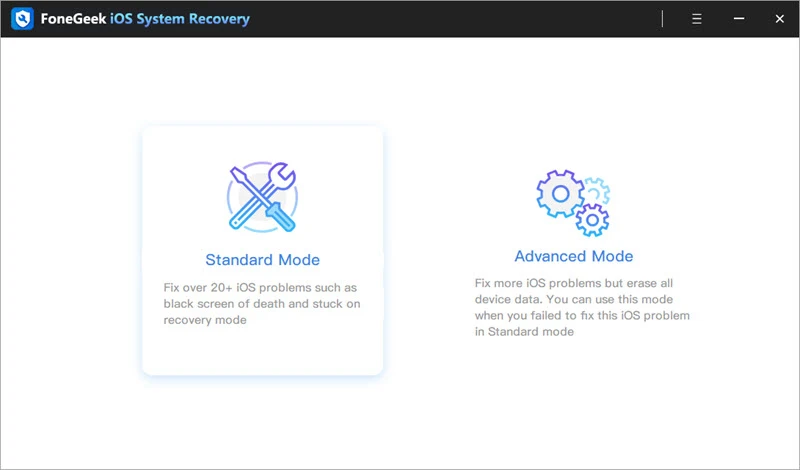
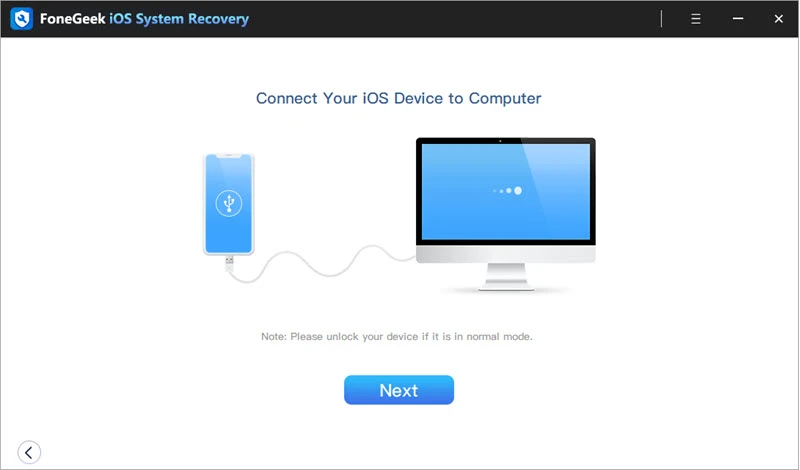
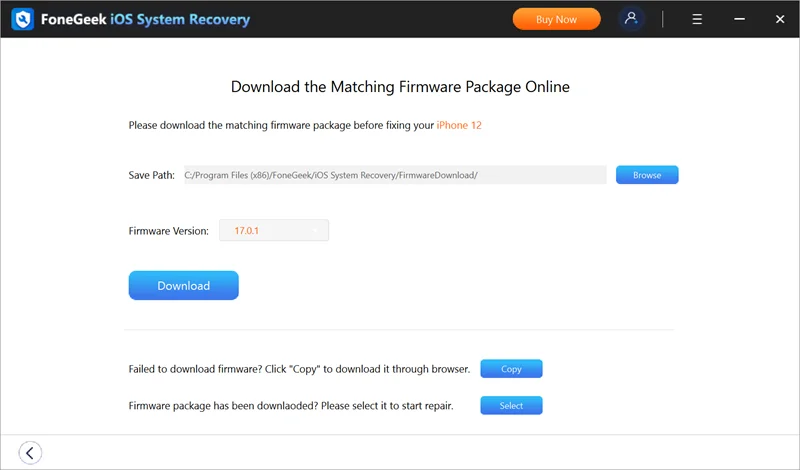
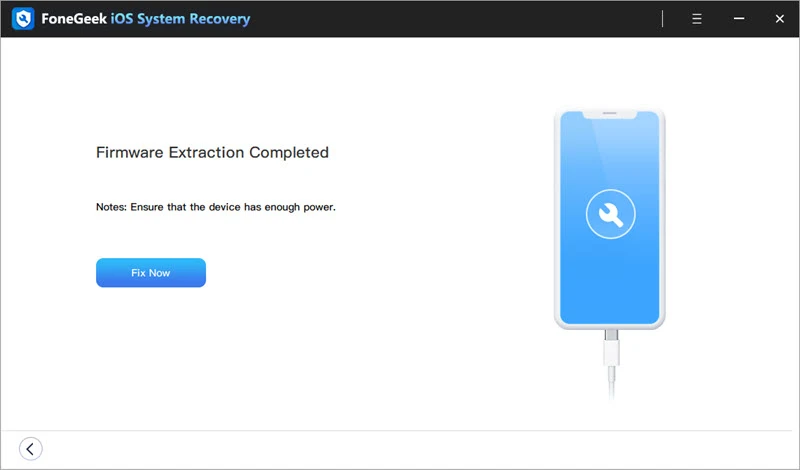
Is the SOS Only text still there even after trying the above methods? Your iPhone probably has a system issue that has left it stuck in the SOS state. Such system-related issues are best addressed using iOS system repair tools. There are many of them but FoneGeek iOS System Recovery works the best. It’s designed to resolve any kind of iOS issue, including iPhone stuck in the “SOS Only” state.
It’s a highly reliable iOS System repair tool and works without erasing any data on the phone. Using it is very simple too. The interface has been designed to enable easy navigation and the steps to fixing iOS issues are straightforward. You can as well do more with this FoneGeek tool than just fixing system issues.


Steps to fix SOS only on iPhone using the FoneGeek iOS System Recovery:
You can do everything but still, the problem continues. This is the point where you need to contact your carrier provider to seek help. There are various measures they can take, including replacing your SIM card.
It’s frustrating seeing your iPhone show the “SOS Only” text, especially if you use it for work and communication. Fortunately, the solutions we’ve highlighted above can help you troubleshoot and fix the issue. But, you’ll have to try each one of them, which may take time.
If you want a quick solution, use FoneGeek iOS System Recovery tool instead. It will get your iPhone out of the SOS Only state once and for all, and even fix many other iOS problems your phone may have.
Fay J. Melton has explored the area of technology and software for more than 5 years and he is enthusiastic about helping users solve various technology issues.
Your email address will not be published. Required fields are marked *


Copyright © 2025 FoneGeek Software Co., Ltd. All Rights Reserved


 English