
Have you encountered an SSL error when visiting a website or opening a particular app on your iPhone? With this error in place, there’s nothing you can do on the affected website or app. That doesn’t mean, though, that your browsing experience is permanently disrupted. This article provides several troubleshooting methods that can help fix this SSL error on iPhone completely. But first, let’s understand what the error is all about and the causes behind it.
For a device to communicate with websites and access information, it requires an SSL certificate. The SSL certificate also serves as a firewall that protects the data on the device from leaking to third parties. The three most common SSL errors that occur on iPhones include:
The “Invalid certificate” Error
Most iPhone users often encounter SSL errors because they have outdated, invalid, or expired certificates. iPhone need these certificates to establish secure connections with websites via HTTPS to ensure there’s no leaking of data. Ensuring that these SSL certificates are up to date can fix the error.
The “Connection is not private” Error
Public Wi-Fi networks, such as those found at restaurants, schools, railway stations, and others, are usually less secure. When using these free Wi-Fi networks, you’re highly likely to get the iPhone SSL error message.
The “SSL/TLS handshake failed” Error
When the “SSL/TLS handshake failed” error occurs, there’s probably a problem with the network connection or the date and time settings on your iPhone. You can also encounter this SSL error in Safari if the SSL certificates are outdated. The SSL handshake process can’t be completed due to this error, and as such, users are blocked from accessing secure websites or apps.
When there’s an SSL connection error in Safari, the cause is often an unstable network connection. Check if the Wi-Fi connection is okay on other devices. Maybe it’s only your iPhone that has a connectivity issue. If so, re-establishing the connection can fix the issue and remove the error.
You can do that by turning the Airplane mode on and off again. Find the Airplane icon from the Control Center and tap it to enable Airplane mode. Wait at least a minute and turn off Airplane mode again. Then open Safari and try to load a website to check if the SSL error is gone.

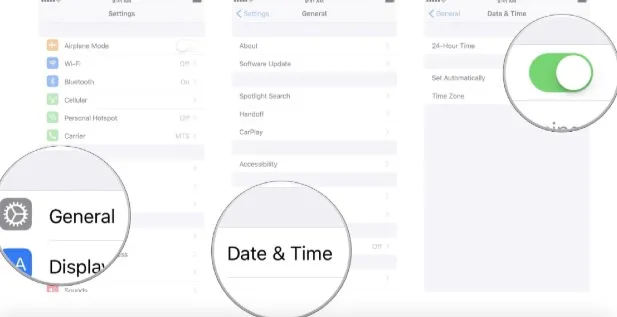
If the date and time are not correctly set, the iPhone SSL error will occur. Therefore, check the date and time settings to ensure they correspond to the selected region. If you changed the settings without knowing or you moved to another time zone, set them correctly and turn on the Set Automatically feature.
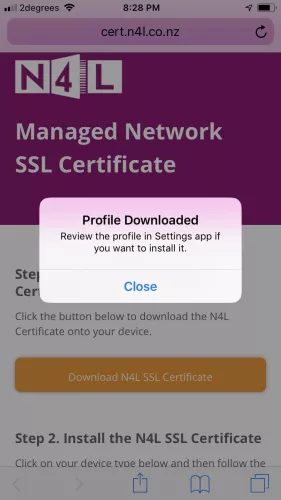
Are the SSL certificates on your iPhone valid? If they’re invalid and outdated, Safari will display an SSL connection error, and the only way to fix this error is to install trusted SSL certificates. Start by checking the SSL certificates on your iPhone. If you find that they are corrupted or outdated, use the following steps to manually install new trusted certificates.
How to download trusted SSL Certificates:
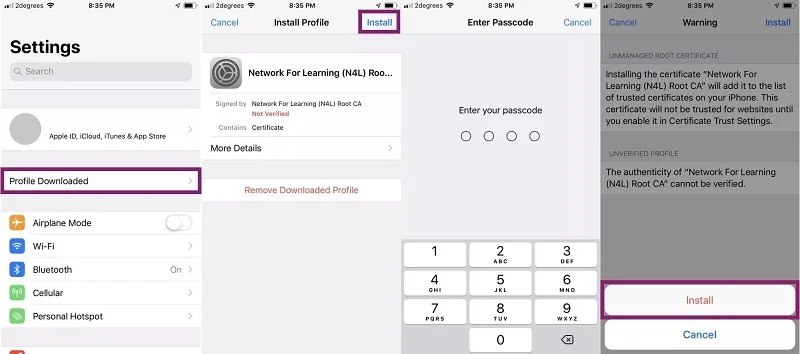
How to install the SSL Certificates:
The SSL error may appear if there is a network problem on an iPhone or if the network settings are incorrect. A simple solution here is to reset the network settings. This process won’t delete any data, but it will restore your iPhone’s network settings to their default state and fix the SSL error.
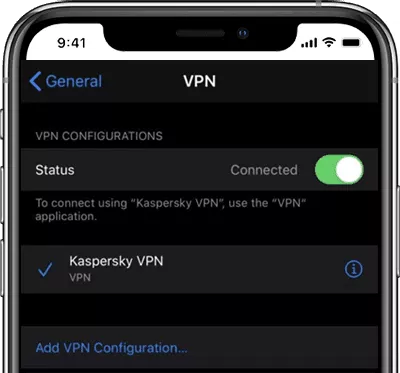
Sometimes, an SSL error occurs on an iPhone because of a VPN. The VPN might be disrupting the SSL connection, causing the Safari browser to fail to connect to websites and show the SSL error. To remove the error, turn off the VPN service for a while by following these steps:
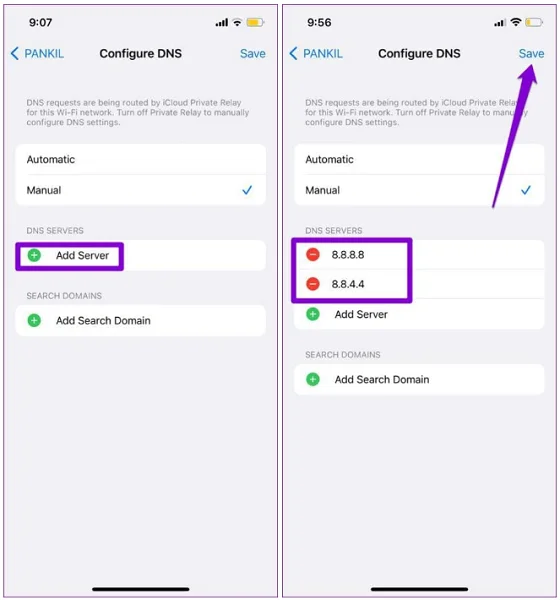
The DNS server that most iPhones use for internet connection is usually assigned by the Internet Service Provider (ISP). When these DNS servers encounter problems, they may cause an iPhone to fail to establish a secure connection between its Safari browser and websites. So, how do you fix this? Use Google’s Public DNS servers instead. To do that:
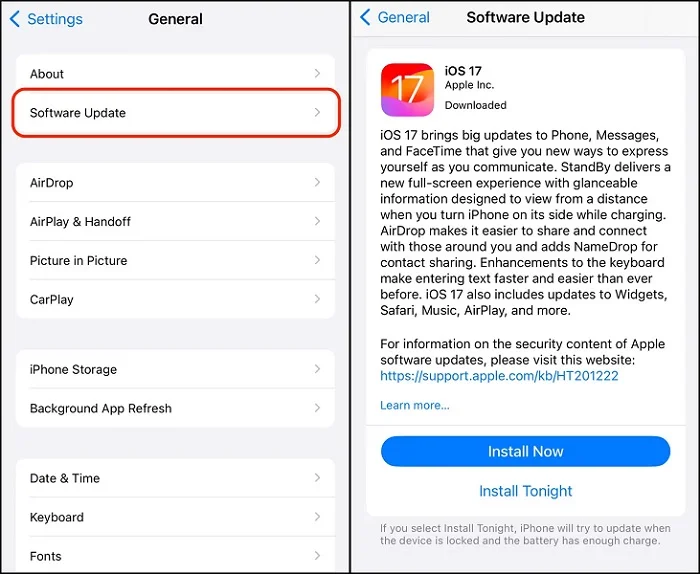
Are you getting the same SSL error iPhone issue when using different apps? Try installing the latest iOS 26 on the iPhone and see if the error disappears. Here are the steps:
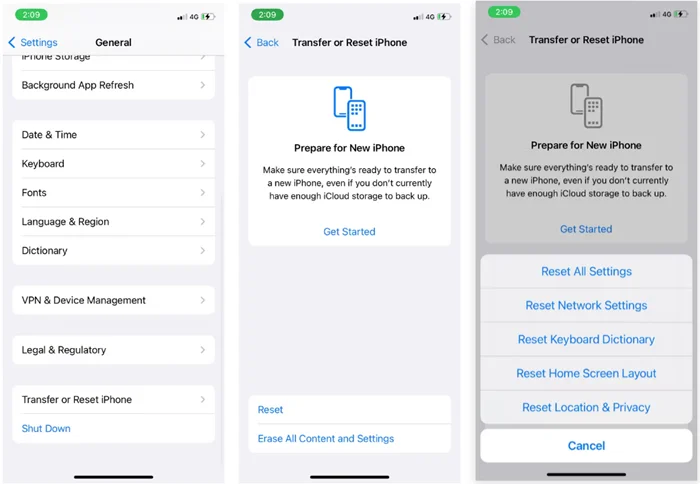
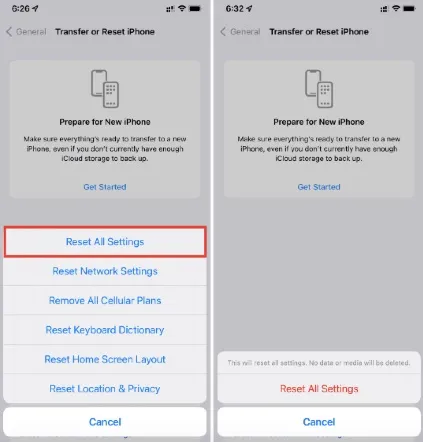
Has the SSL error disappeared? If not, try to reset all settings on your iPhone. No data will get lost in the process, but all settings will revert to their default state, and the SSL error will disappear if it was caused by incorrect settings. Follow these steps to reset all settings on any iPhone:
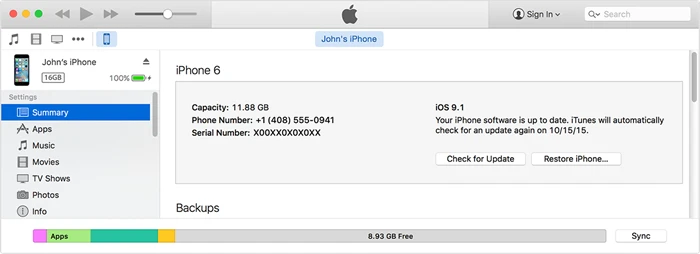
The iTunes Restore feature is another solution for removing the SSL error on your iPhone. It resets the iPhone to factory settings to fix various iPhone problems. This feature can help to fix the SSL error, but it will delete all data in the process. Therefore, back up your iPhone first before you start.
Does the SSL error persist even after trying all the above methods? You need to try a more effective and reliable solution like the FoneGeek iOS System Recovery. This powerful tool can fix all iPhone issues completely and doesn’t delete any data in the process. You can use it to fix the SSL iPhone error and other common iOS issues, including iPhone stuck on the Apple logo, frozen screen, black screen, etc.


How to use FoneGeek iOS System Recovery to fix the SSL error on iPhone:
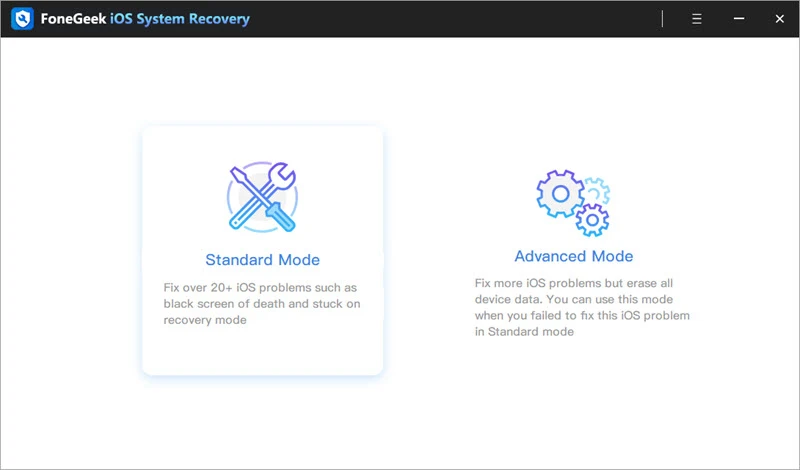
Step 1: Download FoneGeek iOS System Recovery from the link above. Install the program on your computer and launch it, then choose the Standard Mode.
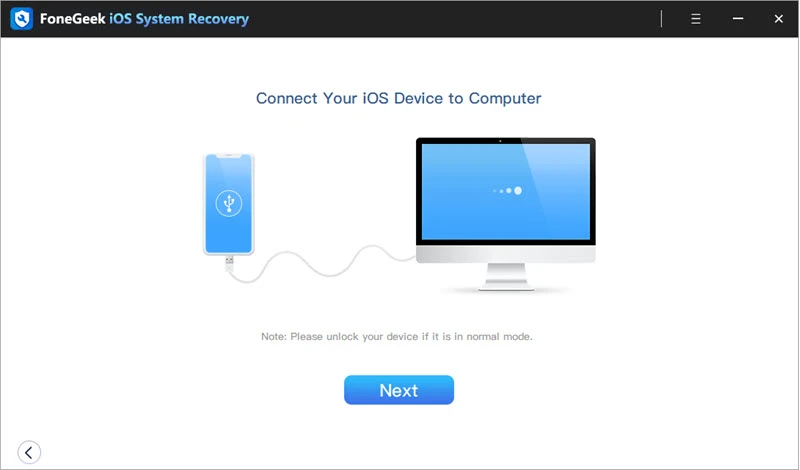
Step 2: Get your faulty iPhone and connect it to the computer - use a compatible cable and ensure the program detects the phone.
Step 3: The program will suggest the firmware package that suits your iPhone model. Save this package by clicking on the Download button.
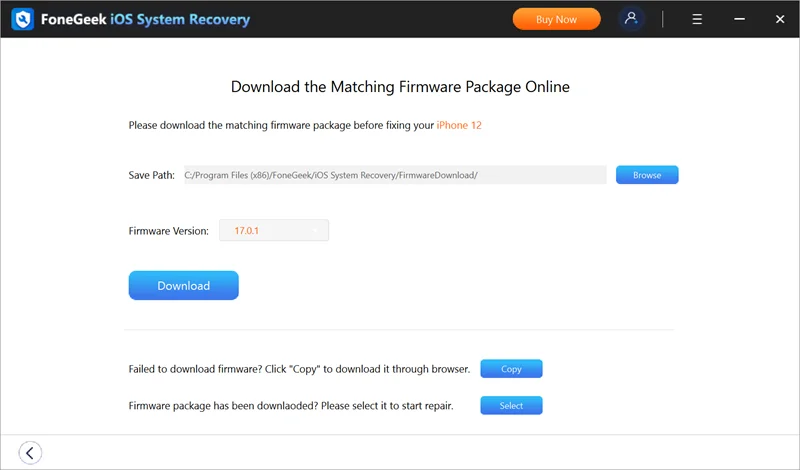
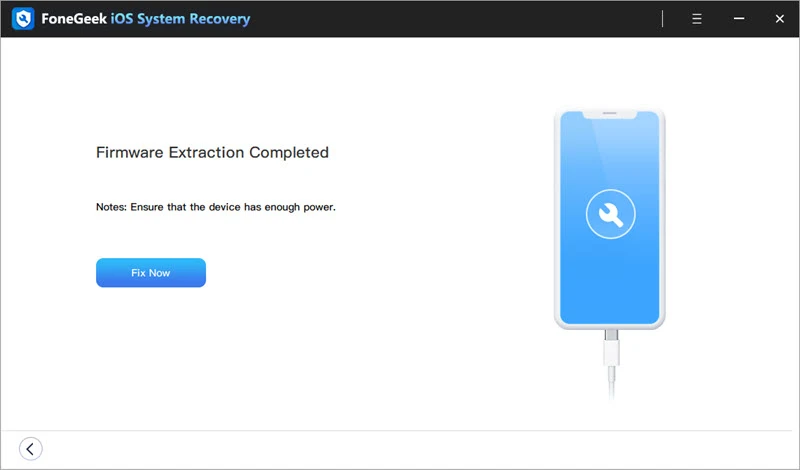
Step 4: After the firmware finishes downloading, go to the program and click on Fix Now. Allow the repair process to complete - you’ll see the Done message once it finishes.
The SSL error on iPhone can be frustrating when it keeps showing up whenever you visit a website in Safari. If the error is not fixed, there’s nothing else you can do in the browser. Fortunately, this guide provides several ways to eliminate this SSL connection error in Safari on iPhone. The most effective and safest method is FoneGeek iOS System Recovery. This powerful tool will remove the SSL error completely without causing data loss, and you can also use it to fix all other iOS issues.
Fay J. Melton has explored the area of technology and software for more than 5 years and he is enthusiastic about helping users solve various technology issues.
Your email address will not be published. Required fields are marked *


Copyright © 2025 FoneGeek Software Co., Ltd. All Rights Reserved


 English