
“I got a cable for my iPhone 16 i can charge and listen to music at the same time. It was working at the beginning but when I updated to iOS 18 it keeps telling this accessory may not be supported. Any solution?”
Many iOS users have reported seeing the error message "This sccessory may not be supported" when they try to charge their iPhone or iPad. It is a common problem on iOS 18 devices that can be caused by various reasons, and usually happens soon after an iOS update.
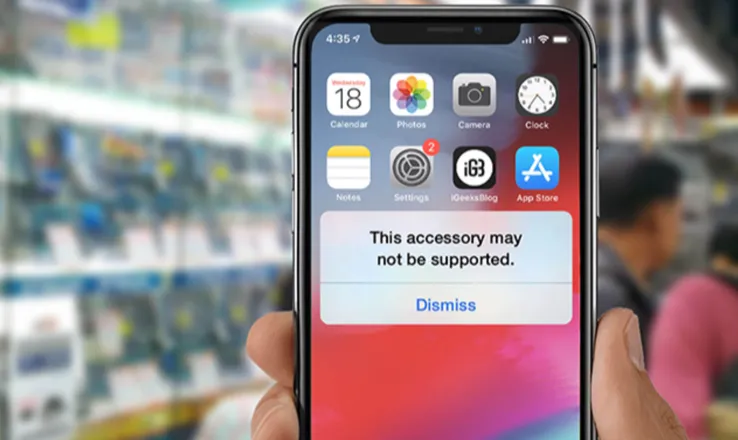
If you're in the same situation and seeing this error popping up every now and then, you've come to the right place. This article explains why you're seeing this message on your iPhone or iPad and share you effective ways to remove the error.
Before we get to the solutions, it may be important to take a look at some of the reasons why is your iPhone showing this error. Actually, there is a variety of reasons why your iPhone says "This accessory may not be supported" and some of the most common ones include the following:
The following are some effeictive solutions you can try to fix this accessory may not supported error on your iPhone/iPad:
When you see the error message "This accessory may not be supported" on your iPhone, the first thing you can try is to disconnect the accessory and reconnect it again. Then check if the same alert appears.
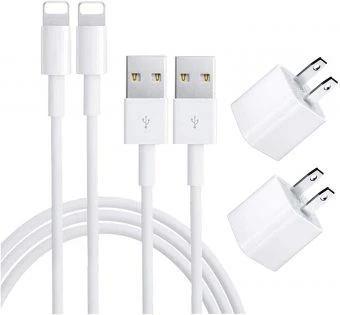
If this problem occurs immediately after plugging the iPhone into a power source, it is possible that the cable you are using to charge the device is not MFi-certified. This means that the cable doesn't meet Apple's design standards.
If you purchased the charging cable at an unauthorized store for a few bucks, then it is likely that it was cheaply made and not certified to work with Apple products. These cables can cause damage to your iPhone and cause the voiding of the warranty.
The best way to fix this issue therefore is to charge your iPhone with the origianl cables or purchase an Apple’s recommended charging cable.
It is also important to make sure that both the accessory and the port on your iPhone or iPad are free from dust and dirt.
To clean the accessory, disconnect it from the device and turn off everything, then use a microfiber cloth to rub at the surface to remove lint, dust or dirt that may be on the accessory. You can also use the standard pencil eraser and a lint-free cloth or electronic cleaning cloth to clean the port.
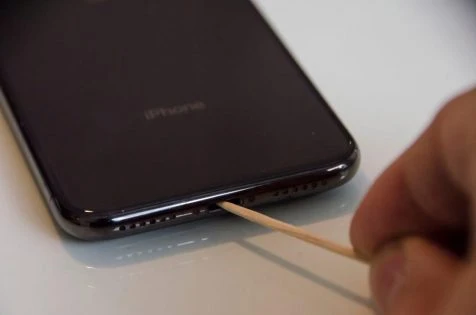
If your iPhone says "This accessory may not be supported" when you try to charge the device, there might be something wrong with your charger, not the lightning cable. Check your iPhone's charger and clean out any lint or debris using an anti-static brush.
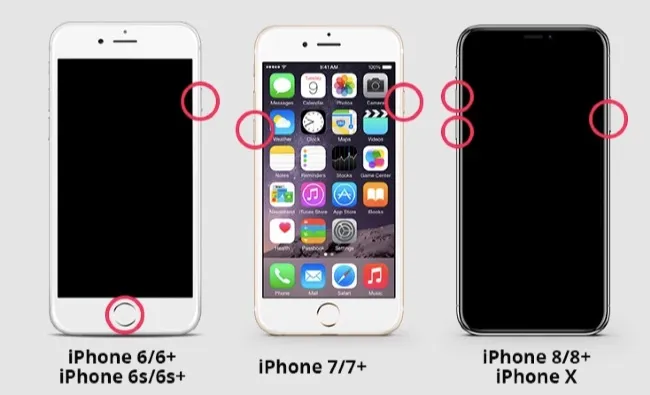
If you still see this alert, then it is likely that the problem is software related. In this case, the simplest solution is performing a restart of your iPhone or iPad. Restarting the device will refresh the software components and fix some minor errors.
To restart your iPhone, simply press and hold the power button (the side button on iPhone X and earlier) until the "slide to power off" appears. Slide to turn off the device, wait a few seconds and then press the power button again until the device power on.
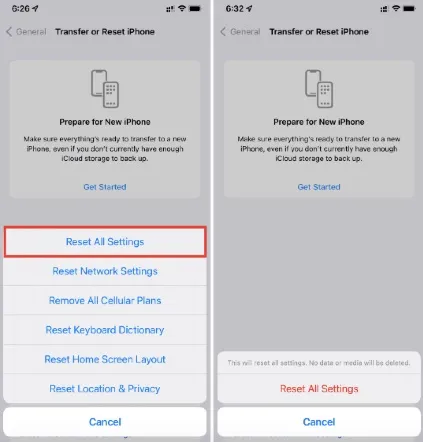
If a restart doesn't work, you can also try to remove any conflicting settings that are causing the problem by resetting all settings on your iPhone.
To do that, simply go to Settings > General > Transfer or Reset iPhone> Reset All Settings and then enter your passcode when prompted. Wait for the device to restart to check if the problem is gone.
Some accessories might require the latest version of iOS. If you see an alert, try to update your iPhone or iPad to the latest version of iOS 16. It is also a great way to remove some of the glitches that could cause the device malfunctioning. Here's how to update the device wirelessly:
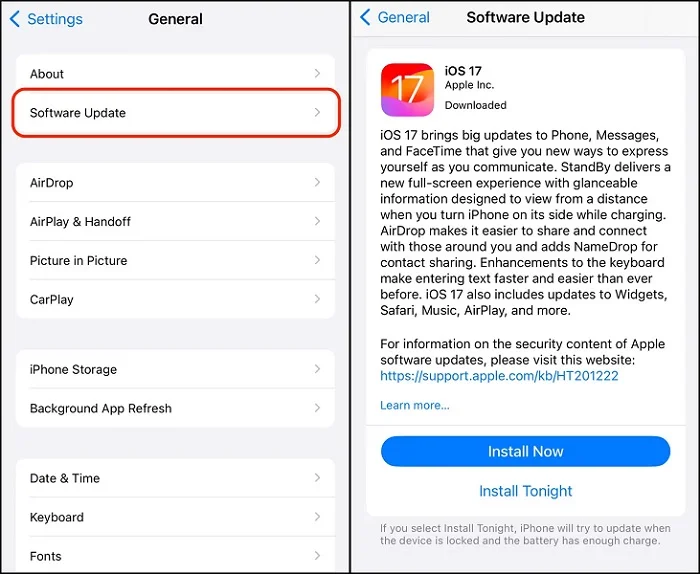
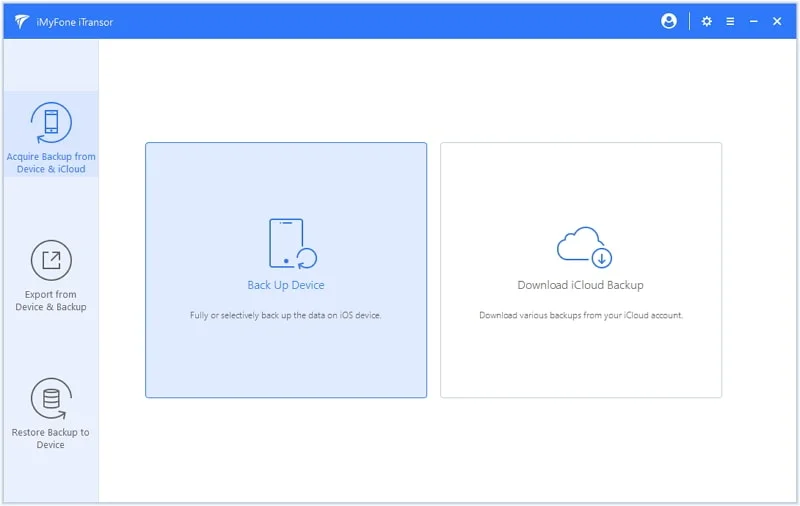
It is worth pointing out that updates can sometimes cause errors like this accessory may not be supported on your iPhone or iPad and even data loss. Therefore, it is important to back up all the data on your iPhone/iPad before attempting to update to iOS 18. This way, your data will be safe in case something goes wrong. The best tool to help you easily make a complete backup of all the data on your iOS device is FoneGeek iOS Data Backup & Restore. This program is designed to backup all your data on iPhone or iPad for Free. The following are just some of its features:


These quick fixes should help resolve the issue, and it's important to remove junk files from your iPhone regularly. If you have any other suggestions or tips, feel free to share them in the comments section below.
As a professional writer who is interested in technology, Edwin J. Parke has helped thousands of users by offering various tips to solve their problems.
Your email address will not be published. Required fields are marked *


Copyright © 2025 FoneGeek Software Co., Ltd. All Rights Reserved


 English