
One of the great features of iPhone is that you can send audio messages directly through the dialog box. Have you received important audio messages from your friends and you need to keep that but you have no idea how to do that?
To save audio messages sent/received with iPhone, here are 5 practical solutions discussed in this article.
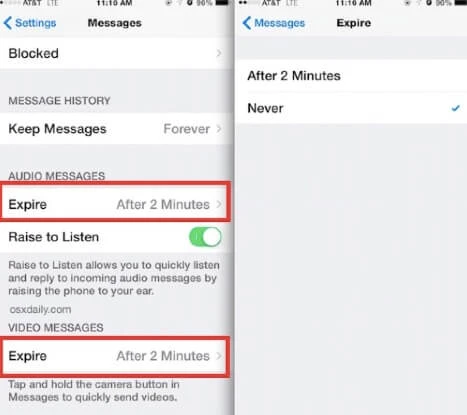
If the audio messages are sent or received through iMessage, they will be automatically deleted in 2 minutes when they are opened. This auto deletion feature is to free up more space for your iPhone. If you need to keep the iPhone audio message permanently, you can change the expiration time from iPhone settings.
Step 1. Click on Settings and Messages on your iPhone.
Step 2. Tap on Expire under the option of Audio Messages and set the expiration time to Never.
If the audio messages are set to expire after 2 minutes of playing it, this method can be used.
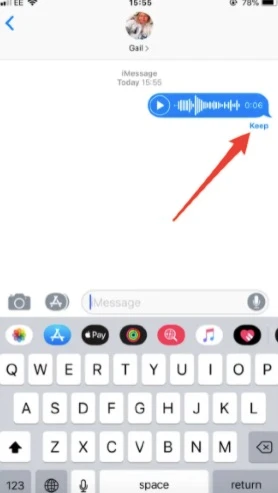
When you receive and play an audio message on your iPhone, you will see ‘Expires in 2m’. And the option of ‘Keep’ will appear after 30 seconds. Click on it to save the message.
The methods above can keep audio messages. But when you get new messages, they may still get lost. If you don’t want to scroll down to find the audio message, you can:
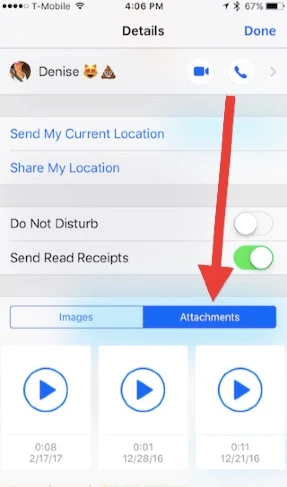
While you receive an audio message from iMessage, you can save them as voice memo. However, it may not be that effective. You cannot save all the audio messages in one single click. Here are the steps:
Step 1. Click on the iMessage that contains the audio message. Press and hold the audio message and click on "Copy" to save it.
Step 2. The selected audio message will be saved in your Voice Memo app. You can then open the Voice Memo app to hear the audio message you just saved.

A simple and effective method to save iPhone audio messages is to transfer them to your computer. In that case, a reliable iPhone data exporter tool called FoneGeek iPhone Data Recovery can do you a favor. It is very convenient to use. You can selectively save audio messages you received or sent you want. Here are some of the functions that make FoneGeek iPhone Data Recovery the best choice for most iOS users:


Here are the steps to use FoneGeek iPhone Data Recovery to save audio messages sent/received with iPhone. The instructions on the interface is very easy to understand. Every user can use it without any hassle even if he/she knows little about our software.
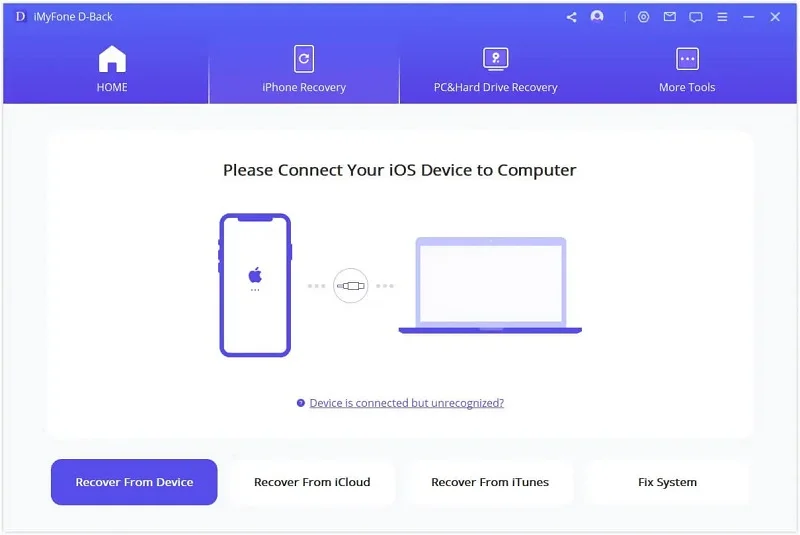
Step 1. Download the program on your computer and run it. Click "Recover Data from iOS Devices" on the main window. The program will ask you to connect the iPhone to computer. Just do it and wait for the program to detect the device.
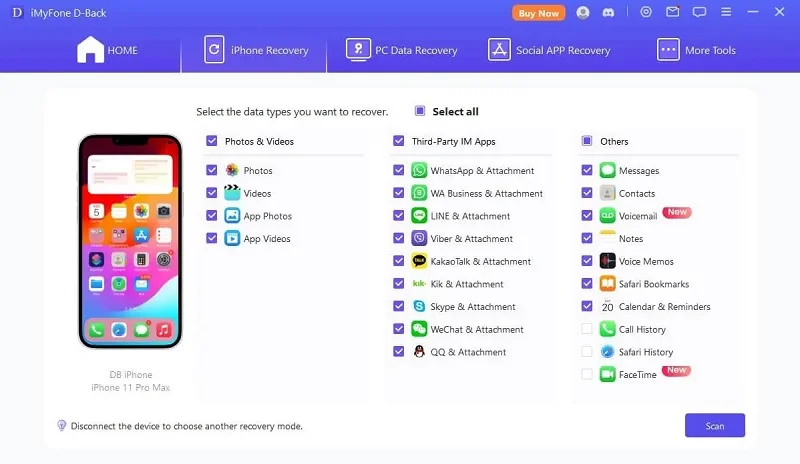
Step 2. After the connection, you can select "Messages" and any other data you want to recover and save, then click on "Scan" to begin scanning.
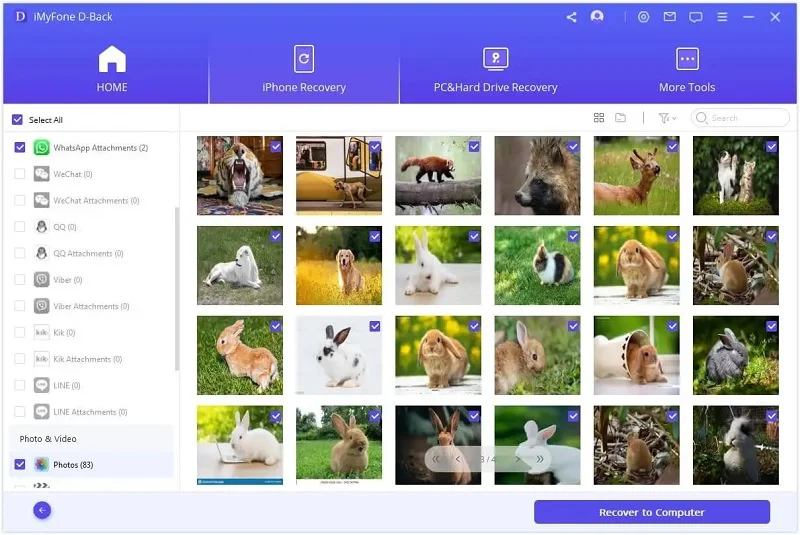
Step 3. After the scanning is done, you will view that all the audio messages are well organized. You can click them to preview all the audio messages that you need.
Step 4. Finally, tap on "Recover to PC" and choose the folder where you want to save the audio messages on your computer.
To do this, you can follow some steps in 2nd method and:
As a professional writer who is interested in technology, Edwin J. Parke has helped thousands of users by offering various tips to solve their problems.
Your email address will not be published. Required fields are marked *


Copyright © 2025 FoneGeek Software Co., Ltd. All Rights Reserved


 English