
When you import photos from your iPhone to your Mac computer, you not only get to view them on a larger screen but also get to back them up. In addition, you can free up a decent amount of space on your iPhone.
Importing photos form iPhone to Mac, in most cases, is pretty simple. Just plug the device to your Mac, then pick the photos from Photos or iPhoto app and drag them to Mac. However, you may get problems when importing iPhone photos to your Mac.
For instance, the Mac cannot successfully detect your iPhone, only a partial photos are imported or the importing process gets stuck. Whatever the reason is, we will show you several methods to bypass the issue of can’t import photos from iPhone to Mac.
There are several reasons that can cause photos not to get imported from iPhone to Mac. The most common ones are:
These are the usual culprits behind can’t import photos from iPhone to Mac. Now that you know them, here are steps you can take to fix the issue.
It may not seem much but a simple restart is often effective to get rid of most small system glitches on devices. Therefore, try restarting both the iPhone and the Mac if you’re unable to import photos to Mac. Once you do that, try importing the photos once more.
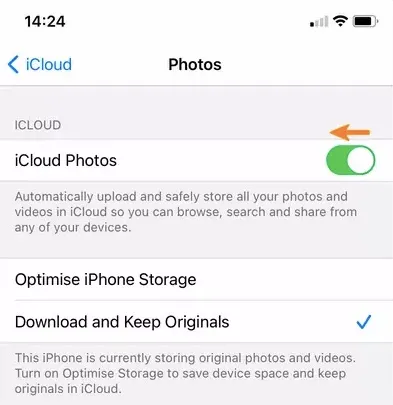
We mentioned before that importing photos from an iPhone to a Mac computer might not work if you have the “Optimize iPhone Storage” feature turned on in iCloud. So, disable it to fix the issue. Follow these steps to do it:
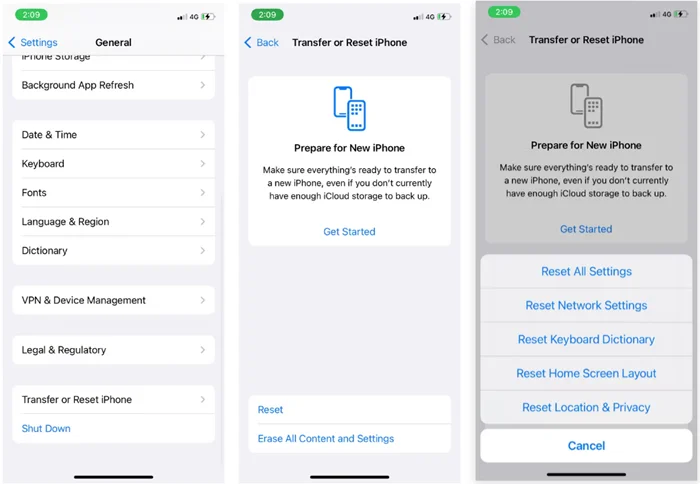
This small glitch could also be repaired by resetting location & privacy on your iPhone. So why not give it a try if you can’t import photos from iPhone to Mac.
Open Settings app on your iPhone, go to General > Reset > Reset Location & Privacy. After that, connect your device to Mac and click on Trust on iPhone when prompted.
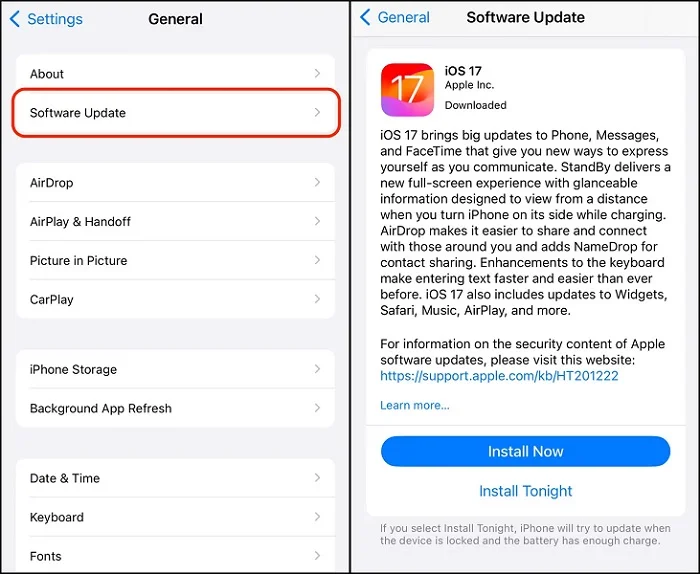
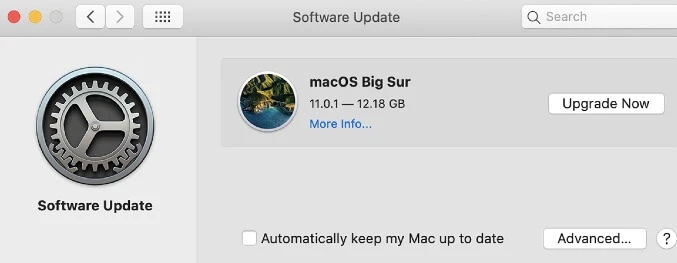
Your Mac or iPhone could be running on an old operating system or software that doesn’t support photo transfer and that could be the reason why you can’t move photos from the iPhone to your Mac. You can solve this by simply updating the system as well as the related software.
You might be uploading too many photos (like hundreds of photos at once) which is what’s causing the photos can’t import issue you’re facing. The best solution, in this case, is to ensure you only choose a small number of photos to upload to your Mac at a time to enable the Photos app to easily manage the importing task.
It’s really not the ideal or most convenient option when you have a lot of photos to import, so you may as well consider getting a third-party tool that can help you out.
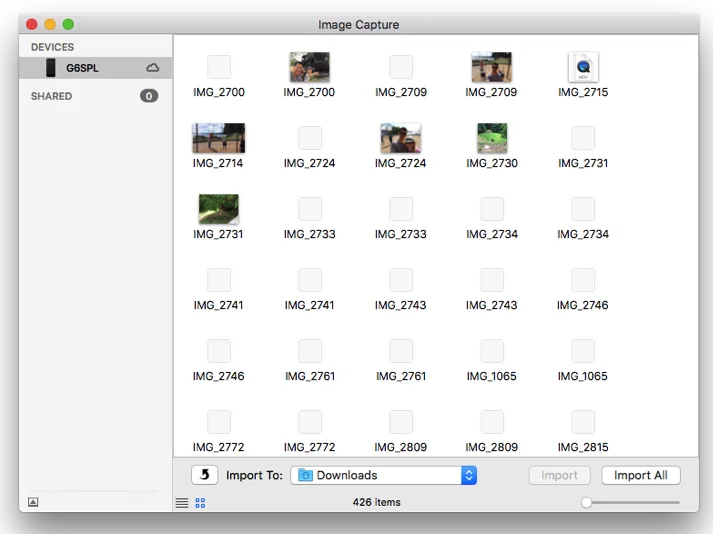
With Image Capture, you can easily transfer your iPhone’s photos directly to your desktop or download them. It’s a very handy tool and although it’s not actually a solution, it’s a viable alternative that you can try, especially if you need to import the photos fast and there’s not enough time to fix the problem. To use the Image Capture:
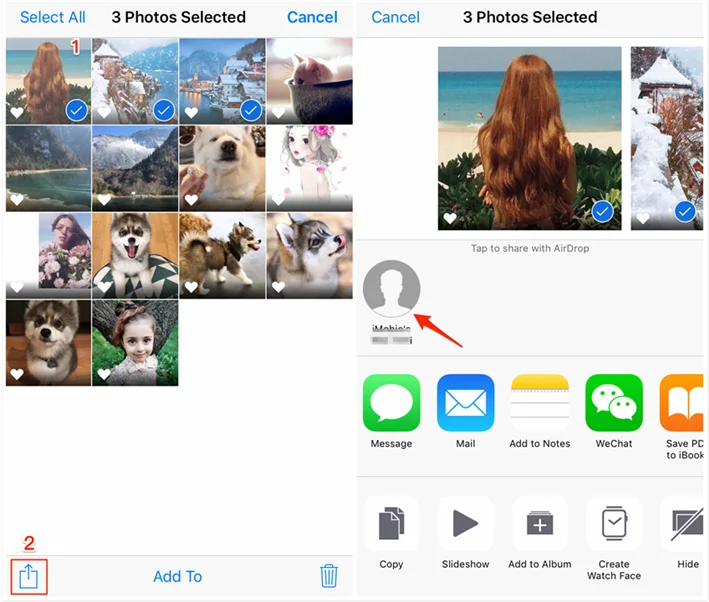
Another fast way to fix this can’t import photos issue is to use a wireless method like AirDrop and Mail to send the photos on your iPhone to your Mac. First, turn on the Wi-Fi and Bluetooth connections on your iPhone and Mac, then follow these steps:
I guess that you have searched for a great many tips to import photos from iPhone to Mac. But what if you still have other types of data to import to Mac? We highly recommend an expert in this industry: FoneGeek iOS Backup & Restore. It helps to access and import different types of iPhone data to your Windows or Mac computer.
How to Import Photos from iPhone to Mac Using FoneGeek
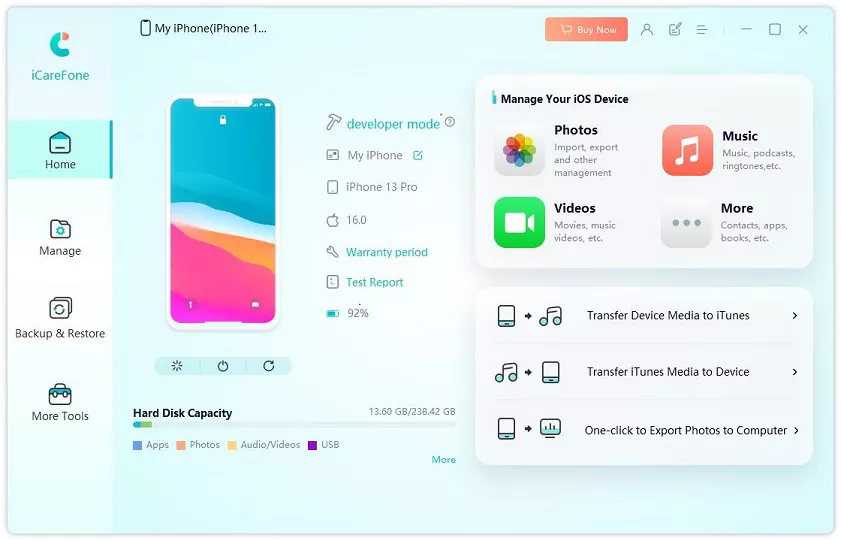
These basic solutions are more than capable of fixing the can’t import iPhone photos to Mac issue you’re facing. All of them can work, so you need to try each of them in case one doesn’t solve the issue. However, FoneGeek iOS Backup & Restore is a much better option compared to these basic fixes, especially when it comes to importing many iPhone photos to Mac. You won’t run into many problems when using it, so try it out if you want a smooth transfer.
Joan J. Mims is interested in researching all tips about iPhone, iPad and Android. He loves to share useful ideas with all users.
Your email address will not be published. Required fields are marked *

Copyright © 2025 FoneGeek Software Co., Ltd. All Rights Reserved