
“I have an iPhone 17 with iOS 26, and I still cannot get Focus/Do Not Disturb to actually work. It's turned on, yet every call still comes through. Any suggestions?”
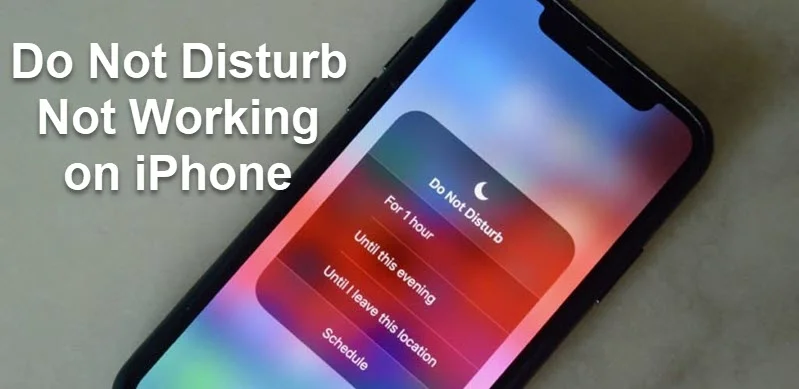
Do Not Disturb (DND) is a useful feature that manages incoming notifications, ringtones, and alarm sounds on your iPhone or iPad. It’s perfect for muting calls, texts, and app alerts when you don’t want to be disturbed.
However, sometimes Do Not Disturb may not work as expected. Many users have reported still receiving calls and text alerts even with DND enabled. If you’ve experienced this issue, don’t worry. This article will provide all possible solutions to get Do Not Disturb working properly again.
Before trying advanced methods, there are some basic troubleshooting steps you can try if Do Not Disturb isn't working on your iPhone after updating to iOS 26. Start with the following:
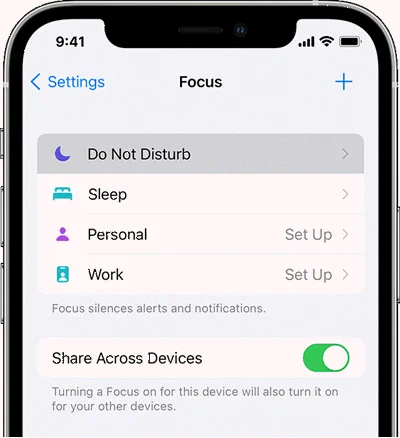
To turn on Do No Disturb, go to Settings > Focus (skip this for iOS 14 and earlier) > Do Not Disturb. When you have this feature turned on, a crescent moon icon will appear in the status bar and on your lock screen.
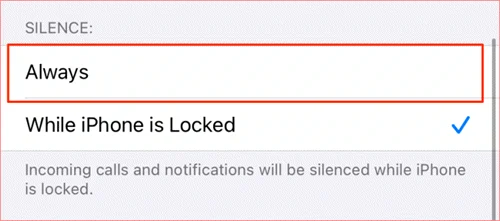
By default, Do Not Disturb will only mute your incoming calls and alarms when your iPhone is locked. If you want to mute all notications while using your iPhone, go to Settings > Do Not Disturb and choose Always in the Silence section.
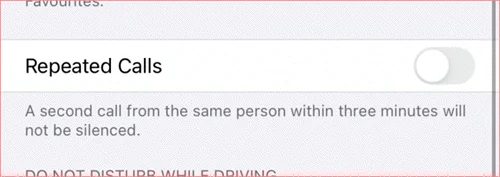
When Do Not Disturb is turned on, all phone calls, texts and app notifications will be muted, but people can still contact you if they call multiple times.
This is due to the DND feature can be overridden by repeated calls from the same person. To avoid this, you can go to Settings > Do Not Disturb to turn off the Repeated Calls option.
If you found that Do Not Disturb only works at a particular time of the day, you should check if you have accidentally create a Do Not Disturb schedule. Head to Settings > Do Not Disturb to ensure the Schedule option is turned off.
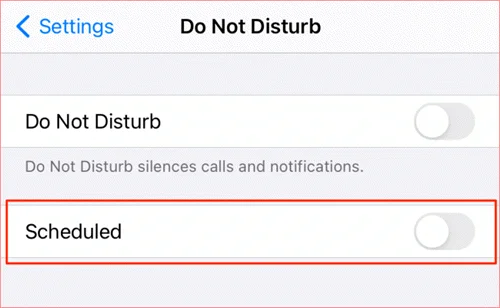
If you need to create a Do Not Disturb schedule, you should ensure the start time and end time are set correctly.
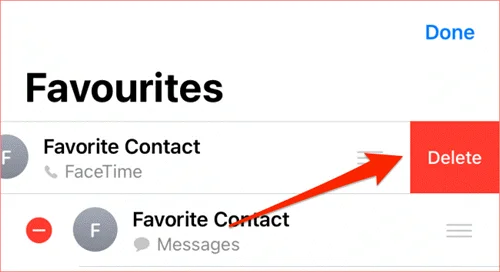
Same as Repeated Calls, your favorite contacts may also override the Do Not Disturb mode on your iPhone. When you favorite a contact, that person can still contact you at any time even when Do Not Disturb is enabled. You can check your favorite contacts and remove the contact from the list.
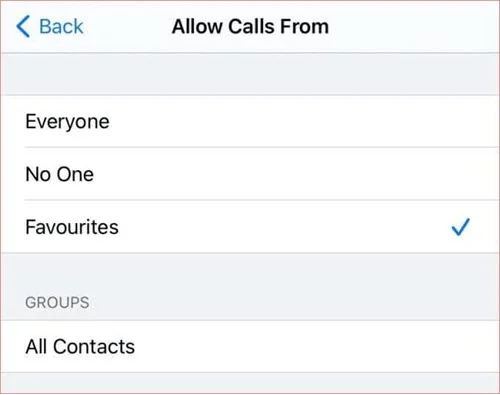
If you have set Do Not Disturb to accept all incoming calls, you will still get phone calls when Do Not Disturb is turned on. In this situation, go to Settings > Do Not Disturb > Allow Calls From and ensure either Favorites or No One is selected.
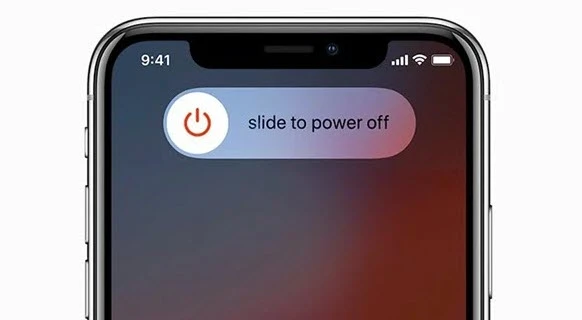
If Do Not Disturb is still not working on your iPhone, you can try to restart the device. Press and hold either volume button and the side button (For iPhone with home button, just press and hold the side/top button) until the power off slide appears. Then you can drag the slider to turn off the device.
Do Not Disturb will only mute phone calls, texts and app notifications. Your alarms and reminders won't be turned off, which may interfere the function of Do Not Disturb.
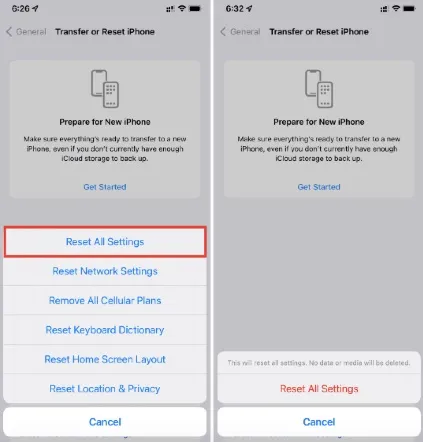
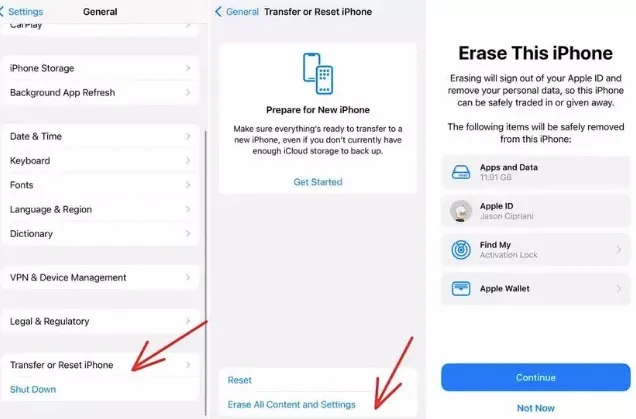
In such case, you can consider resetting all the settings on your iPhone. Go to Settings > General > Transfer or Reset iPhone. Choose Reset and tap Reset All Settings to restore your device's settings to factory default.
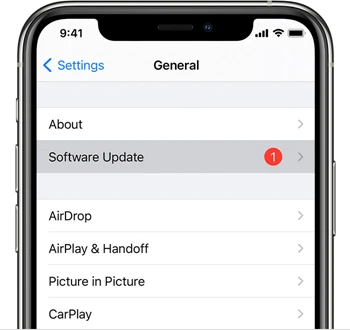
The Do Not Disturb feature may stop working if there are problems with your iPhone's operating system. You can update your iPhone to the latest iOS version to fix the system errors. Go to Settings > General > Software Update and tap Download and Install if any new iOS update is available.
If Do Not Disturb feature is still grayed out after trying the basic troubleshooting tips above, it may be the reason that the service is restricted. You need to check your Restriction Settings to see whether the feature is restricted or not. Here are the simple steps you can follow:
Step 1. Open the Settings app and head over to General > Restriction.
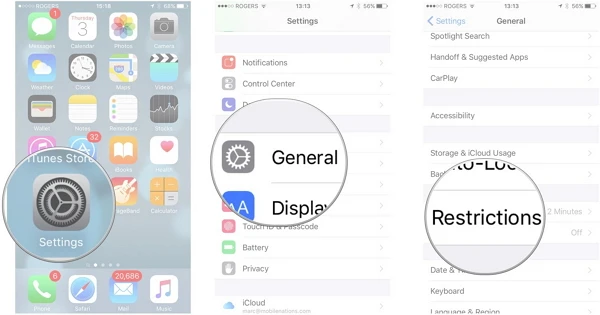
Step 2. You will be asked to enter the passcode to continue.
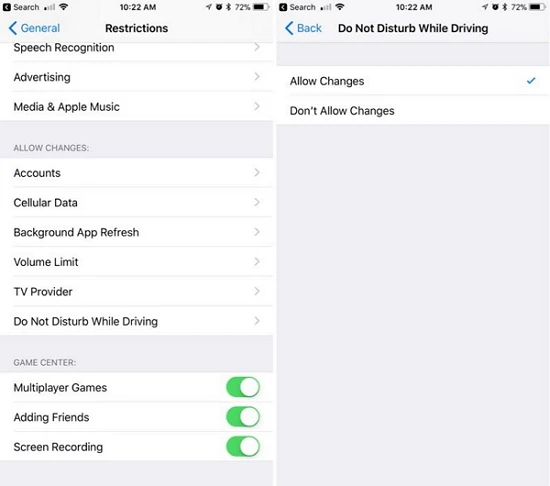
Step 3. Scroll down to click Do Not Disturb While Driving, select Allow Changes.
This can always fix the Do Not Disturb not working issue. You can have a try. If it is still not working, then continue to reading the solutions below.
Do Not Disturb related issues could be caused by iOS system bugs after upgrading to iOS 26. Take it easy, FoneGeek iOS System Recovery will help you fix the Do Not Disturb not working issue without restoring the device system. In other words, none of your iPhone data will be damaged or deleted by the program.
FoneGeek iOS System Recovery is a tool specialized in fixing different types of iOS issues. Check for more features of this powerful software below:


Here is how to fix the Do Not Disturb not working problem without data loss:
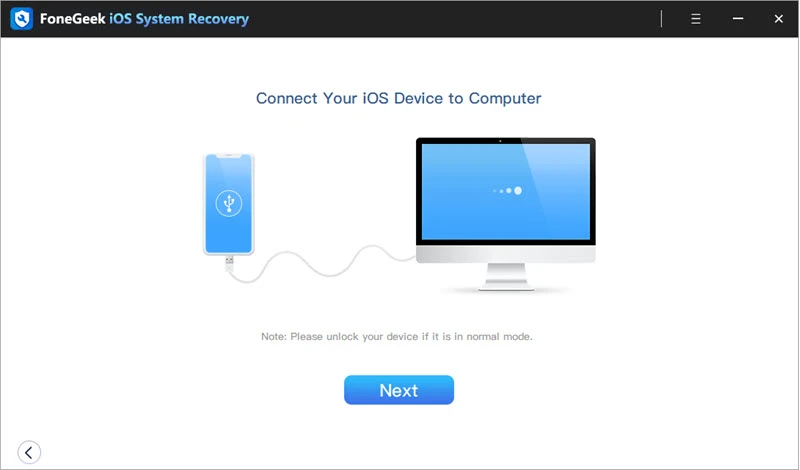
Step 1. Download and install FoneGeek iOS repair tool on your computer. Then launch it and choose the "Standard Mode". After that, connect your iPhone to the computer using an USB cable.
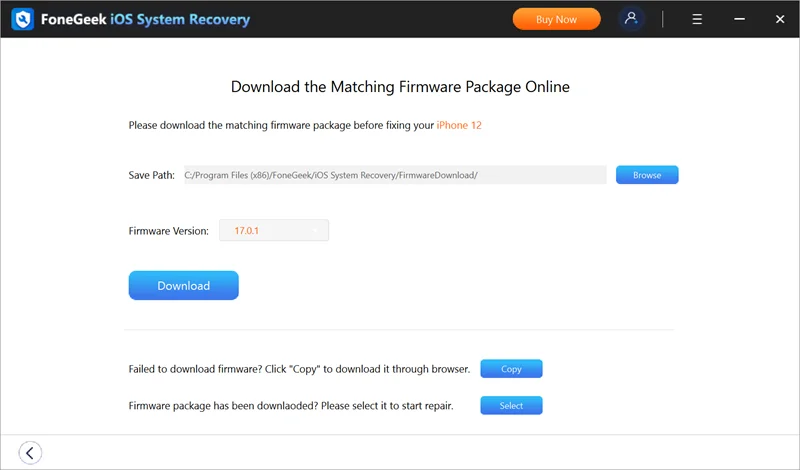
Step 2. Once your device is detected, the program will display your device model and available firmware package. To continue, choose a version and click on "Download".
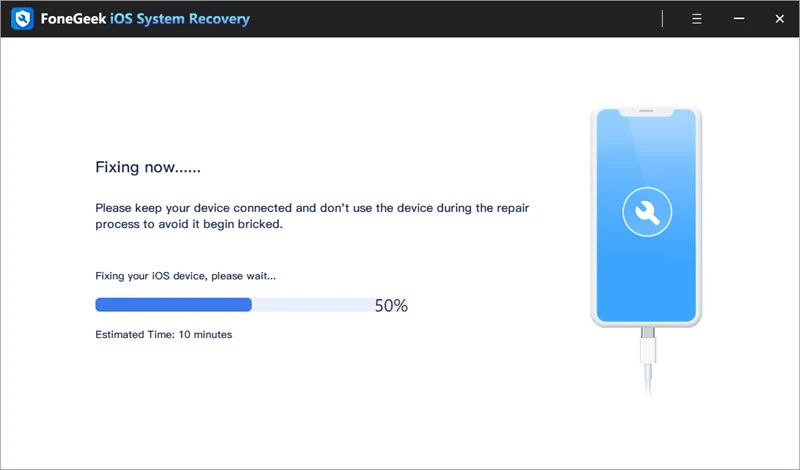
Step 3. After the firmware is downloaded, click on "Fix Now" and the program will fix your iPhone automatially. When the repair process is finished, the device will reboot itself and the Do Not Disturb issue will be resolved as well.
You can consider restoring your iPhone to factory settings if the above solutions don’t fix the DND not working problem. This can be an effective way to fix most iOS issues although you may suffer from data loss.
We've covered the top 12 solutions to fix Do Not Disturb not working on your iPhone. If the basic solutions don't work or you want a quick fix, try FoneGeek iOS System Recovery. This tool is designed to resolve iOS and iPadOS issues efficiently. It only takes a few simple steps to solve the problem, and the best part is your data stays safe.
Joan J. Mims is interested in researching all tips about iPhone, iPad and Android. He loves to share useful ideas with all users.
Your email address will not be published. Required fields are marked *


Copyright © 2025 FoneGeek Software Co., Ltd. All Rights Reserved


 English