
“During the data transfer from my iPhone 11 to iPhone 17, I end up with 'unable to complete data transfer'. Anyone could help?”
Although Apple makes it easy to transfer data from one iPhone to another, the process can sometimes fail. It can be annoying when you're unable to complete data transfer on your new iPhone 17.
Don't worry, we're here to help. In this guide, we'll explore why this error happens and provide effective methods to help you complete the data transfer process successfully. Keep reading!
Why is your new iPhone unable to complete data transfer? Below are some possible reasons:
Now that you know the possible causes of the data transfer issue, try using the following methods to fix it.
When transferring data wirelessly between iPhones, make sure the devices are close together. Bluetooth and Wi-Fi are needed for wireless transfers, and Bluetooth has a limited range.
If the devices are too far apart, even by a few feet, the transfer might fail. Place the two devices side by side to ensure a strong connection, and try the data transfer again.
You may be unable to complete data transfer because you have a new (target) iPhone, and it's not activated. You'll need a SIM card to activate the device. So, ensure to insert a SIM card into the target phone and then attempt to transfer data once more.
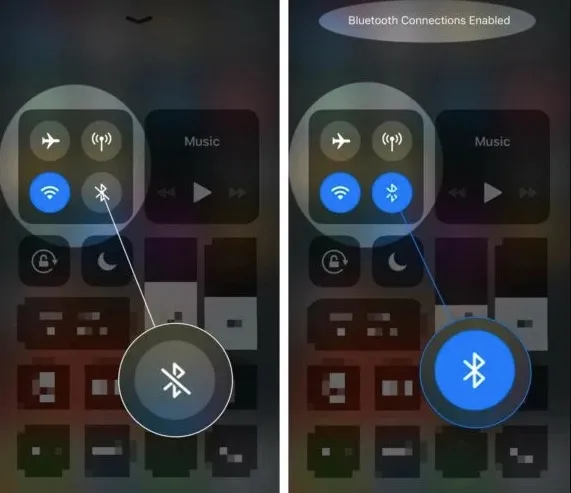
As mentioned earlier, wireless data transfer between iPhones requires both Bluetooth and Wi-Fi. Ensure Bluetooth is enabled on both devices to establish a connection for a successful transfer using Quick Start. If you haven't already turned on Bluetooth, follow these steps to do so:
If you're unable to complete data transfer due to low battery life, make sure both your old and new iPhones are fully charged before starting the data transfer. Or you can keep the two devices connected to a charger during the process to avoid interruptions and ensure a smooth transfer.
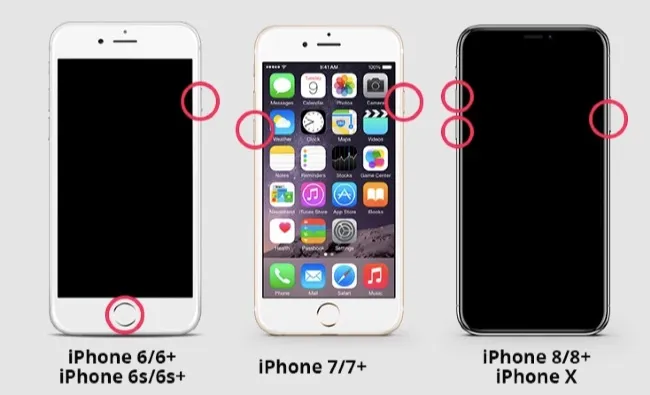
Restarting your old iPhone and performing a factory reset on your new iPhone can often solve this unable to complete data transfer ssue. This process refreshes the devices and can fix any system glitches affecting the transfer.
Reboot the Old/Source iPhone:
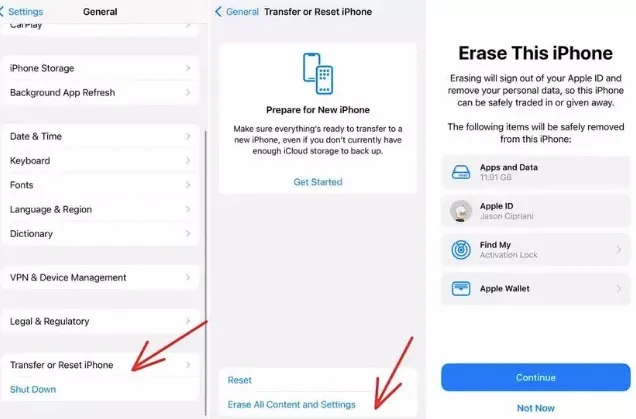
Reset the New iPhone 17:
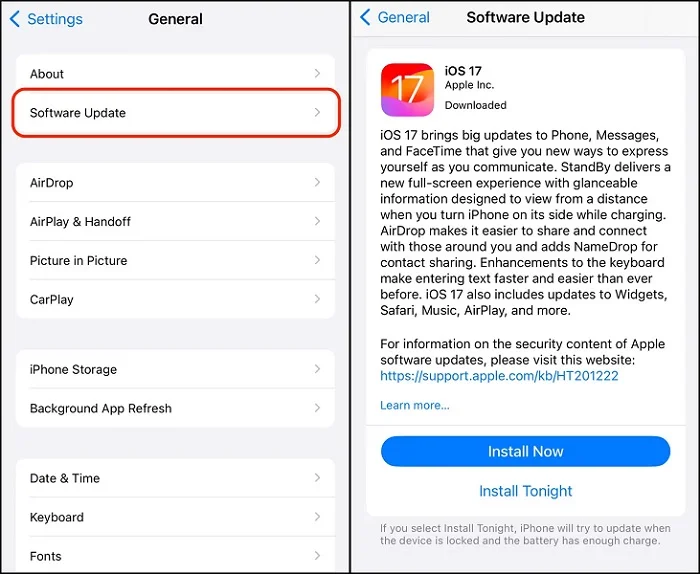
Quick Start requires iPhones to be running iOS 11 or later. If you're having trouble with the transfer, check if both iPhones meet this requirement. If they’re on an older version, update them to iOS 11 or higher. Here's how to update your iPhones:
Still getting the “Unable to Complete Data Transfer” error? Try these alternative methods that don’t rely on wireless setup.
Wired data transfers are usually more reliable than wireless ones. If you're having trouble with data transfer over WiFi and Bluetooth, try using a wired connection instead. Connect your iPhones with a lightning cable and a USB 3 Camera Adapter.
Once connected, proceed with the data transfer. If you still encounter issues, check the USB cable for any damage or defects. If you find any problems, use another Apple-certified cable to connect the devices and try the transfer again.
If wired and wireless transfers fail to work, then you can try using iTunes. It's a reliable alternative method for transferring data from your old iPhone to your new iPhone. You can follow the steps below to transfer data via iTunes:

Not sure which data transfer method to choose? Here's a quick comparison of the most common options — wireless, wired, and iTunes — to help you decide which one works best for your iPhone.
| Transfer Speed | Requires Internet | Success Rate | Best For | |
| Wireless Transfer | Moderate | 60% | New iPhone with good Wi-Fi & small backups | |
| Wired Transfer | Fastest | 90% | Large data transfer, unstable Wi-Fi | |
| iTunes Transfer | Moderate | 90% | Users with iTunes backup |
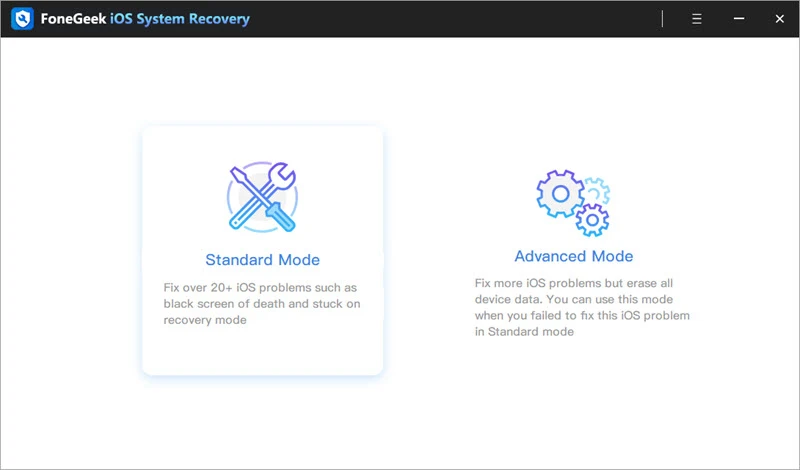
No matter the cause of the data transfer issue on your iPhone 26, FoneGeek iOS System Recovery can fix it effortlessly. This powerful and secure iOS repair tool resolves any iPhone system problem with a high success rate and without data loss. The user-friendly interface makes it easy for everyone to use. It works with all iOS versions (even iOS 26) and is compatible with all iPhone models. Check out more features here:


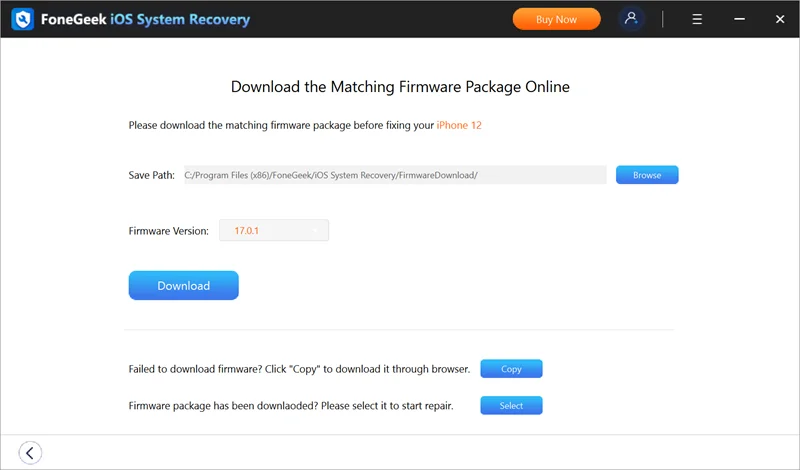
Steps to fixing iPhone unable to complete data transfer using FoneGeek iOS System Recovery
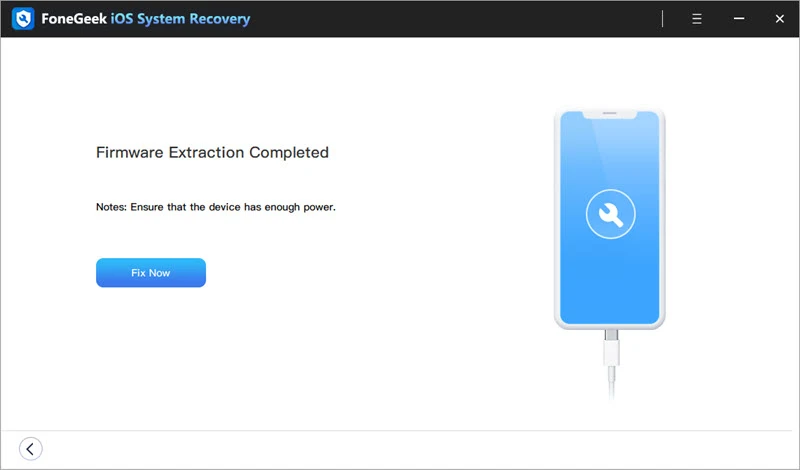
Once the repair is finished, your device will restart and should function properly. You can then complete the data transfer successfully.
Transferring data to a new iPhone usually takes between 30 minutes and an hour, though it can sometimes take longer. The exact time depends on factors such as the amount of data being transferred, the transfer method you choose, and your internet connection speed.
Yes, you can transfer data to a new iPhone without Wi-Fi. You can use a computer and transfer tools like iTunes or Finder, or use a direct wired connection between your old and new iPhone with a compatible cable and adapter.
Yes, it’s a good idea to back up your iPhone before transferring data. This ensures that you won't lose any important information if something goes wrong during the transfer process.
As you've seen, there are several ways to fix the iPhone unable to complete data transfer issue. Understanding the cause can help you choose the right solution. However, if you're unsure of the cause and want a quick fix, use FoneGeek iOS System Recovery. It's a reliable tool for resolving all types of iPhone system issues, including data transfer problems.
Joan J. Mims is interested in researching all tips about iPhone, iPad and Android. He loves to share useful ideas with all users.
Your email address will not be published. Required fields are marked *


Copyright © 2025 FoneGeek Software Co., Ltd. All Rights Reserved


 English