Often, you need to send the same mail or message to numerous contacts at once. Apple's contact group feature makes it easier. With the help of the feature, you can easily direct a message to all contacts on the list at the same time.
This write-up will explore 3 different ways to create a contact group on an iPhone or iPad. Keep reading to learn the exact steps you need to follow!
 Note
NoteBefore creating a contact group, we advise you to back up your iPhone to avoid unexpected data loss. You can follow Apple's official guide to make a backup of your iPhone data.
Requirements of Organizing Contacts on iPhone
- To create a contact group on iPhone, you should update your iPhone to iOS 16 or later versions.
- The contacts you wish to add to the contact group should be saved to the contact list first.
Actually, making a group of contacts on iPhone is almost the same as the steps to add one to your social messaging apps. Here are the steps in detail:
How to Create a Contact Group on iPhone?
Apple makes it a breeze to create a contact group on the new iOS 16/17 version. Here is how to do it:
- Unlock your iPhone and launch the Phone app. Then click on Contacts.
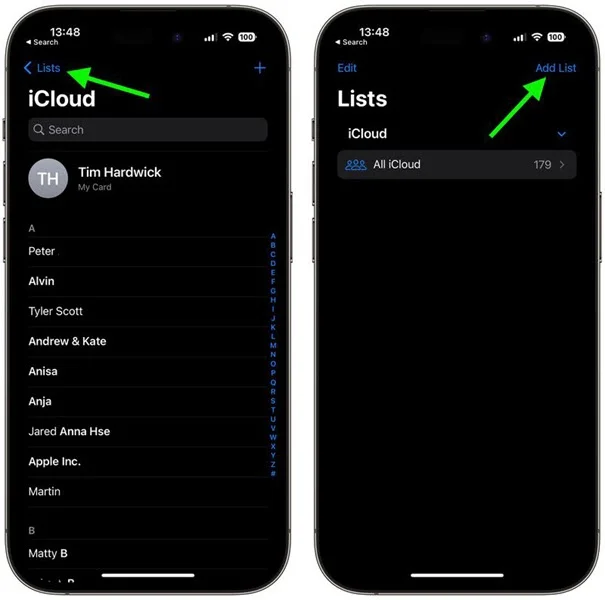
- From the Contacts interface, tap on List in the top-left corner.
- On the new page, you will get all the groups you have created till now through iCloud.
- You can click Add List from the top-right corner of the screen to add a new list.
- Enter a name for the list in the popup and click Done. That’s it!
Add Contacts to Contact Group
Here is how you can add contacts to the group:
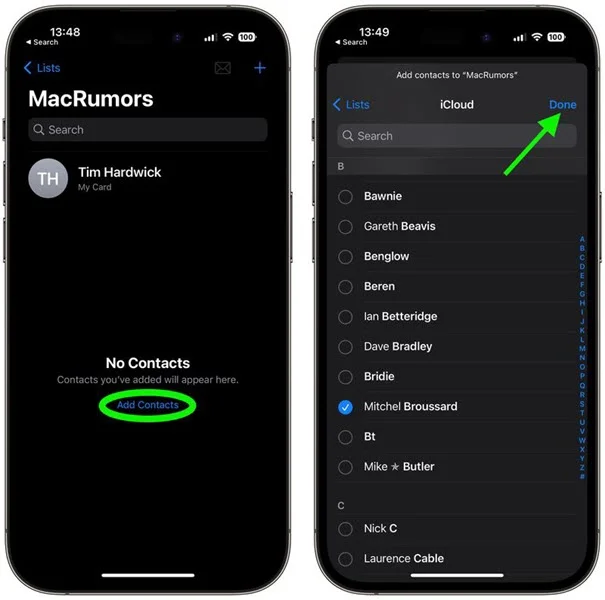
- Open the Lists page on your iPhone’s Contacts app.
- Click on the group's name to which you like to add the contacts.
- Now click Add Contacts or + from the screen’s top-right corner.
- Pick the contacts that you desire to add and press Done.
Remove Contacts from Group on iPhone
- Browse the Contact group.
- Find the contact you want to delete and swipe it from the display’s right.
- Click on the Remove button once it occurs.
- You can also long-press on a contact to delete it from the group.
Email or Message All Members in Contacts Group
It is very easy to send a message or email to all the contacts of a group. Here is how:
- Navigate to the Contacts app.
- Press the contacts list to which you want to send the message/email.
- Then click on Message All or Email All to send messages to all members in the Contacts group.
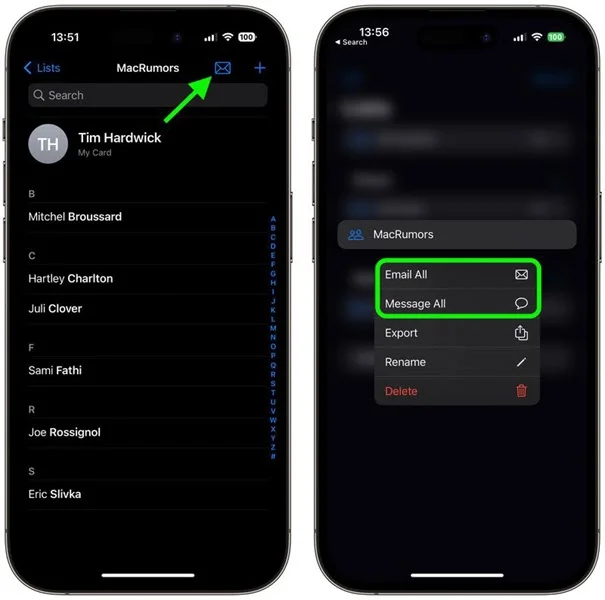
If you click on Messages All, you will be moved to the Messages app. The other option will take you to the email app. Note that email will only be sent to contacts with an email address.
Create a Contact Group on iPhone Using iCloud
Another easy and official way to create a contact group on iOS devices is through iCloud. The steps are:
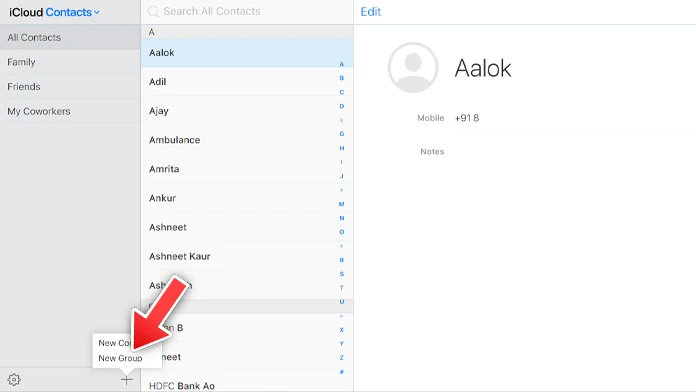
- Open icloud.com from a web browser on your PC.
- Sign into your account with iCloud credentials and click on Contacts.
- On the new page, click the + icon from the bottom-left of the screen.
- Then select New Group. Enter a name for the group. Done!
Add Contacts to Group on iCloud
Here is how to add contacts to the group you have created in iCloud:
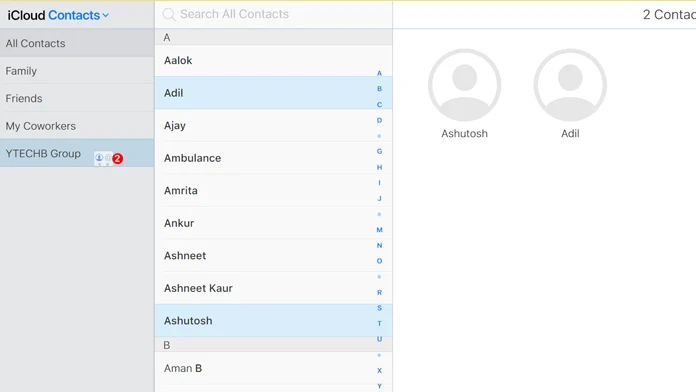
- In iCloud, open the Contacts tab.
- Navigate to the All Contacts section.
- Select the preferred contacts to add. You can press the Control/Command key to add multiple contacts at once. After that, you can simply drag and drop them into the intended group.
Remove Contacts from Group on iCloud
Here is the process to remove contacts from the iCloud group:
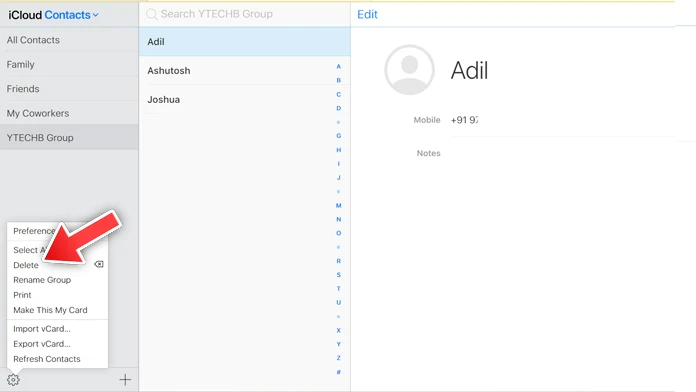
- Open the group from where you want to remove the contact.
- Now, pick the desired contact.
- Press the gear icon next to the top-left of the screen.
- Press Delete. Done!
View or Access Contact Groups on iPhone
Now that your contact group is created in iCloud, you can easily view and access the group from your iOS device. Here is how:
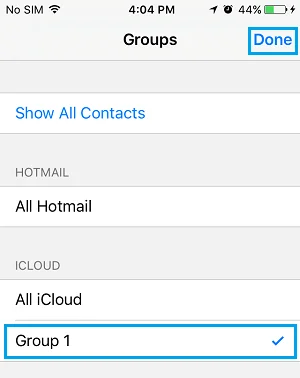
- Navigate to the Contact apps on your iPhone and click Groups from the top-left.
- Under the iCloud section, you will find the group you have created.
- To view the contacts, click on the desired contact group and select Done from the top right.
Note that sometimes it may require a bit of time for the contact group to occur on the iPhone’s contact app if your internet connection is weak.
Make a Group of Contacts on iPhone Using Apps
Many third-party apps on App store also enable you to assemble a contact group. Below, we will discuss such 2 apps.
Using the Contact Groups App
Steps to create a contact group with this app:
- Download and install the Contact Groups app from App store. Launch it and allow access to the contacts.
- Click + icon from the screen’s top-right and add the name of the group.
- Now press the Add Contacts. Select the preferred contact and click Save.
- After creating the group, click on it to locate the group info. There you will find the option to send a message through Email or Text.
Using Groups App
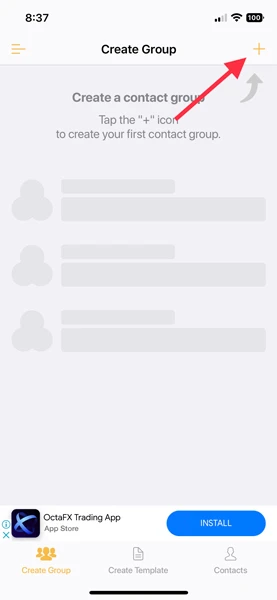
Steps to create a contact group with the Groups app:
- Download and install the Groups from App Store. Launch the app and grant access to the contacts.
- After doing so, press Skip if you see a popup. Then return to the All Contacts page.
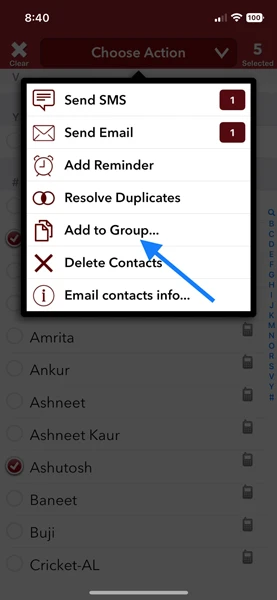
- Pick the preferred contacts to include to the group. Click Choose Action.
- Now choose Add to Group. In the new window, press Copy Contact.
- Add a name for the group. Then press Done.
Conclusion
As you see, creating a contact group on iPhone or iPad is very easy. You can utilize any of the desired methods to create a contact group and start sending group messages or emails. Even if you have mistakenly deleted a contact you want to include in the group list, don’t worry, just use the FoneGeek iPhone Data Recovery to restore the contact easily.


 English