
“I cannot manage to hear WhatsApp voice messages anymore since the iOS 26 update. When I click on it, the voice just doesn't start. There is no error with my iPhone sound. Anyone else has that issue? How to fix it?”
Voice messages in WhatsApp offer a convenient way to communicate with families and friends. It is time-saving and conveys emotions in a better manner than typing long texts.
However, WhatsApp voice messages might stop working in various situations. Sometimes, you're unable to download, play or record a voice message. Or you may see a black screen when listening to WhatsApp voice messages or get the error "This voice message is unavailable."
If WhatsApp voice messages is not working on your iPhone as expected, here're the things you can do to fix this issue. In this article, you will learn 11 effective solutions to get WhatsApp voice messages working correctly again.
There are various reasons why voice messages in WhatsApp may not function properly. To begin with, it's advisable to narrow down the issue you're experiencing. Here are some possible problems to consider:
If you're having difficulty sending or receiving voice messages on WhatsApp, the following troubleshooting solutions should help;
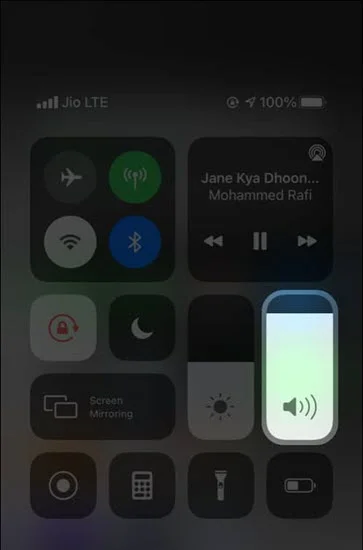
If you're playing a voice message on WhatsApp but don't hear any sound, you should first check your iPhone volume. Make sure your device volume is not low or muted.
When you're listening to a voice message via the speaker, turn up the volume and try again. If you're using headphones, you should also increase the volume as it is different from the speaker.
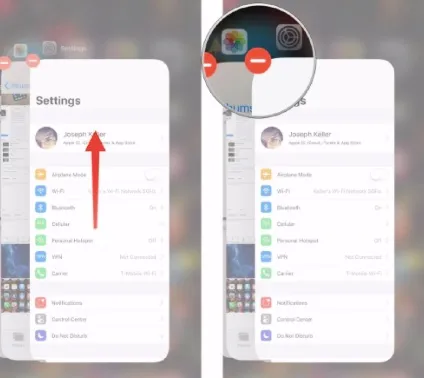
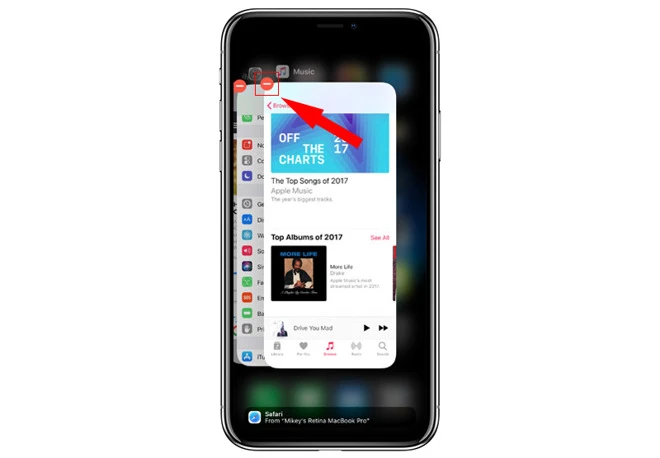
When WhatsApp voice messages is not working on your iPhone or iPad, you can try to force close the app and re-open it. To do it,
If the problem is that you are trying to record a voice message but the process stops abruptly, you should check if you have granted the necessary permissions that allow for WhatsApp voice message recording.
To give WhatsApp the mic permission to record voice messages, follow these simple steps:
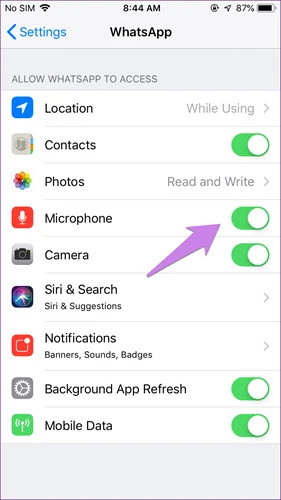
After that, return to WhatsApp and check if you can record and send voice messages now.
WhatsApp has a proximity sensor feature that is useful for listening to voice messages through the earpiece. Sometimes, the screen protector is wrongly placed and causes a problem to the proximity sensor on your iPhone.
So, you should check if the screen protector is blocking the sensor or remove the screen protector from your iPhone until you are done recording the voice messages you need.
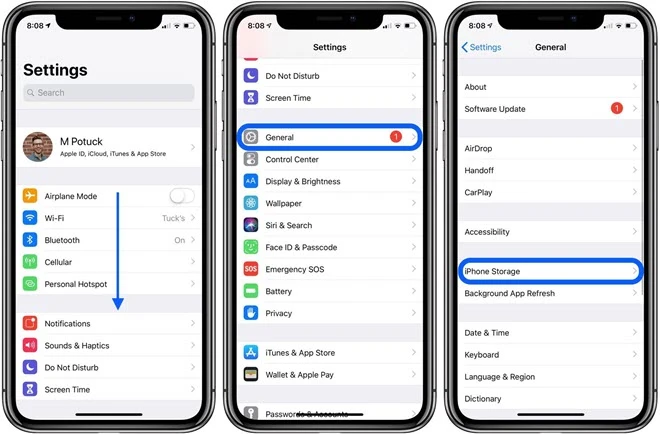
If you see an error message that says: "Sorry, cannot load this audio right now. Please try again later", the issue could be the iPhone's storage. If your iPhone is low on storage space, WhatsApp may fail to load or play voice messages.
In this case, go to Settings > General > iPhone Storage to check the available storage on your iPhone. If your iPhone is low on storage, you can free up some space before attempting to download or record the WhatsApp voice messages.
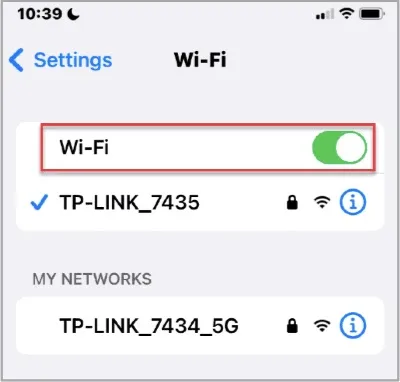
A stable and reliable internet connection is required to send and receive voice messages in WhatsApp. So, another method you can try to fix the WhatsApp voice message not working problem is checking your iPhone's internet connection.
Before recording or sending voice messages, make sure your iPhone is connected to a good Wi-Fi or cellular network. You can try to turn off your WiFi or cellular data and then back on. If possible, you can change to a different network.
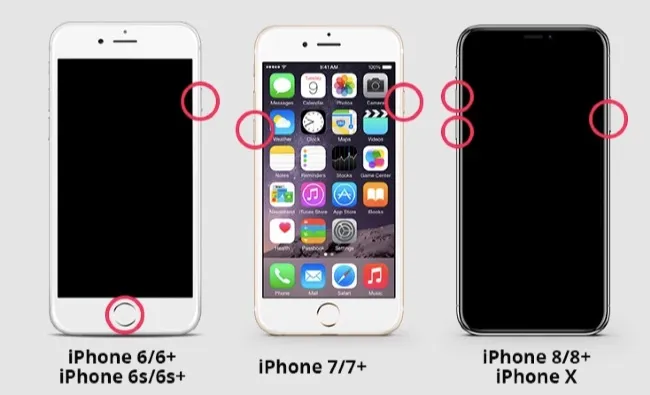
One of the easiest ways to fix any problem with your iPhone including WhatsApp voice message malfunctioning is to restart the device. It is a simple solution that works for many minor iPhone glitches.
Therefore, if WhatsApp voice messages do not play or have no sound, restart your iPhone and check if the problem is gone.
If your iPhone's microphone is being used by another app like screen recording, you might be unable to record voice messages in WhatsApp.
Try closing all the applications that may be using your device's microphone and recording the voice messages again. If the problem persists, try uninstalling the third-party recording apps.
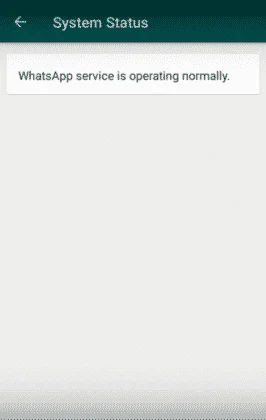
If you get an error "Download Failed" when try to download or play a voice message in WhatsApp, it is possible that WhatsApp's servers are down.
You can check the status of WhatsApp's server from WhatsApp Settings > Help > System Status. If the problem is with WhatsApp's server, just wait WhatsApp to fix the problem.
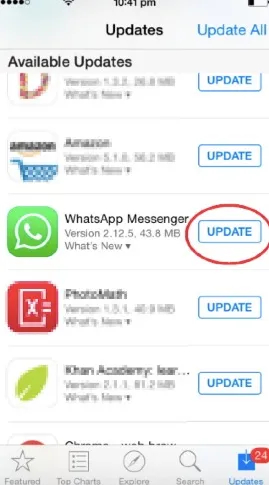
To get WhatsApp voice message working properly, you should always ensure that you have installed the latest version of WhatsApp on your iPhone. Go to the App Store and search for WhatsApp, then tap on "Update" to install any available WhatsApp update.
If WhatsApp is up-to-date but the problem persists, you should consider uninstalling WhatsApp and then reinstalling it. Doing this will remove some of the settings or bugs that could be interfering with the proper function of the app.
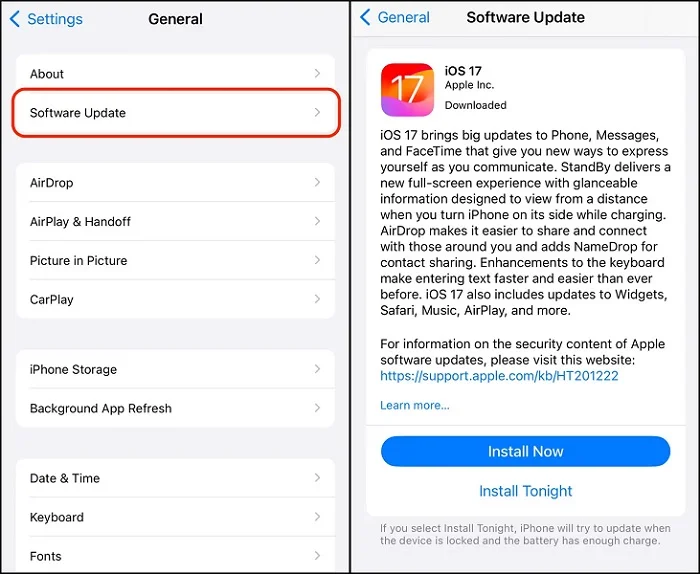
In addition to checking the WhatsApp app, it's important to ensure that your iPhone is running on the latest iOS version. Outdated software can cause bugs that may affect certain features of WhatsApp. Therefore, it's recommended that you check your iPhone's software to see if any updates are available and install them if necessary.
If you accidentally delete some important WhatsApp voice messages on your iPhone while attempting to fix the problem, you can use third-party tool like FoneGeek iPhone Data Recovery to get the deleted messages back. Unlike other data recovery tools, it can recover data even if you don't have a backup. Some of the features that make this tool the ideal choice include the following:


To recover deleted/lost WhatsApp voice messages on iPhone, follow these simple steps:
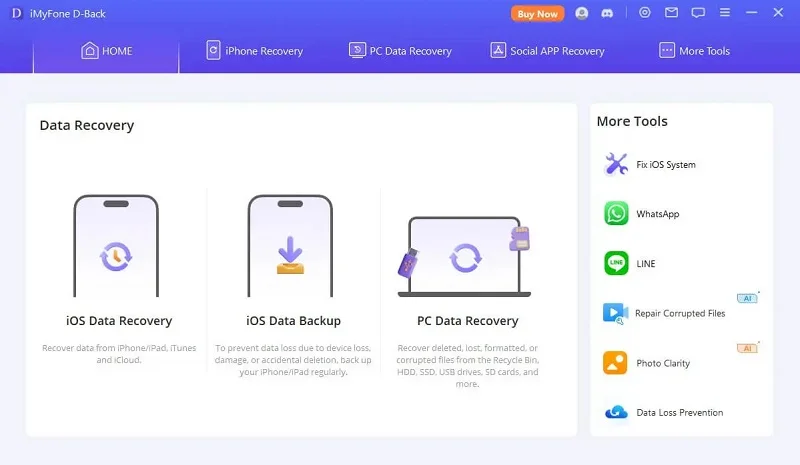
Step 1: Download and install FoneGeek iPhone WhatsApp Recovery software on to your computer. Connect the iPhone to the computer using USB cable and then run the program. Click on "Recover Data from iOS Devices" in the main window.
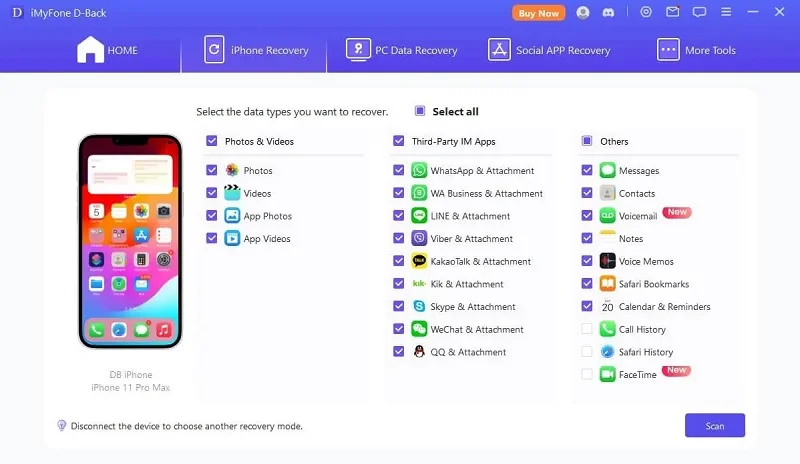
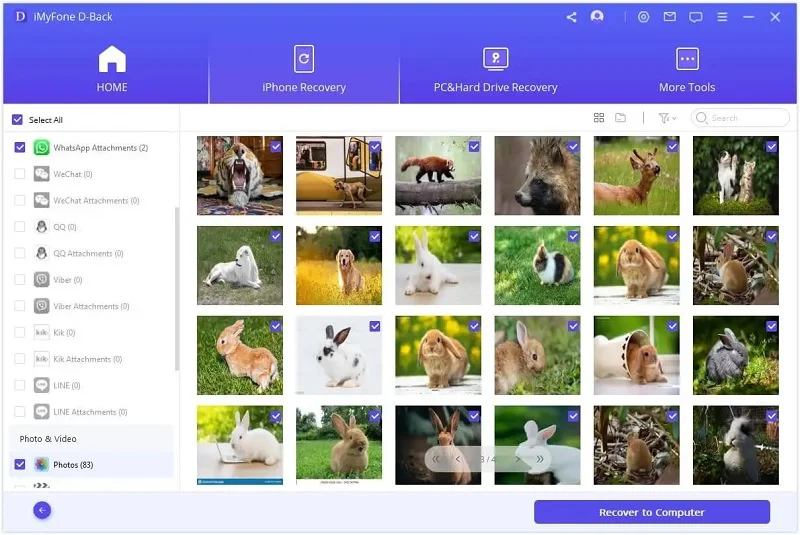
Step 2: In the next interface, select the type of data you would like to recover, in this case "WhatsApp & Attachments" and then click "Scan".
Step 3: The program will begin scanning the device for the missing WhatsApp messages. When the scan is complete, you should see all the WhatsApp messages and their attachments in the next window. To see only the missing messages, click on "Only Display Deleted Items" to turn on the option.
Step 4: Now select the WhatsApp messages you would like to recover and preview them before clicking "Recover to PC".
It could be a potential scenario where the message's playback rate was unintentionally altered to 1.5x or 2x the original speed. To verify this possibility, examine your screen and confirm whether the playback speed is set to 1.5x or 2x. If you discover that the rate has been changed, click the number to switch back to the standard pace (1x) and make sure that the message playback is functioning at its usual rate.
If you want to remove a message on WhatsApp, start by launching the app and accessing the Chats section. Once you're in the Chats menu, find the message you want to delete, then press and hold on to it to display a menu. From there, select the "Delete" option to erase the message.
If you have previously made a backup that includes the deleted voice messages, you can restore the deivce and get them back. However, note that this method is only useful if a backup exists. Alternatively, if you don't have a backup, you can use FoneGeek iPhone Data Recovery to recover the deleted WhatsApp messages directly from your iPhone.
It is really frustrating when WhatsApp voice messages isn't working and you have to type long texts. Hope that the above solutions help you solving the problem and you can send and receive voice messages normally again.
As a professional writer who is interested in technology, Edwin J. Parke has helped thousands of users by offering various tips to solve their problems.
Your email address will not be published. Required fields are marked *


Copyright © 2025 FoneGeek Software Co., Ltd. All Rights Reserved


 English