
“I just got a new iPhone. I had to use verizon transfer for photos and contacts because my company doesn't allow use of iCloud. How can I get all iMessages from my old iPhone to my new iPhone?”
Getting a new iPhone is exciting, and moving all your important data including iMessages from the old phone to the new one is essential. Luckily, it is quite a simple process to transfer iMessages to new iPhone.
Basically, you can make a backup of iMessages and restore the backup onto the new iPhone. In this article, we will look at how to back up iMessages with iCloud, iTunes, or third-party tool, then transfer iMessages to your new iPhone.
All these solutions below can be applied to iOS versions and iPhone models, including the newest iOS 16 and iPhone 14/13.
Apple allows its users to sync messages/iMessages between 2 different iPhones via the iCloud syncing feature as long as the 2 devices have logined with the same Apple ID.

You can also transfer iMessages to new iPhone if you have used iCloud to back up the data on the old iPhone before. It will be very easy to transfer all iMessages by restoring the iCloud backup to the new iPhone. Follow the step-by-step guide below:
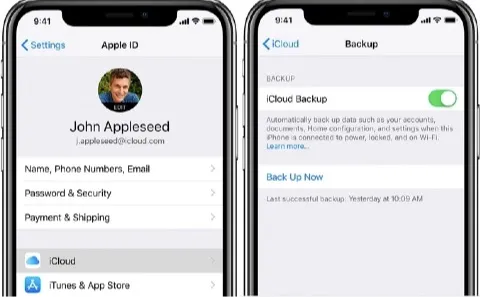
Step 1. Start by backing up old iPhone with iCloud: Go to iPhone Settings, click on [your name] and then "iCloud" to toggle on "iCloud Backup". Click on "Backup Now" and the backup process will get started.
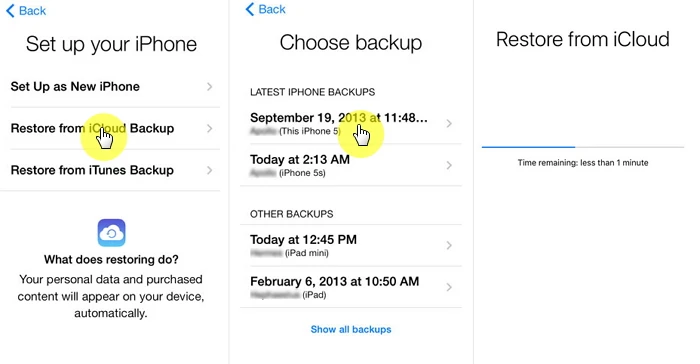
Step 2. Go to Settings > General > Reset on the new iPhone to set the device as a new one by erasing all content and settings. After completing the basic settings, choose "Restore from iCloud Backup" and select the most recent backup to restore after signing into the iCloud account.
To transfer iMessages to new iPhone using iTunes, the iMessages should be backed up to the old iPhone with iTunes first, and then restored to the new iPhone.
Step 1. Connect the old iPhone to your computer and sync it with iTunes.
Step 2. Select the device icon and head over to the Summary page.
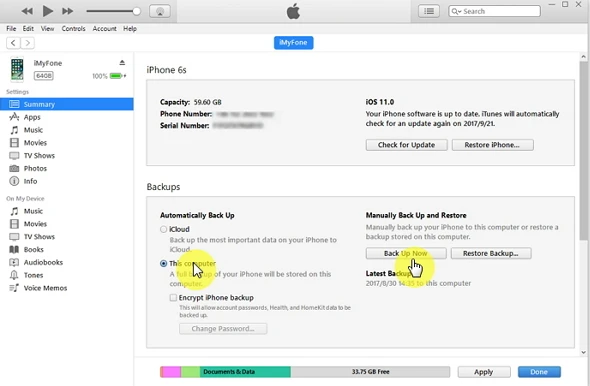
Step 3. Under the section of Backups, select "This Computer" under the "Automatically Back Up" section and click on "Back Up Now" to ensure that iMessages are backed up to computer instead of iCloud.
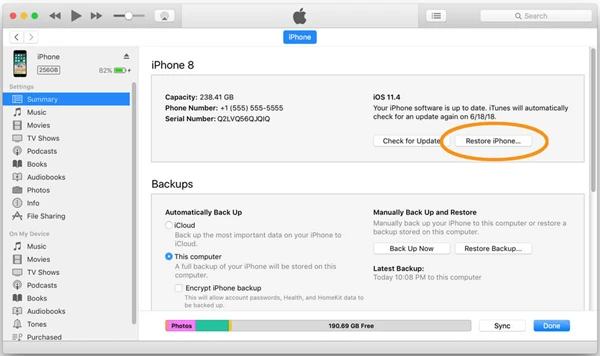
Step 4. After backing up the iMessages on old iPhone, disconnect it from your computer and connect the new iPhone with iTunes.
Step 5. When the program detects the new iPhone, you will be able to restore the new iPhone with the previous iTunes backup by tapping on the "Restore iPhone" button. This will transfer all iMessages as well as other data to your new iPhone.
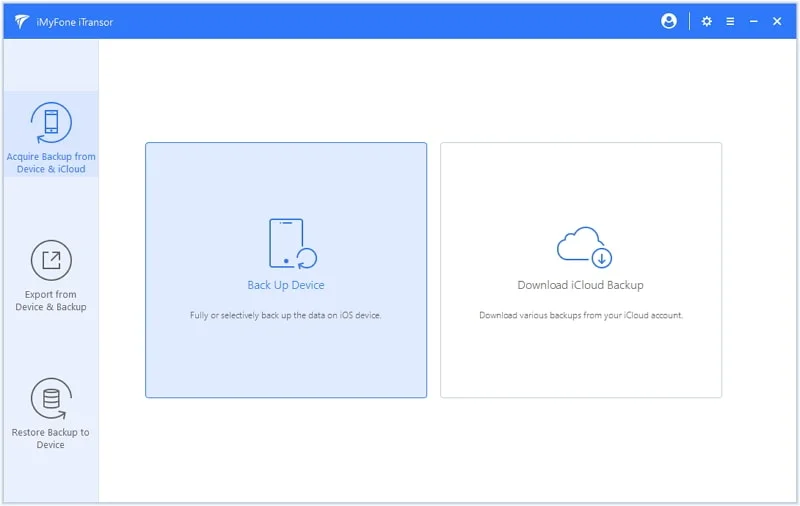
If you are willing to transfer only iMessages instead of unwanted data to new iPhone, you can use third-party tool to transfer specific data to new iPhone. FoneGeek iOS Backup & Restore will be the best choice to selectively back up and restore specific data like iMessages without deleting any other data on the new iPhone. This tool gives you the freedom to do the following:


Here are the complete instructions to restore only iMessages to new iPhone with FoneGeek iOS Backup & Restore. Apart from iMessages, you can also restore other data with the steps below.
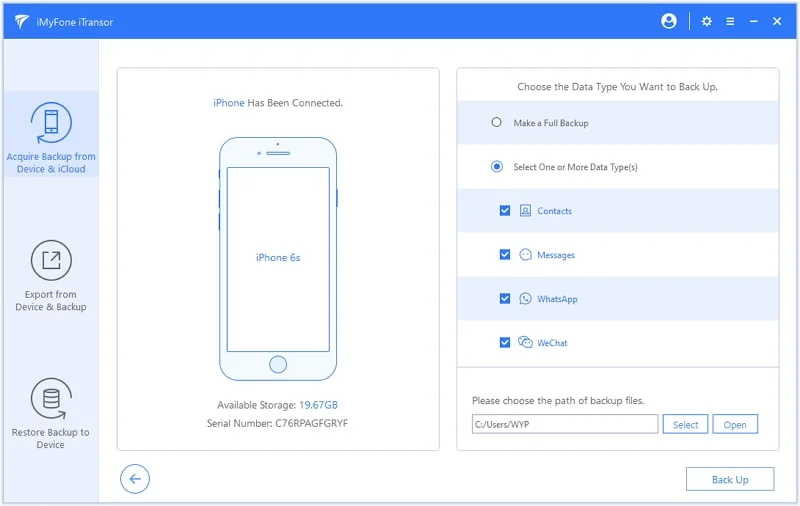
Step 1. Download and install FoneGeek iOS Backup & Resoter on your computer and run it afterwards. Choose "Backup & Restore", then connect the old iPhone to the system and wait for the device to be detected.
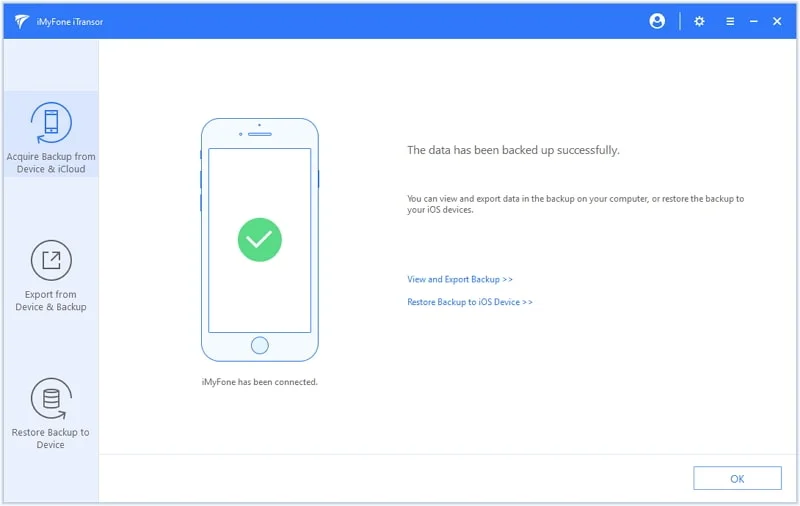
Step 2. Select "Messages" and click on "Backup" to back up messages/iMessages on your old iPhone with FoneGeek.
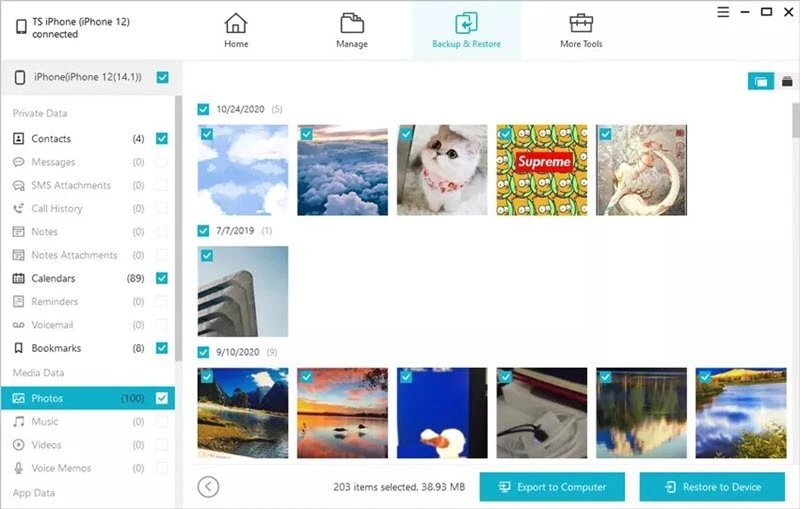
Step 3. Tap on "View Backup Data" and the iMessage backup will appear.
Step 4. Click on "Restore to Device" and the program will prompt you to connect the new iPhone with the computer to transfer all iMessages to new iPhone.
In this article, we've introduced 4 ways to transfer iMessages to new iPhone 14/13. As you can see, most of the methods have some limitations while FoneGeek iOS Backup & Restore provides an easy solution with no limitaions.
If you've accidentally deleted important iMessages during the transfer process, don't worry, you can follow this guide - How to Recover Deleted iMessages on iPhone.
Joan J. Mims is interested in researching all tips about iPhone, iPad and Android. He loves to share useful ideas with all users.
Your email address will not be published. Required fields are marked *


Copyright © 2025 FoneGeek Software Co., Ltd. All Rights Reserved


 English