
With the release of iOS 26, Apple has introduced the ability for the iPhone or iPad to automatically update itself when new iOS updates are available. However, this doesn't always work.
Are you among those who experience automatic software updates not working on your iPhone? Congratulations to you, now you are on the article containing the information you need.
This guide explains the reasons for automatic updates not working on the iPhone and provides seven simple ways to fix this problem.
There are several reasons why Automatic Updates may not work on iPhone. Some of them include having a poor network connection and Automatic Updates is disabled on your iPhone. This problem can also be from the Apple server itself. The good news is that, regardless of the cause, there's always a way out. Let's get right into it.
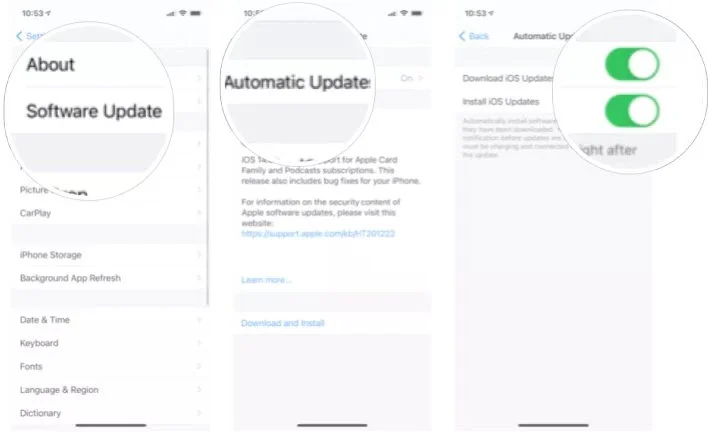
iPhone will not update iOS automatically if it has not been granted permission to do so. Therefore, before complaining, ensure that Automatic Updates is enabled on your phone.
For your iPhone to update automatically overnight, it will have to be charging. So even if you have a strong network and the Automatic Updates is turned on, if your phone is not actively charging, it will not download and install iOS updates automatically.
Connect your iPhone to a working charger and connect this charger to a good power source overnight.
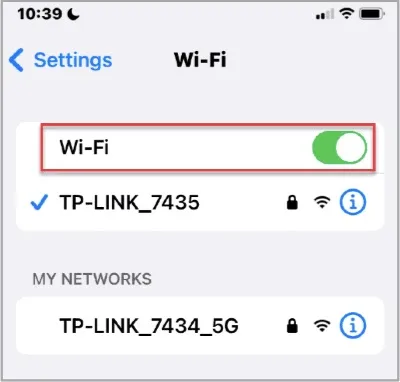
Without a strong network connection, you will also experience automatic updates not working on iPhone. So, in addition to ensuring the Automatic Updates is enabled, and your phone is actively charging, also ensure that you are connected to a strong Wi-Fi network. To do this;
If all the factors discussed above are in place and you still experience iPhone automatic updates not working issue, then you can try restarting the device. Rebooting your iPhone has a way of making it reset, then get back to normal settings.
Before connecting iPhone to charge, simply restart the device, then ensure Automatic Updates is enabled, and a strong Wi-Fi connection as well. Follow these steps to restart your iPhone;
For iPhone X, 11, 12, 13 and 14
For iPhone 8 and lower versions
Once in a while, Apple's server can experience congestion due to many users are trying to update their iPhones at the same time. When this happens, it can also affect your iPhone's automatic update. So, if all factors are in place but you still experience automatic software updates not working on iPhone, then it might be an Apple's server problem.
You can go to Apple's System Status page to verify if all is well. However, after some time, the problem usually gets resolved and you'd be able to update your phone again.

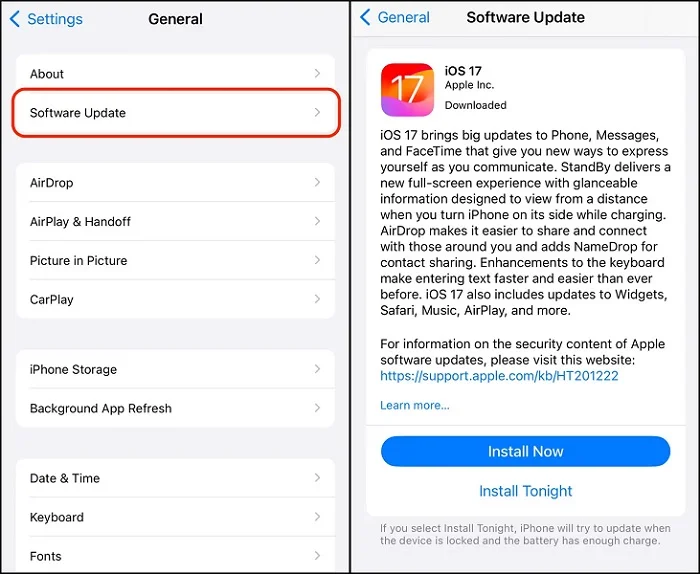
If you've tried all the ways explained above and your iPhone is still not updating automatically, then perhaps it's time to try updating your iOS manually. Follow these five steps to do so in no time;
When you discover that you cannot update your iOS both automatically and manually, then you can try to do it using a computer. This can be done in two ways.
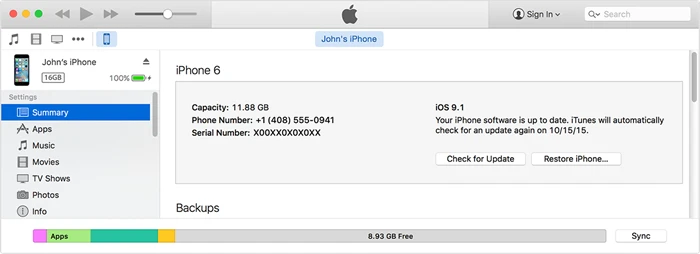
You can download and install your iOS update via iTunes, using your personal computer. Simply follow these steps.
Another way of updating iOS from your computer is to do so via a third-party tool. One of the best is the FoneGeek iOS System Recovery. It is a one-stop solution that resolves all iOS software problems without data loss. It comes in handy for any form of iPhone or iPad software problems, such as automatic software updates not working on iPhone, iPhone App Store not working, iPhone grey screen issues, and the likes.


To update iPhone with FoneGeek iOS System Recovery, follow these steps;
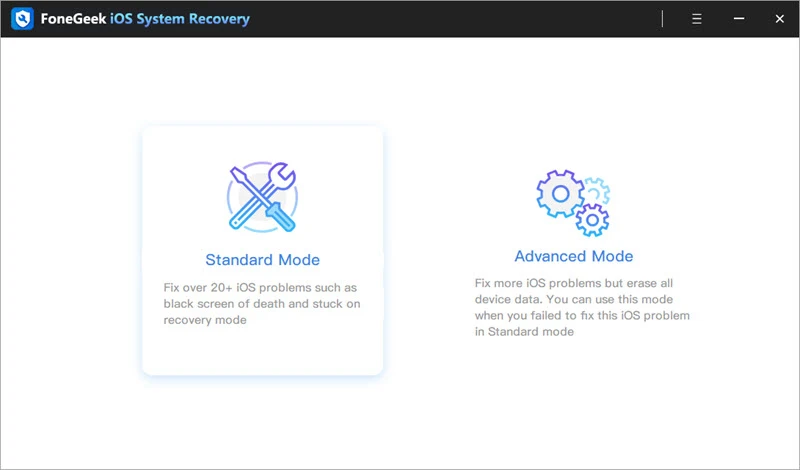
Step 1: On your personal computer, download and install FoneGeek iOS System Recovery. Launch it, and select Standard Mode.
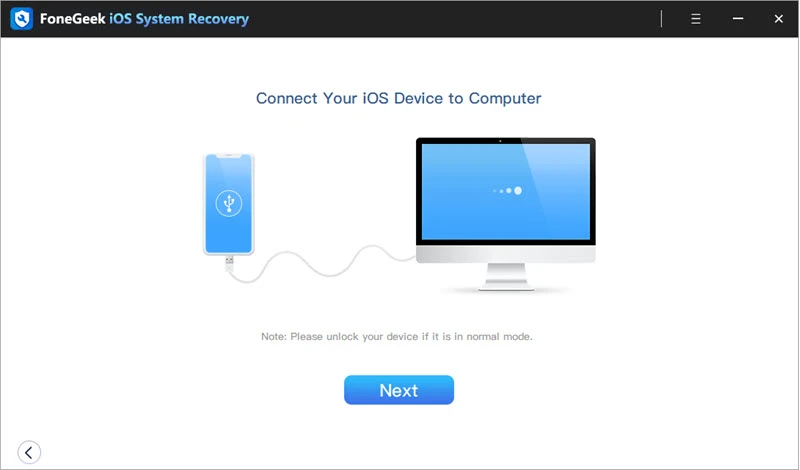
Step 2: Connect iPhone to computer via a USB cable. Then, tap on Next on your phone, or simply follow the instructions on your screen.
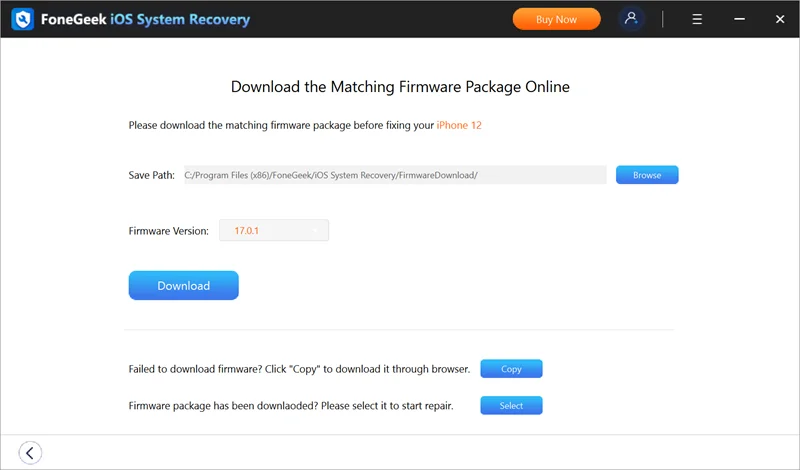
Step 3: Select the iOS version that best suits your iPhone, then click on Download.
Step 4: After the download has been completed, select Fix Now to start repairs of any software problems on your iPhone.
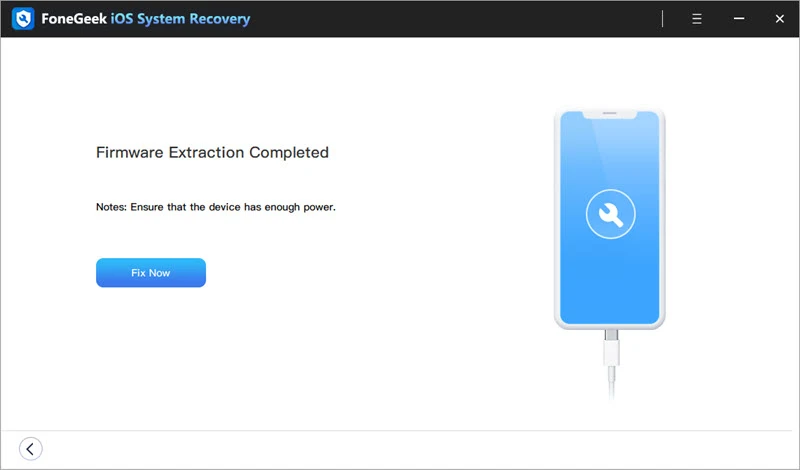
When the repair process is complete, your iPhone will reboot and the latest version of iOS 17 will be installed.
Various reasons can make you experience iPhone automatic updates not working any longer. As described in this guide, it can be due to poor network connection, Automatic Updates not enabled, not charging your iPhone, or even a problem with Apple's server. Whatever the cause, this problem can be resolved in no time.
However, if you realize that all strategies to fix this are not working, then you can rely on third-party tool, like FoneGeek iOS System Recovery. This is because this software works best to fix all system problems on your iPhone and update the device to the latest iOS version.
Fay J. Melton has explored the area of technology and software for more than 5 years and he is enthusiastic about helping users solve various technology issues.
Your email address will not be published. Required fields are marked *


Copyright © 2025 FoneGeek Software Co., Ltd. All Rights Reserved


 English