
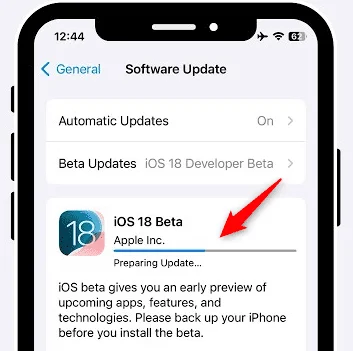
“I tried to update my iPhone to the latest iOS 18. Downloaded successfully but now stuck on preparing update...I have enough space (around 50 GB) and my internet is pretty good. What should I do?”
If you’ve tried updating your iPhone to the latest iOS version like iOS 18 and found it stuck on Preparing Update, you’re not alone. This problem can happen due to software bugs, network issues, or even minor hardware glitches.
The good news is that it’s usually easy to fix. In this guide, we’ll look at the common causes of this issue and walk you through practical solutions to help your iPhone finish the update and get back to normal.
Usually, the “Preparing Update” stage on an iPhone should only take a few minutes. However, it can sometimes take much longer or get stuck due to the following reasons:
Here are simple and effective ways to fix your iPhone stuck on the “Preparing Update” screen - no computer needed:
Apple recommends your iPhone be sufficiently charged before updating. If the battery is too low, your device might get stuck on the “Preparing Update” screen. To avoid this, ensure your iPhone has at least 50% battery. If not, plug it in and let it charge for a while, then check if the update resumes.
A weak internet connection can stop your iPhone from finishing the “Preparing Update” step. iOS needs a strong, stable Wi-Fi to download and check the update files. To fix this:
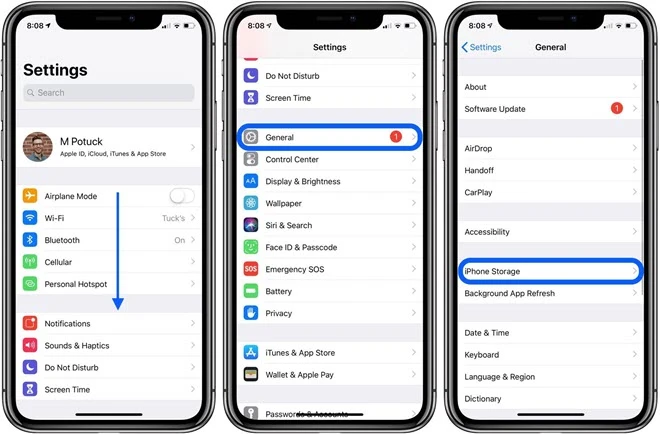
You also need to have adequate storage space on your device to install iOS updates. The amount of storage space you need will depend on the version of iOS that you are installing, but to be on the safe side, you may need to have at least 2GB of storage space.
To check the amount of storage space on your device, go to Settings > General > iPhone Storage. If you don’t have adequate storage space, delete some of the unused apps on your device to create more room.
If your iOS 18 update is stuck on "Preparing Update," the update file might be corrupted. In this case, the best solution is to delete the file and download it again. Here's how to do it:
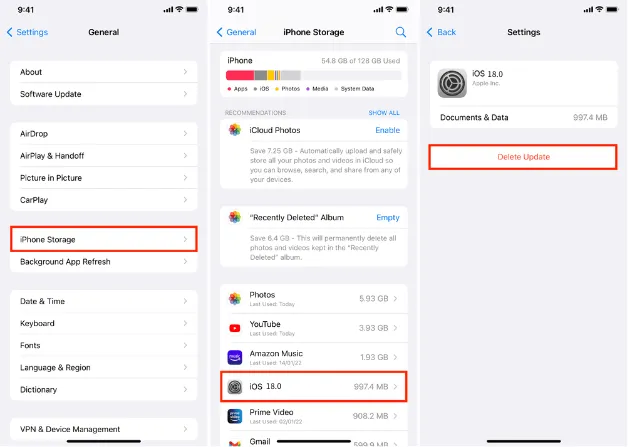
Once the update has been completely removed from the device, go to Settings > General > Software Update to try the update process again.
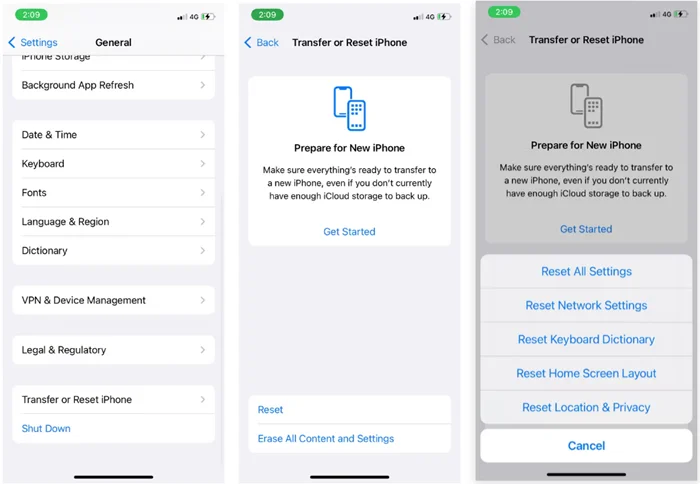
If the problem is caused by a software crash, one of the most effective ways to fix it is to force reboot the iPhone. The steps you use to force restart your iPhone will depend on the model of iPhone that you have. Here’s how to do it:

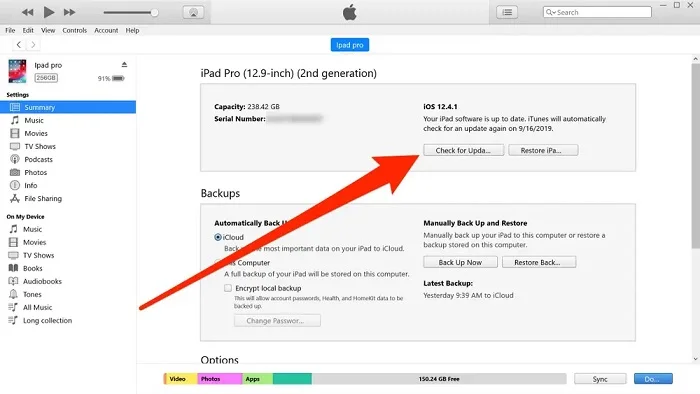
If your iPhone is stuck on “Preparing Update,” you can try updating it through iTunes (or Finder on macOS Catalina and later). Before you begin, it’s strongly recommended to back up your device first, as the update process may sometimes lead to data loss. Here's how to do it:
If you are still unable to update your device, you can try to repair the iOS system on your device using an iOS system repair tool like FoneGeek iOS System Recovery. This tool can quickly fix the issue of iOS getting stuck on "Preparing Update" and help you upgrade your iPhone to the latest version. It won’t erase any data, so you can get past the stuck screen and start using the new features right away.


Download and install FoneGeek iOS System Recovery on your computer and then use these simple steps to fix your iPhone:
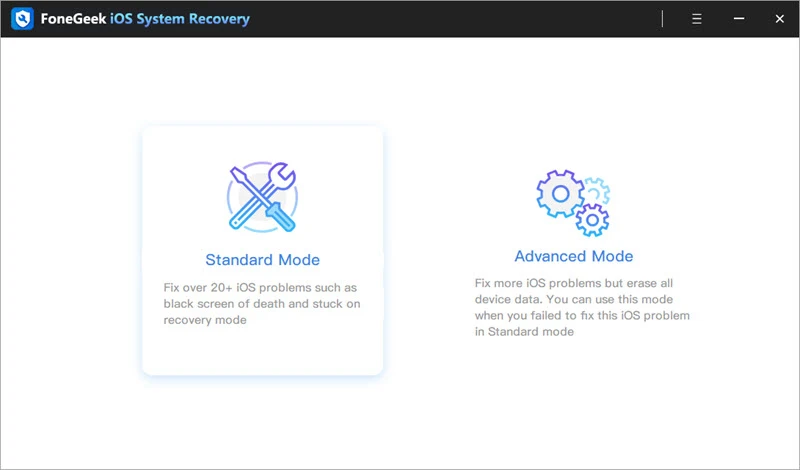
Step 1: Open FoneGeek on your computer and then select the Standard Mode from the main screen. Use USB cables to connect the iPhone to the computer and then click on Next.
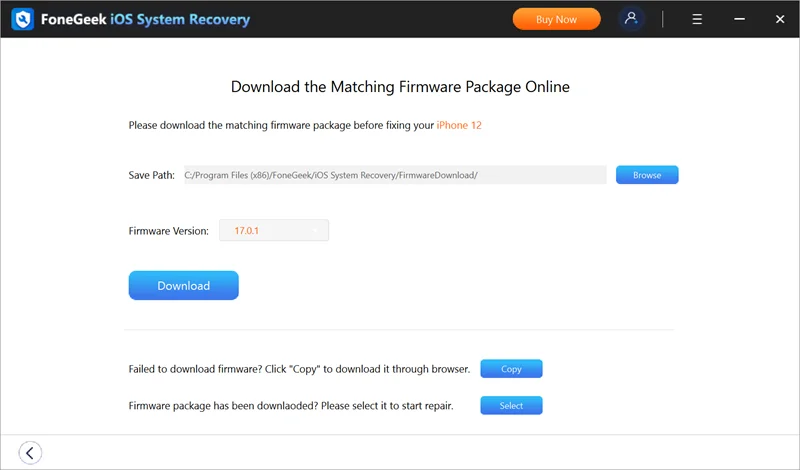
Step 2: Once the device recognizes the connected device, you will be prompted to install the latest firmware to fix the device. Just click on Download to get the firmware package that you need.
Step 3: As soon as the download is complete, click on Fix Now and FoneGeek will begin to repair your device.
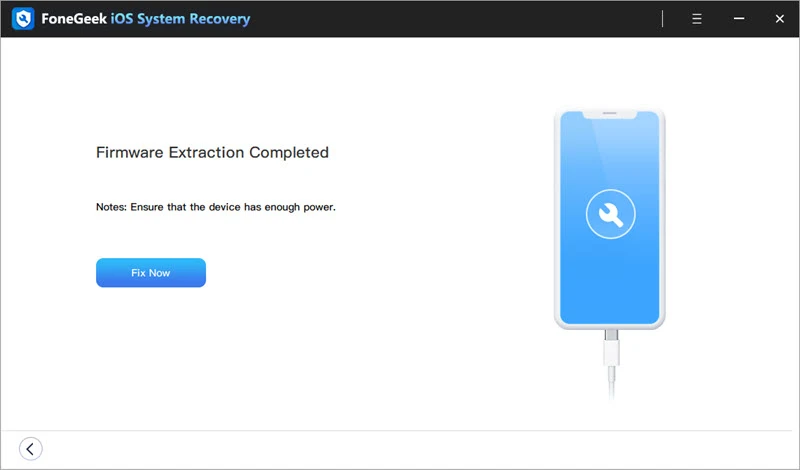
In just a few minutes, the "Preparing Update" stuck issue will be resolved, and your iPhone will restart automatically. It will also be updated to the latest iOS version without needing any manual steps.
"Preparing Update" on an iPhone means the device is getting ready to install the downloaded iOS update. During this step, the iPhone verifies the update file, checks compatibility, unpacks necessary data, and clears space if needed. It's a normal part of the update process that happens after downloading and before installation.
The "Preparing Update" process on an iPhone typically takes between 5 to 15 minutes. However, it might last longer depending on factors like internet speed, free storage space, the size of the update, etc. If it takes more than 30 minutes, there may be an issue preventing the update from progressing.
No, you shouldn't turn off your iPhone while it's preparing an update. Doing so can interrupt the process and may cause errors or even make your device unusable. It's best to let it finish.
To cancel the "Preparing Update" process on iPhone, go to the Settings app, tap General, then iPhone Storage. Scroll through the list of apps and updates until you find the iOS update file and tap on it. You'll see an option to delete the update; once you tap "Delete Update," your iPhone will cancel the preparation process and remove the downloaded file.
Yes, you need Wi-Fi when your iPhone is preparing an update. The update files are large, and Apple only allows iOS updates to download over a stable Wi-Fi connection - not mobile data. Once the download is complete and the update is being prepared, your iPhone still needs Wi-Fi to verify the update with Apple’s servers. If your connection is lost or unstable, the process may fail or get stuck.
Keeping your iPhone updated to the latest iOS version is essential, but the process doesn’t always go as planned. One common issue is the device getting stuck on the “preparing update” screen. This can happen for various reasons, but the good news is that it’s often easy to fix.
One of the fastest and safest ways to resolve it is by using FoneGeek iOS System Recovery. With just a few simple steps, you can fix the iOS 18 preparing update problem without losing any data - and your iPhone will be upgraded to the latest version at the same time.
Joan J. Mims is interested in researching all tips about iPhone, iPad and Android. He loves to share useful ideas with all users.
Your email address will not be published. Required fields are marked *


Copyright © 2025 FoneGeek Software Co., Ltd. All Rights Reserved


 English