
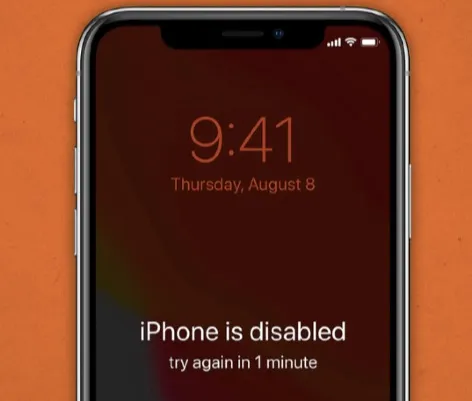
Apple usually offers limited attempts to unlock iPhone. Therefore, typing in the wrong entries too many times can get your iPhone completely disabled or locked out, especially when you forgot the passcode. It's an incredibly frustrating situation and it can even get worse if you had the “Erase Data” security feature activated on your iPhone.
To help you avoid this quagmire, this post will let you know how many attempts to unlock iPhone are usually offered by Apple and what happens at every stage. We'll also share several effective methods that will help you unlock your disabled/locked iPhone when you exhaust your attempts. So, read on.
This security measure offered by Apple ensures no unauthorized user can unlock and access the iPhone and steal or tamper with your data should you, unfortunately, leave or forget your phone somewhere.
So, what if you forget the passcode? Well, the first question in your mind should be how many attempts do you get to unlock your iPhone before it's completely locked or disabled? Generally, Apple allows up to 5 passcode attempts before your iPhone is disabled. Your iPhone will get disabled for a specific time with each failed attempt starting from the sixth try. Here’s exactly how it works.
When you enter the wrong passcode on the 10th attempt, there are two outcomes you’re likely to face. The first one is that all the data on your iPhone will get deleted in case you turned on the “Erase Data” function in your iPhone Passcode Security Lockout feature. On the other hand, if the “Erase Data” function is disabled, you’ll get permanently locked out of the iPhone.
If you've found yourself locked out of your iPhone after too many incorrect passcode attempts, you're not alone. Here are several methods to unlock your disabled iPhone.
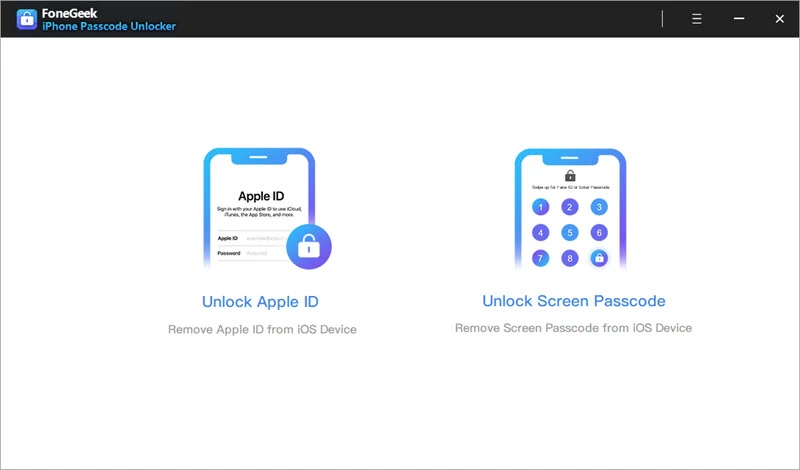
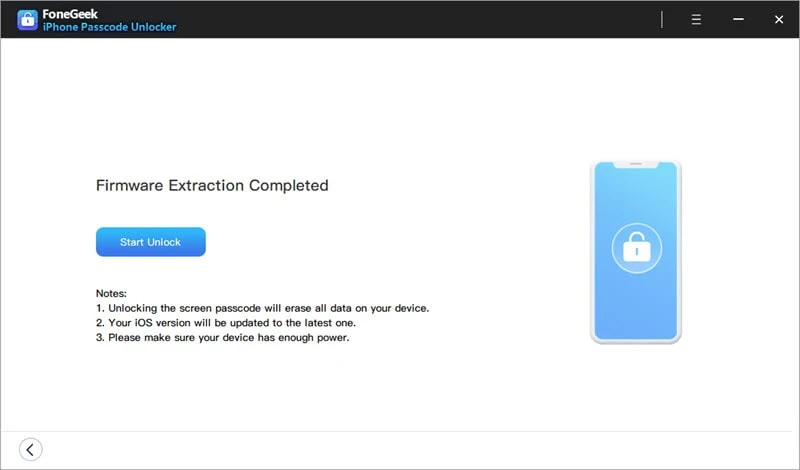
With the help of FoneGeek iPhone Passcode Unlocker, you don’t have to worry about how many attempts to unlock iPhone you have because it’s able to unlock any disabled or locked iPhone with ease. It’s a very effective iPhone Passcode Unlocker that bypasses all restrictions or locks you’ve set on your device without requiring your Apple ID. It’s simply a hassle-free tool with a user-friendly interface that makes it quite easy to use for beginners. You can use it not only to unlock Screen Passcode, but also to unlock the Screen Time Passcode, unlock Apple ID, and even to bypass the MDM Lock in seconds.
Key features of FoneGeek iPhone Passcode Unlocker:


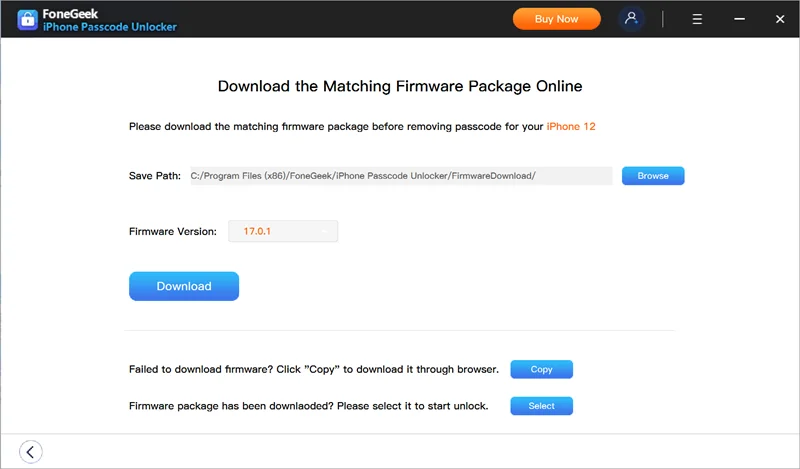
How to unlock an iPhone easily without losing data using FoneGeek iPhone Passcode Unlocker.
You can use iTunes to unlock disabled or locked iPhone provided that you’ve been syncing the iPhone to iTunes regularly on your computer. It’s a simple method that works with or without backups and all your data doesn’t get erased. You don’t have to know how many attempts to unlock iPhone you have either. Note though that this won’t work if you turned on Find My iPhone feature or if iTunes requests for your iPhone passcode. If that’s the case, we recommend using the LockErase iPhone Passcode Unlocker.
Limitations of this method:
Unlocking Disabled iPhone With No Backups
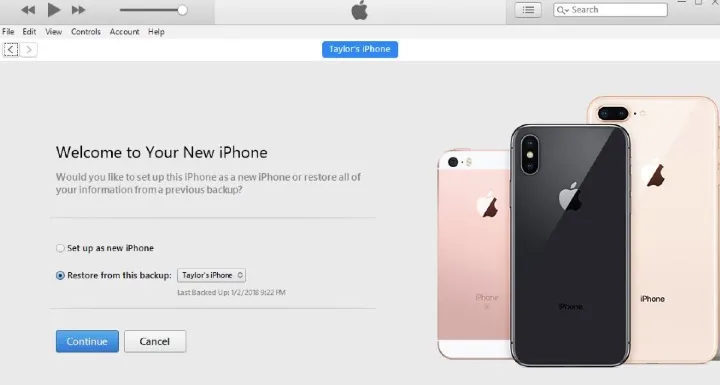
Unlocking Disabled iPhone With Backups
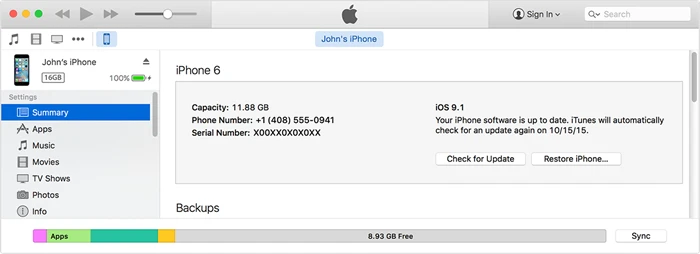
iTunes usually offers two options for unlocking iPhone. You can choose to restore a previously saved backup or decide to completely factory reset your phone. The factory reset option is our next method and it needs caution because it can result in all your data and apps getting deleted.
Limitations:
Steps to unlock disabled iPhone using iTunes Recovery Mode
Step 1. First, disconnect your iPhone from your computer.
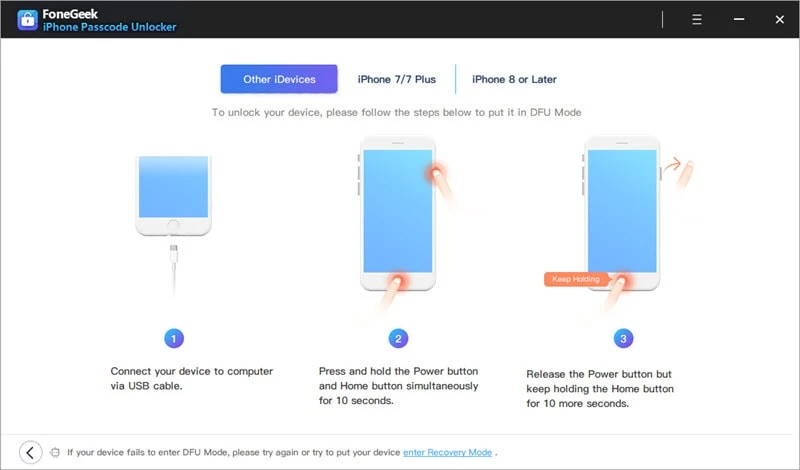
Step 2. Get the iPhone into the DFU Mode.
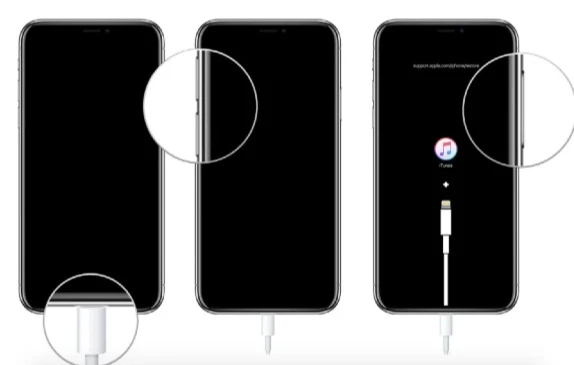
Note: These steps apply only to iPhone 8 and later models. If you’re using an earlier iPhone model, follow Apple’s official procedure to get your iPhone into the DFU mode.
Step 3. Now get your iPhone and computer connected again using a USB lightning cable.
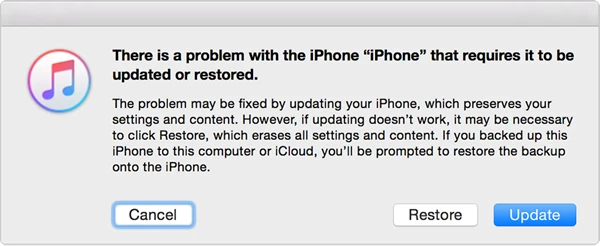
Step 4. Launch iTunes. You’ll see the option to “Update” or “Restore” your iPhone. If you select “Restore”, the phone will get restored using an available iTunes backup. If you select “Update”, iTunes will update your iPhone’s iOS to the most recent version. So, to factory reset the phone, select the restore option. Either method will erase all your iPhone data.
So far it’s clear that making regular iPhone backups is really important. When you end up in this situation where your iPhone is completely locked and you recently backed up your phone, then you won’t worry much about losing your data and apps if you chose to use this method.
It’s possible to unlock disabled iPhone using iCloud provided you have your Apple ID and you enabled the Find My iPhone feature in iCloud. If that’s not so or you just find this method not ideal for you, then using the LockErase iPhone Passcode Unlocker would be the best option.
Limitations:
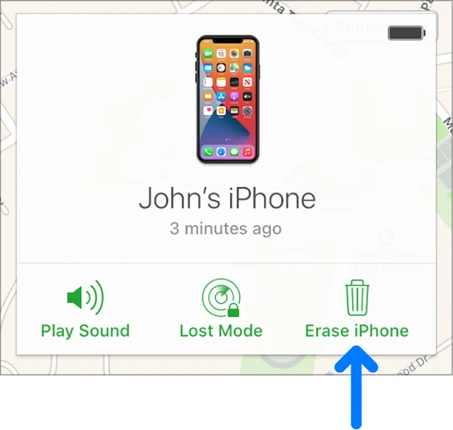
Steps to unlock disabled iPhone through iCloud:
Yes. Apple offers another security option on iPhone that’s known as the “self-destruct data mode”. It’s an ideal security measure for situations where your iPhone is stolen. It wipes out all the data on iPhone after 10 failed attempts.
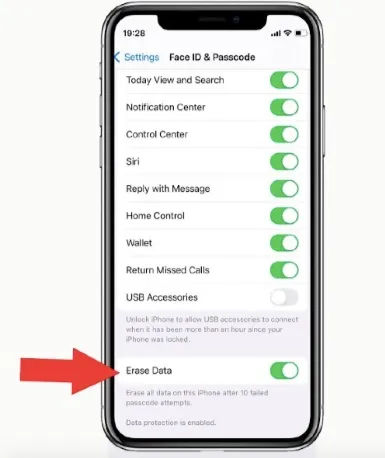
To activate it on iPhone 8 and earlier models, go to Settings, open the Touch ID and Passcodes option, and then click on Erase Data. Tap the toggle beside “Erase Data” to enable it. All your data will now get erased once the 10th passcode attempt fails so that no one else can access it.
If you’re using iOS 16 or a recent version, open Settings, select the Face ID and Passcodes option, and then click Erase Data. Now scroll down to find the right option to select.
If you’ve got very sensitive data that you want to protect in case you lose your device, then this iPhone’s self-destruct data mode will come in handy. You can also use it to ensure the safety of your data in the event that your iPhone gets stolen or snatched.
Not directly. However, failed biometric attempts will eventually prompt the phone to ask for a passcode. If you fail those passcode attempts, the lockout process begins.
No. Siri, Emergency SOS, and Control Center features are restricted on the lock screen unless explicitly allowed in settings. They won’t help bypass the passcode.
Unfortunately, no. Apple has no option to customize or extend the number of failed attempts allowed before the device becomes disabled.
If you’ve forgotten your passcode and you’ve been thinking, “How many attempts do I get to unlock my iPhone?” then now you know, plus also what you can expect after every attempt. You don’t have to be frustrated, though, in case your iPhone gets permanently disabled. With the help of the various solutions we’ve provided above, you can have it unlocked in no time.
However, these methods can lead to your data getting wiped out, except if you use FoneGeek iPhone Passcode Unlocker. It’s the best method we would recommend because it would not only unlock your iPhone without causing any data loss, but you can also use it to bypass other iPhone restrictions and locks. It works fast and it’s also very simple to use. So, try it out.
Joan J. Mims is interested in researching all tips about iPhone, iPad and Android. He loves to share useful ideas with all users.
Your email address will not be published. Required fields are marked *


Copyright © 2025 FoneGeek Software Co., Ltd. All Rights Reserved


 English