
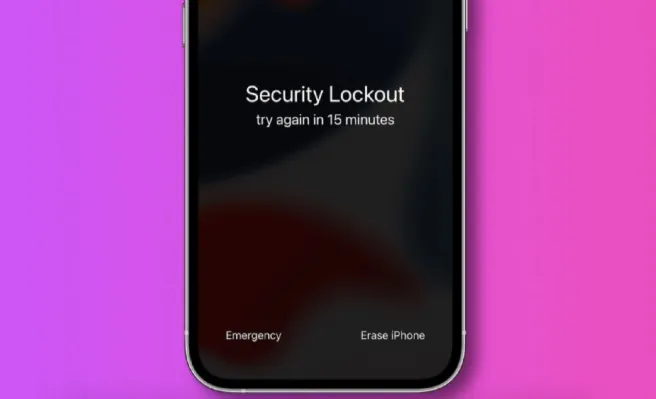
"iPhone is disabled try again in 15 minutes" could delay using your iPhone for security reasons.
There are several ways to bypass the 'iPhone is disabled, try again in 15 minutes' issue. Read this article patiently to learn the solutions to resolve the issue and get your iPhone up and running again.
The reason behind iPhone saying “iPhone is disabled try again in 15 minutes” is that you, or someone else, have inputted incorrect passcode multiple times. This triggers the security lock put in place by Apple to secure your iPhone data.
At first, iPhone will ask you to try again in one minute, then in five minutes, and lastly in 15 minutes. In other words, you need to wait for a 15-minute countdown to put the passcode again and unlock it.
If you still do not get it right, you’ll have to wait for another 1 hour. Failure to get it right at the next chance will result in “iPhone unavailable” or “Security lockout”.
Suppose you cannot remember the passcode; there are several ways to go around it. An initial approach to consider is the Erase iPhone Feature. This option is available on iOS 15.2 or later versions. For those using an iPad, it is referred to as Erase iPad on the device. To use this option, follow the guide below:
Here is another approach to get around. This method only requires logging into your iCloud account. Follow the steps below as a guide:
Step 1: Log into your iCloud account with your Apple ID password.
Step 2: Tap “Find iPhone” then “All Devices”.
Step 3: Choose your device and tap “Erase iPhone”.
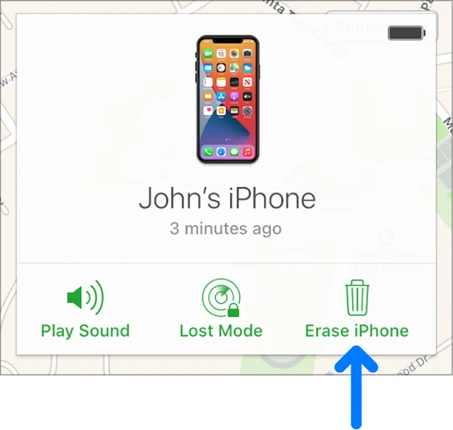
Step 4: Select “Remove from Account”.
This method is not applicable to iPhone users who did not enable their “Find My iPhone”.
While the 2 solutions discussed above should easily help unlock your iPhone, you may consider the following options to unlock disabled iPhone.
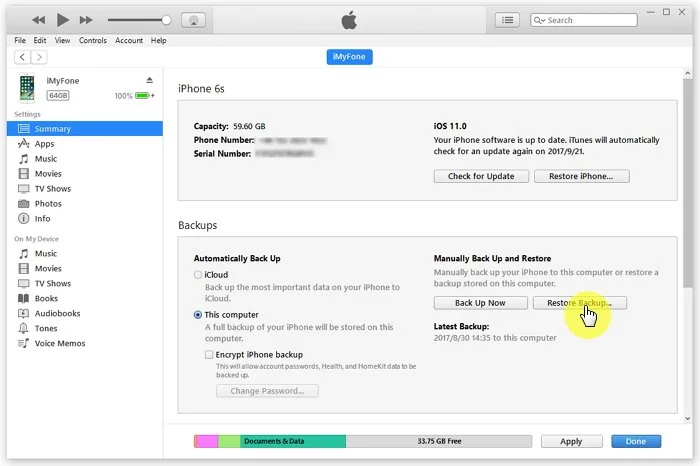
For those who had synced their iPhone with iTunes on their personal computer, you can unlock your disabled iPhone without losing your data by creating a backup. Below is a step-by-step guide to unlock via iTunes:
Step 1: Connect your PC and iPhone. Open iTunes on your PC.
Step 2: After your device gets recognized by iTunes, choose “Summary”.
Step 3: Click “Back Up Now” to develop a backup for your iPhone data.
Step 4: Select “Restore iPhone” to restore the data after the backup is complete.
At this point, the device will be restored by iTunes. All data on the device will be erased. However, once your iPhone is unlocked and available, you can restore the data from the backup.
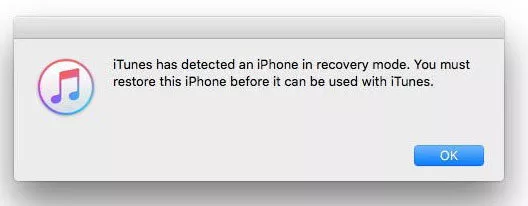
If your iPhone is not synced with computer, recovery mode is an option to unlock your iPhone using iTunes. This approach works for every iPhone model, so you don’t need to be concerned about your device’s version. Use the guide below to unlock your iPhone:
Step 1: Get your iTunes opened without connecting the iPhone.
Step 2: Put your iPhone into the Recovery mode. This is attainable in different ways, depending on your device’s model.
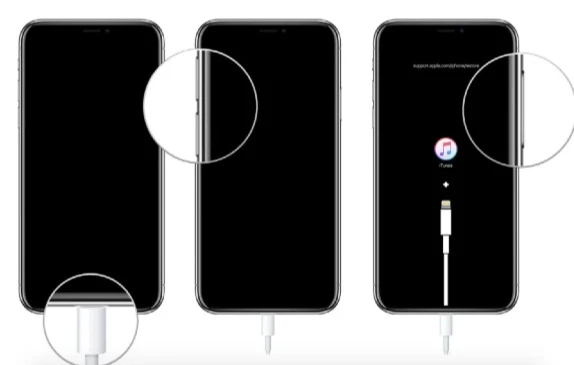
Step 3: Choose the “Restore” option from the iTunes dialogue box.
With the displayed instruction, you’ll be able to unlock your iPhone easily. Note that you need a PC and existing backup to restore your data.
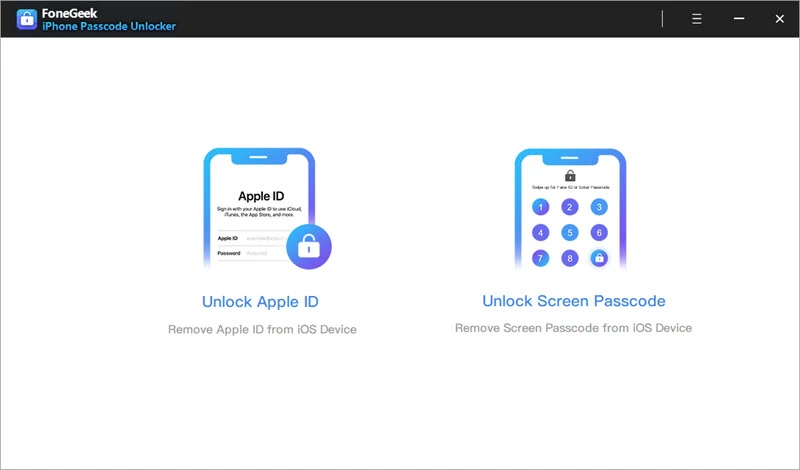
Here is another proven approach to resolve the “iPhone is disabled try again in 15 minutes” issue: utilize the FoneGeek iPhone Passcode Unlocker program. This tool is convenient to use, works instantly, and protects your data and privacy.
More importantly, you don’t need your Apple credentials to unlock your iPhone using FoneGeek iPhone Passcode Unlocker. With ease, it enables users to unlock alphanumeric passcode, Touch ID, Face ID, and 4 or 6-digit passcode. Simply follow the guides below to use:


After a completed process, the iPhone will become unlocked and available to use.
It is almost impossible that any of the solutions above won’t work for you. However, if this is the case, consider taking your disabled iPhone to an Apple office or a certified third-party repair center for help. An Apple expert should be able to erase your iPhone and restore your device without any difficulty.
A disabled iPhone could lead to an unpleasant experience, if not exasperating. To avoid such a troubling experience, consider the following recommendations:
And there you have the proven and reliable approaches to solving an iPhone is disabled try again in 15 minutes bypass. A choice is subjective; hence, you are in the best position to choose the right option for yourself.
However, a professional recommendation is to use a reliable program such as FoneGeek iPhone Passcode Unlocker for a quick and efficient way without losing your data. Also, consider the recommendations stated herein to prevent your iPhone from locking you.
Joan J. Mims is interested in researching all tips about iPhone, iPad and Android. He loves to share useful ideas with all users.
Your email address will not be published. Required fields are marked *


Copyright © 2025 FoneGeek Software Co., Ltd. All Rights Reserved


 English