
Accidentally deleted important data from your iPhone or iPad? FoneGeek iPhone Data Recovery offers three recovery modes to help you retrieve lost files from your iOS device or iTunes/iCloud backup, no matter how the data was lost.
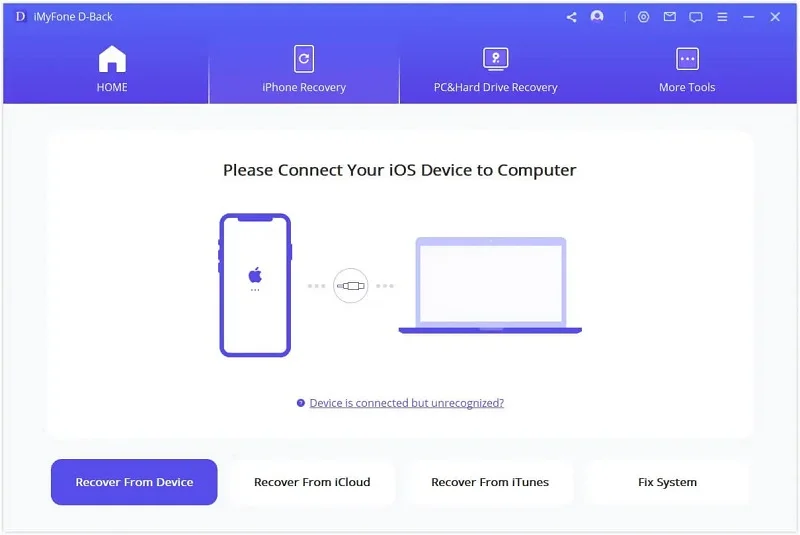
Launch FoneGeek iPhone Data Recovery and choose "Recover from iOS Device". Connect your iPhone to the computer via a USB cable. Once the program detects the device, click "Next" to continue.
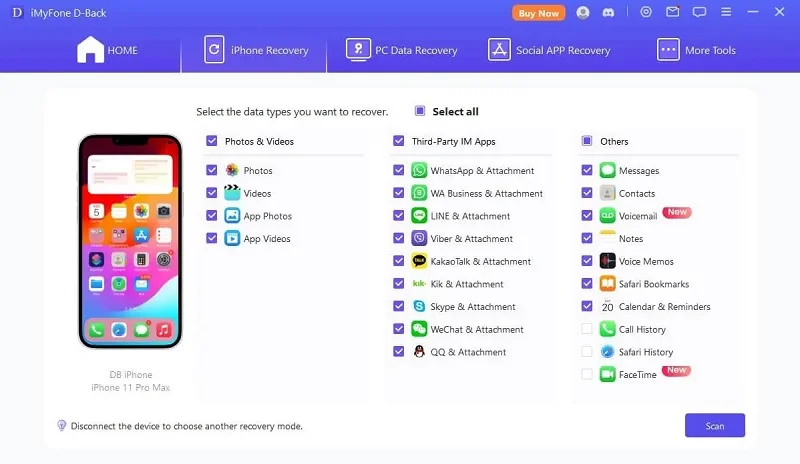
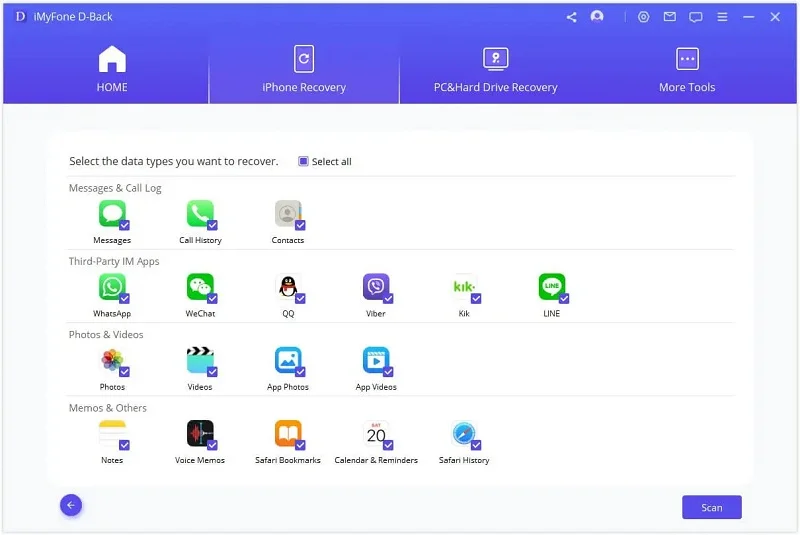
Select the types of data you want to recover, then click "Scan" to let the program search for the deleted data on your iOS device.
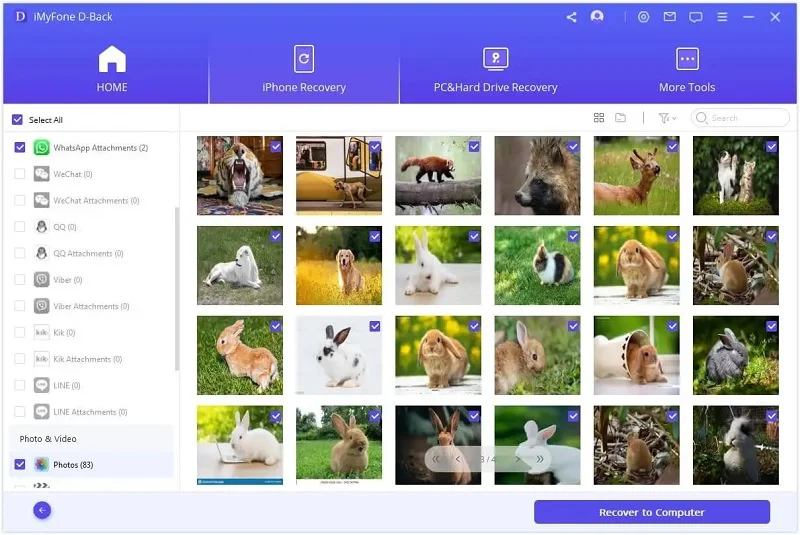
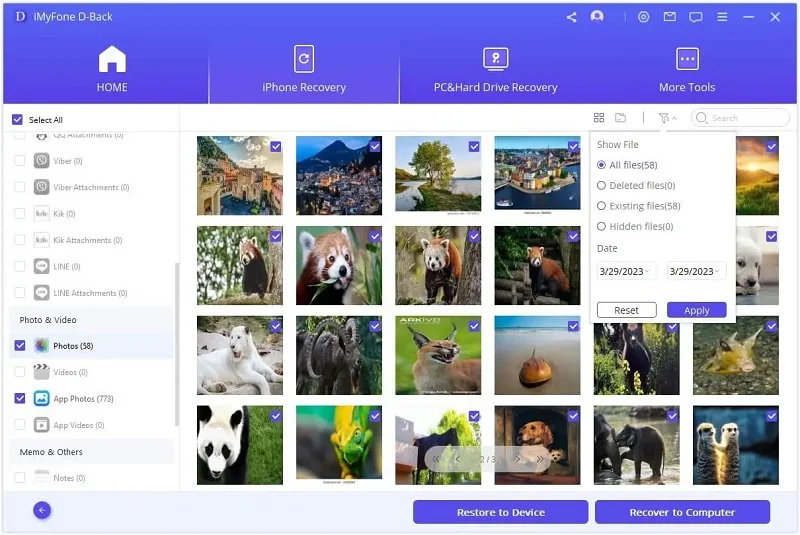
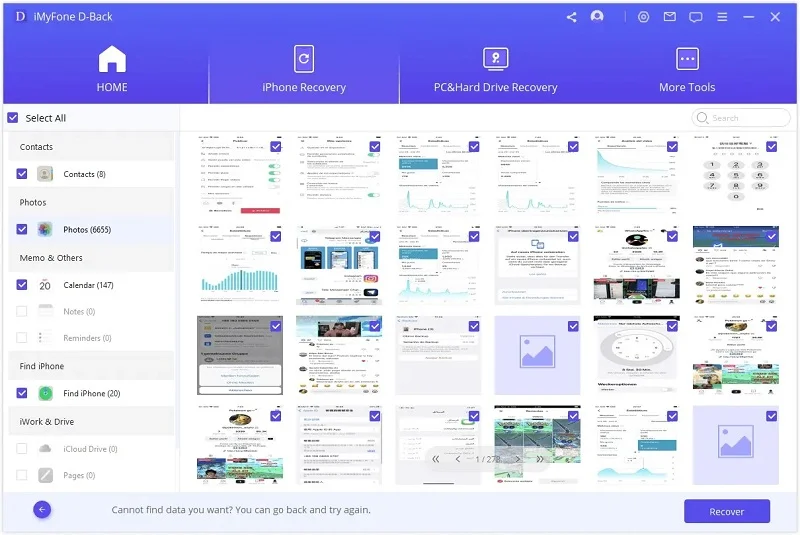
Once the scan completes, all recoverable data will be clearly organized, as shown in the image below. Choose the files you want to recover, then click "Recover to Computer" at the bottom right corner.
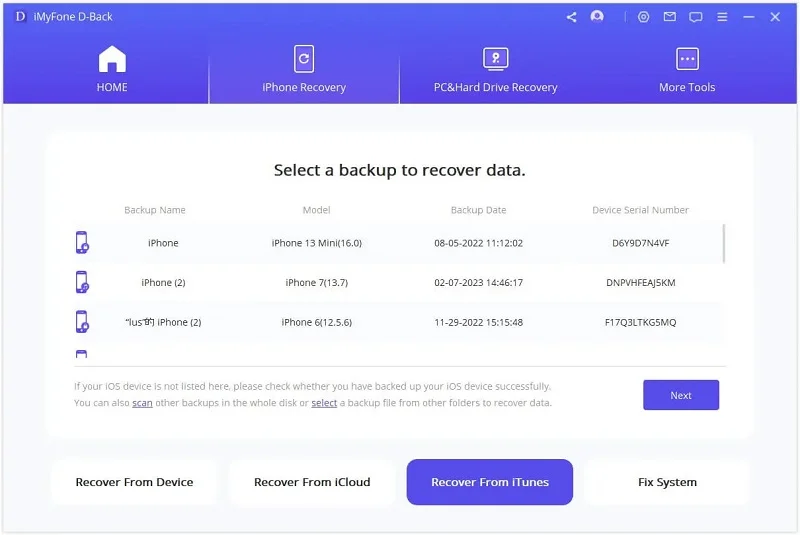
Select the "Recover from iTunes Backup" option, then choose the specific iTunes backup you want to recover data from and click "Next." If the backup is encrypted, you'll need to enter the iTunes encryption password.
In the next page, please choose what you would like to scan and recover, then tap on "Scan" to begin scanning the iTunes backup file.
The scanning results will be displayed clearly in categories. You can check each item and save it to computer by tapping on "Recover to Computer".
After running FoneGeek, click on "Recover data from iCloud account" tab and sign in to iCloud with your Apple ID and password.
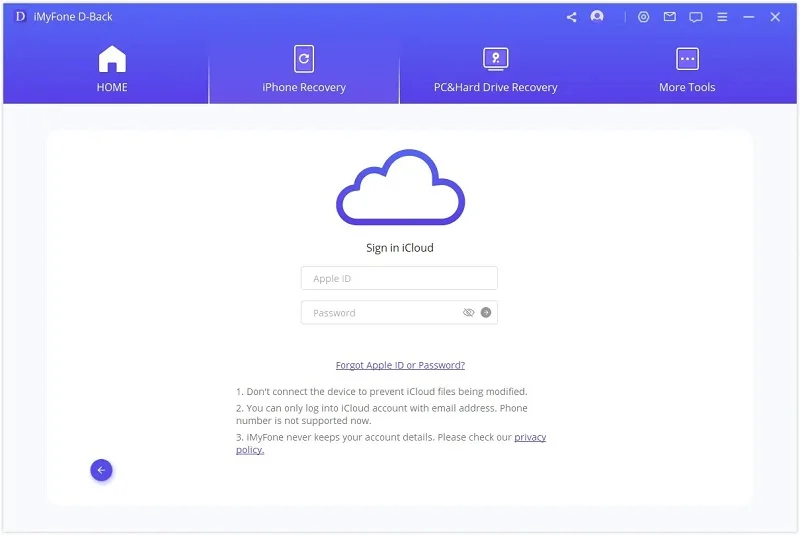
Note: FoneGeek will never keep a record of your Apple ID credentials.
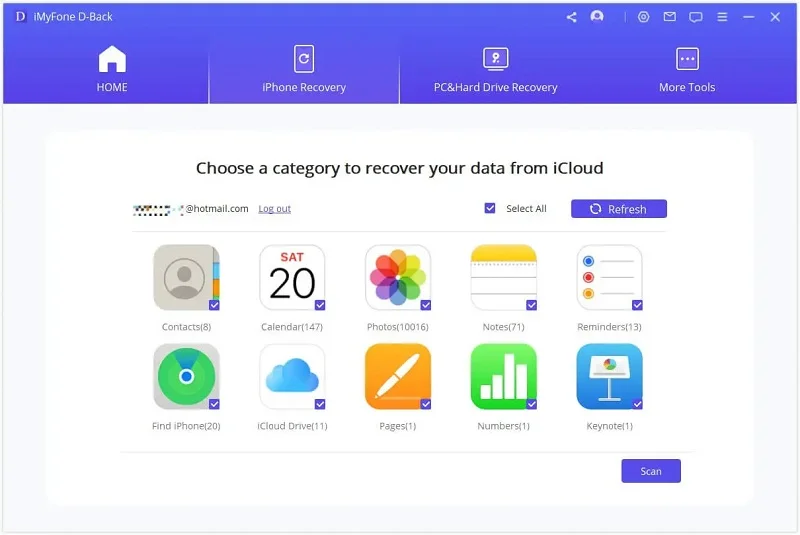
Now you’ll see the data types FoneGeek supports to recover. Just select the file types and click the "Scan" button on the lower right corner.
After the scan is completed, you can choose the data you want to recover and preview them in details. Then click "Recover" to save them to your computer.


Copyright © 2025 FoneGeek Software Co., Ltd. All Rights Reserved


 Still Need Help?

 English